Part 2: Reaching Traefik from External Network Via CloudFlare Network
By completing this part, you will be able to access services via Traefik from external network. All traffics will be forwarded to Traefik before forwarding to the destination service.
Connecting CloudFlare Server to Traefik
In order for traffic from CloudFlare servers to reach any services on unRAID server, we have to setup a tunnel between these two servers using cloudflared, an ArgoTunnel developed by Cloudflare.
Install cloudflared
Refer to the post here to setup cloudflared on unRAID server.
In my case, I used unraid-cloudflared-tunnel to simplify tunnel creation.

Route All Subdomain Traffic to cloudflared Tunnel
After cloudflared is setup, we will setup this tunnel so that all traffic matching subdomain for our root domain, e.g. home.domain.com will be routed to this tunnel.
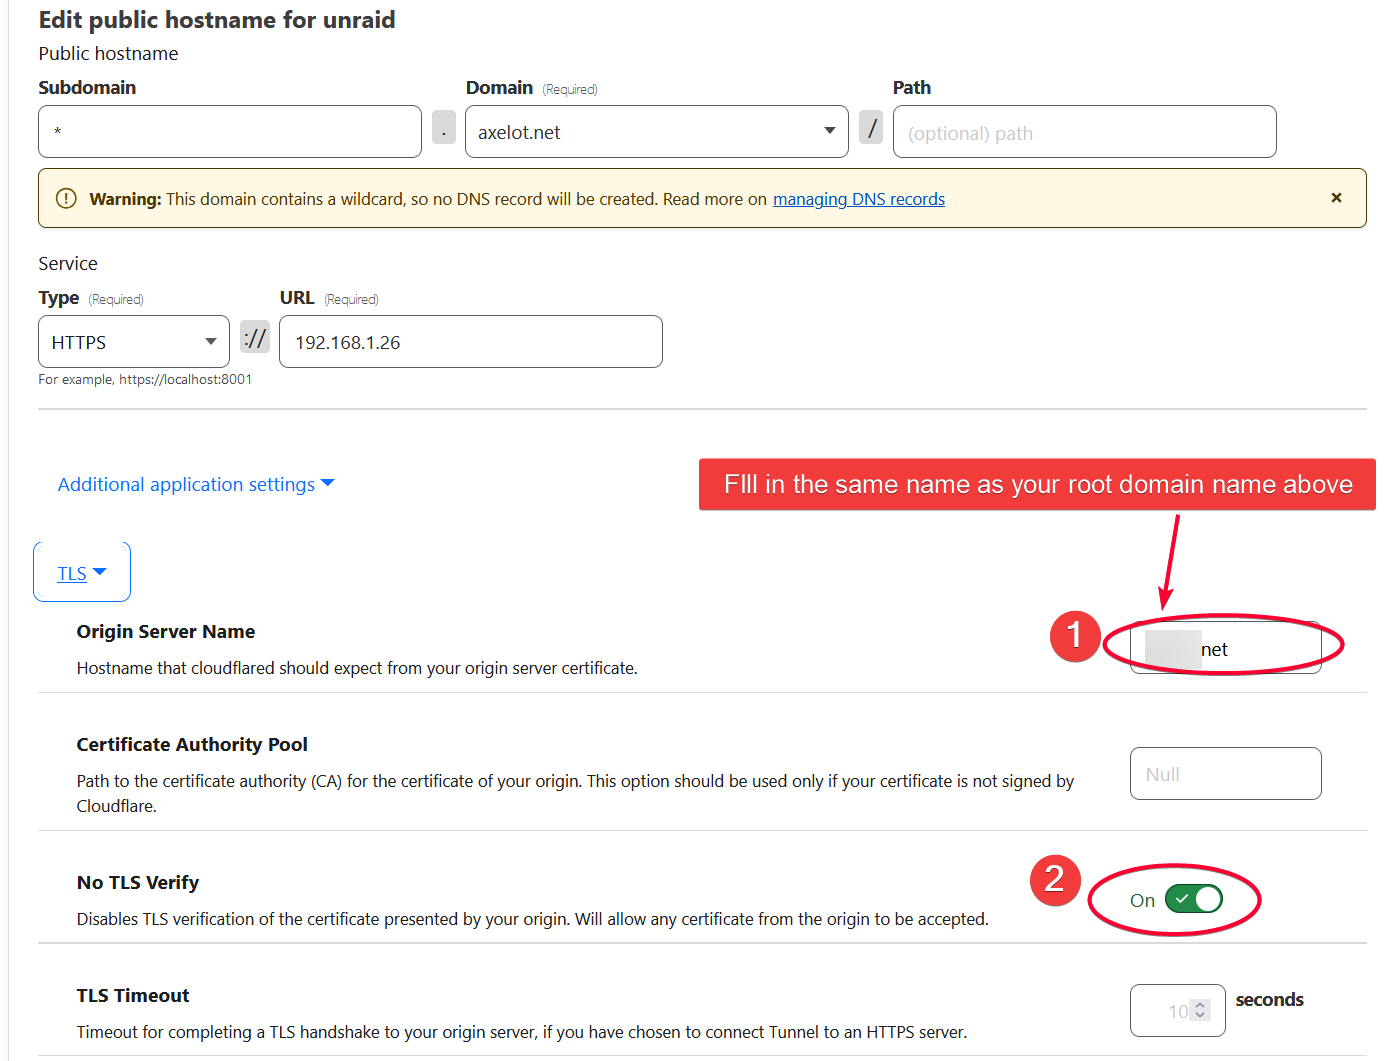
Go to Cloudflare dashboard > Zero Trust > Networks > Tunnels, then select the tunnel and create a Public Hostname

Also enable origin server name to make sure the server certificate matches the request to prevent certificate forgery attack.
Test External Access
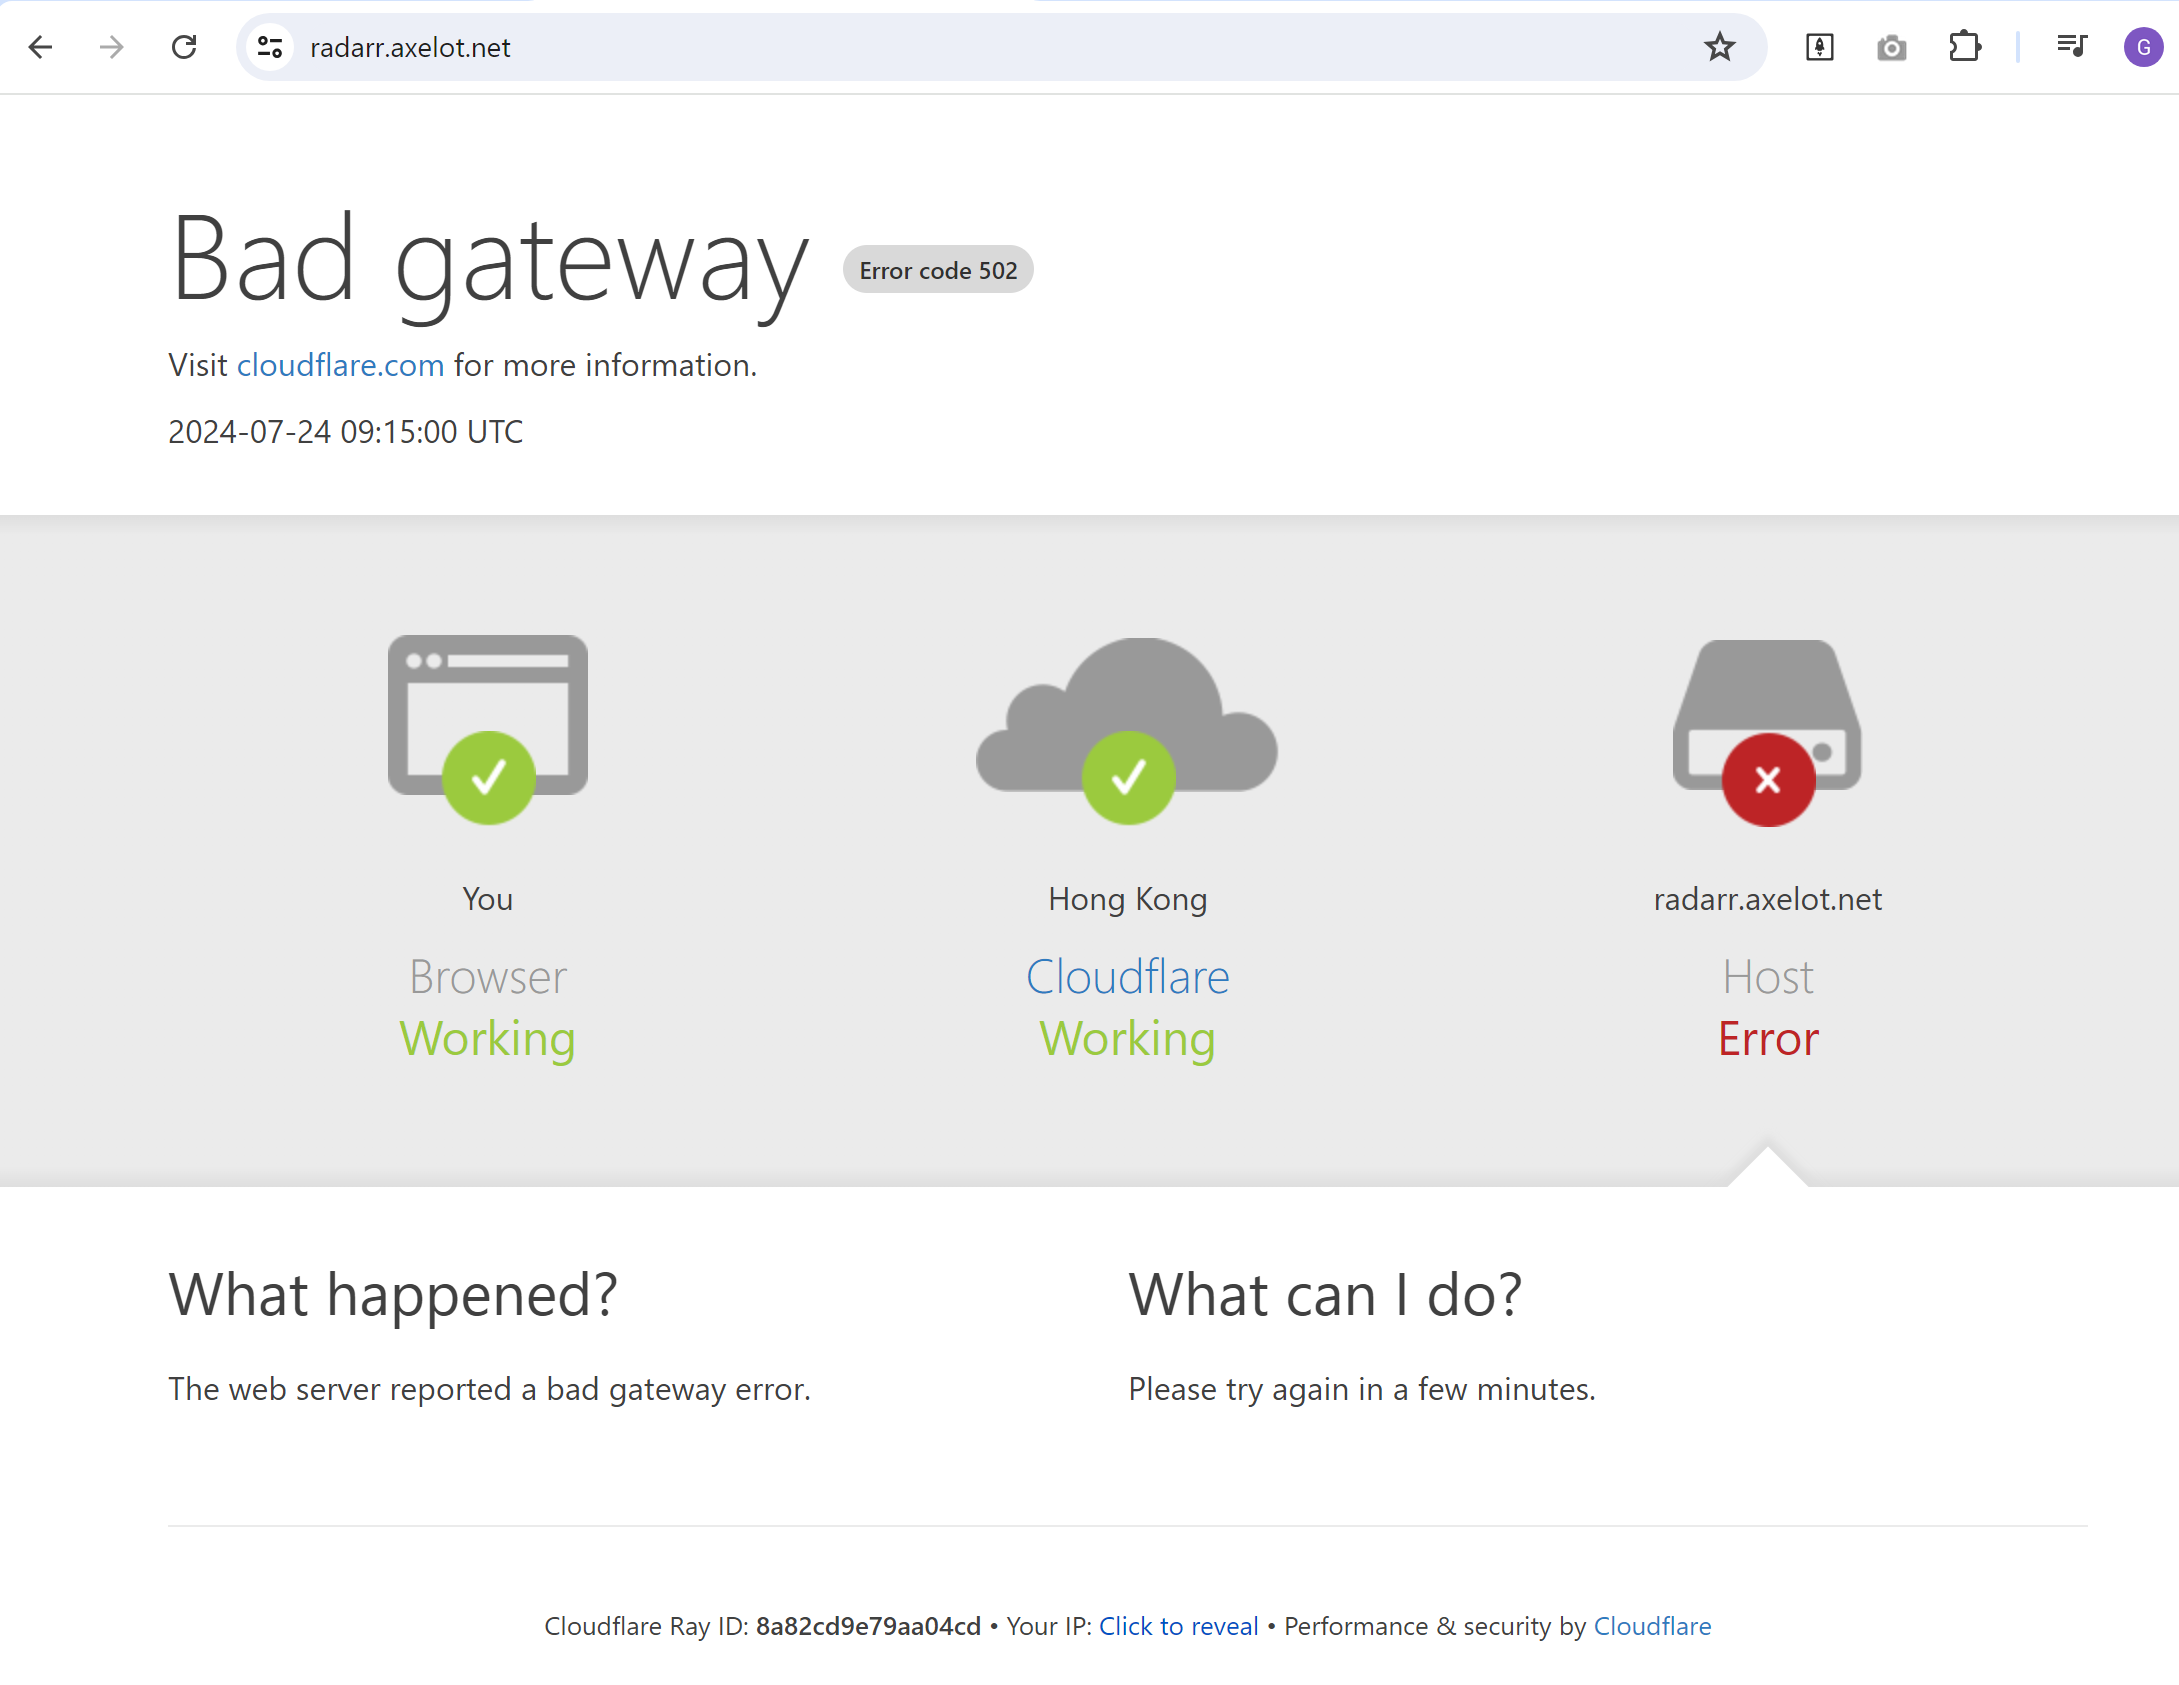
Visit the public hostname using your root domain, e.g. radarr.domain.com.
If you see the following, that means cloudflared cannot verify Traefik self-signed certificate.
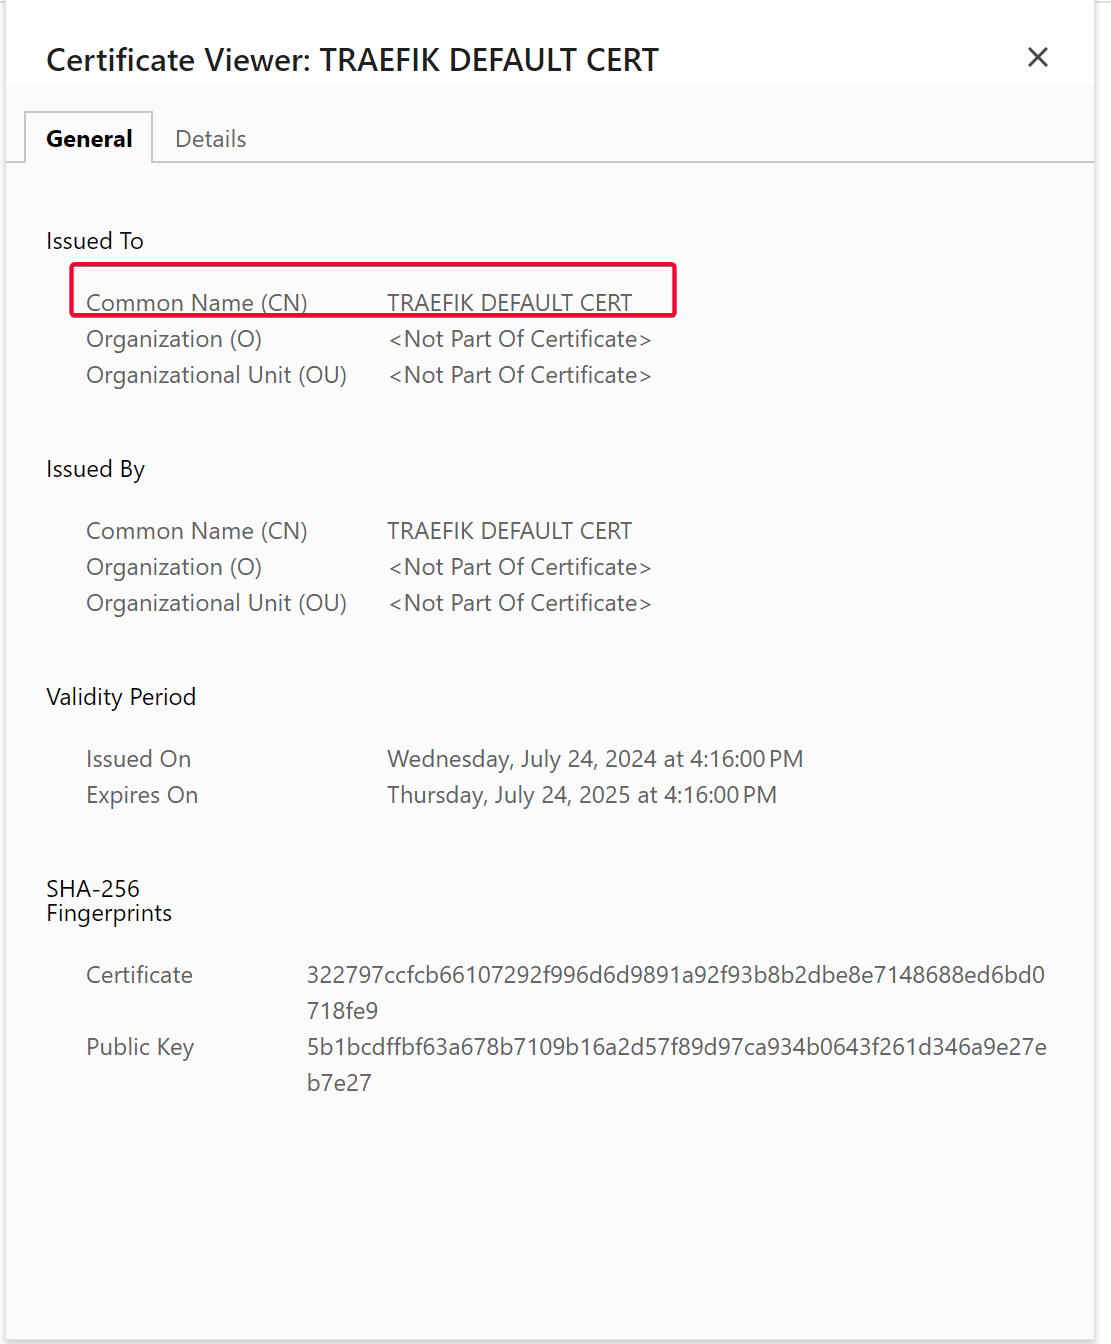
The following is the default self signed certificate generated by Traefik if you visit Traefik HTTPS port and inspect its certificate. E.g. https://<UNRAID_IP>:443. That is the reason why CloudFlare will fail to verify its certificate.
To verify if this is the case, enable the No TLS verify option in the affected Public Hostname and refresh the page. If it passed, that is most likely the reason.
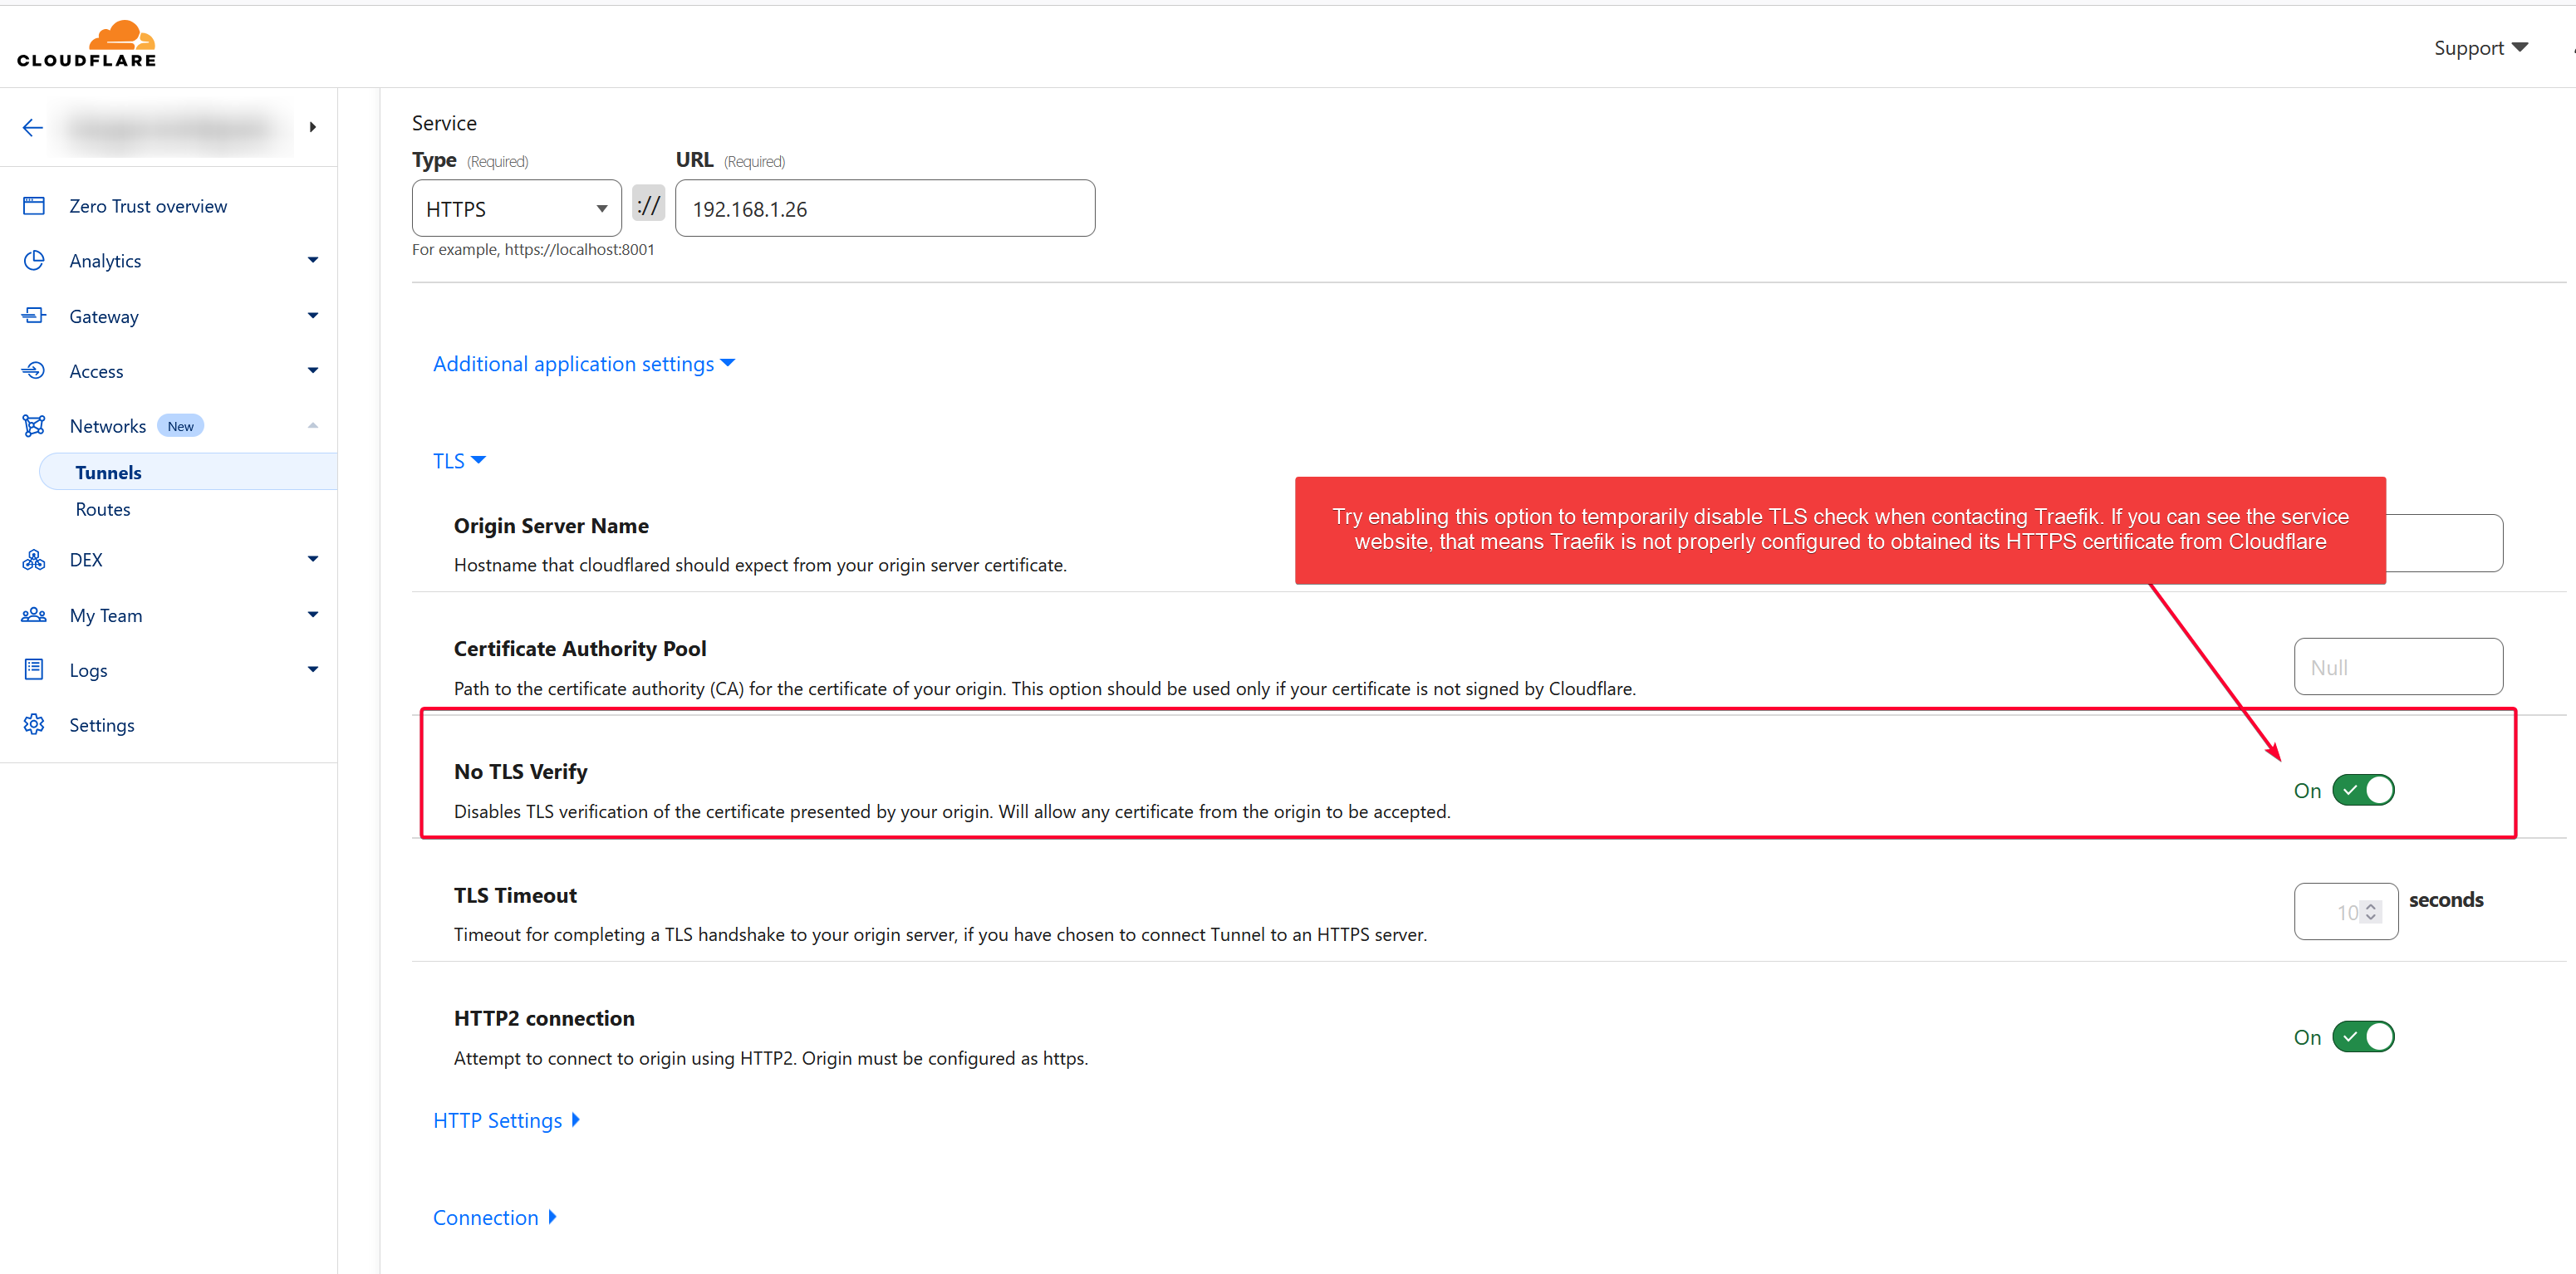
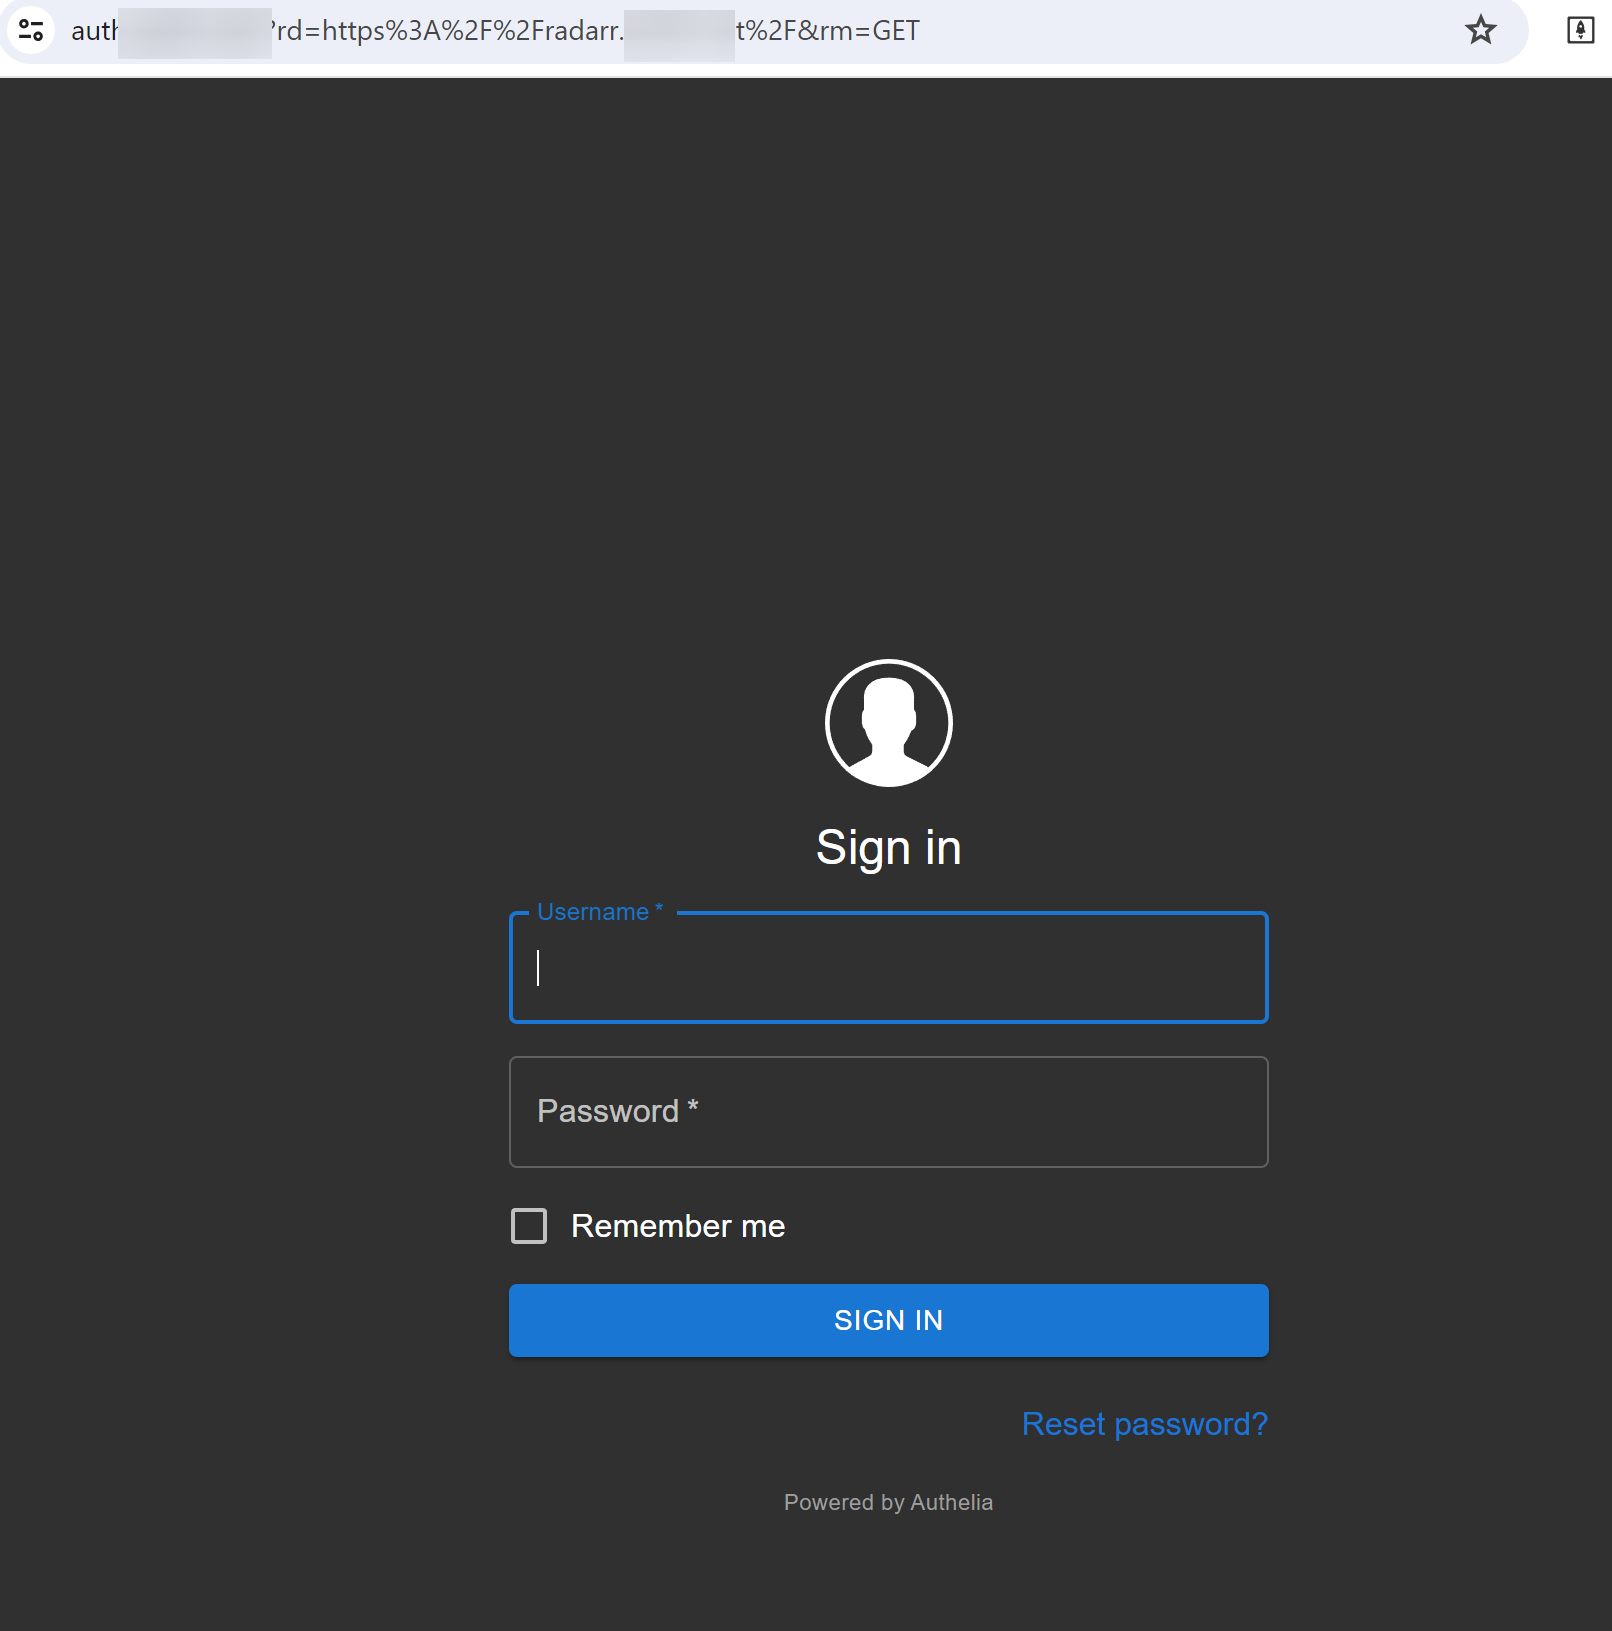
I can see the website after enabling the No TLS verify option. Traefik forwarded the request to Authelia to authenticate before routing it to my Radarr service. Follow Part 3 to setup Authelia as authentication server to intercept any request before reaching the destination service.
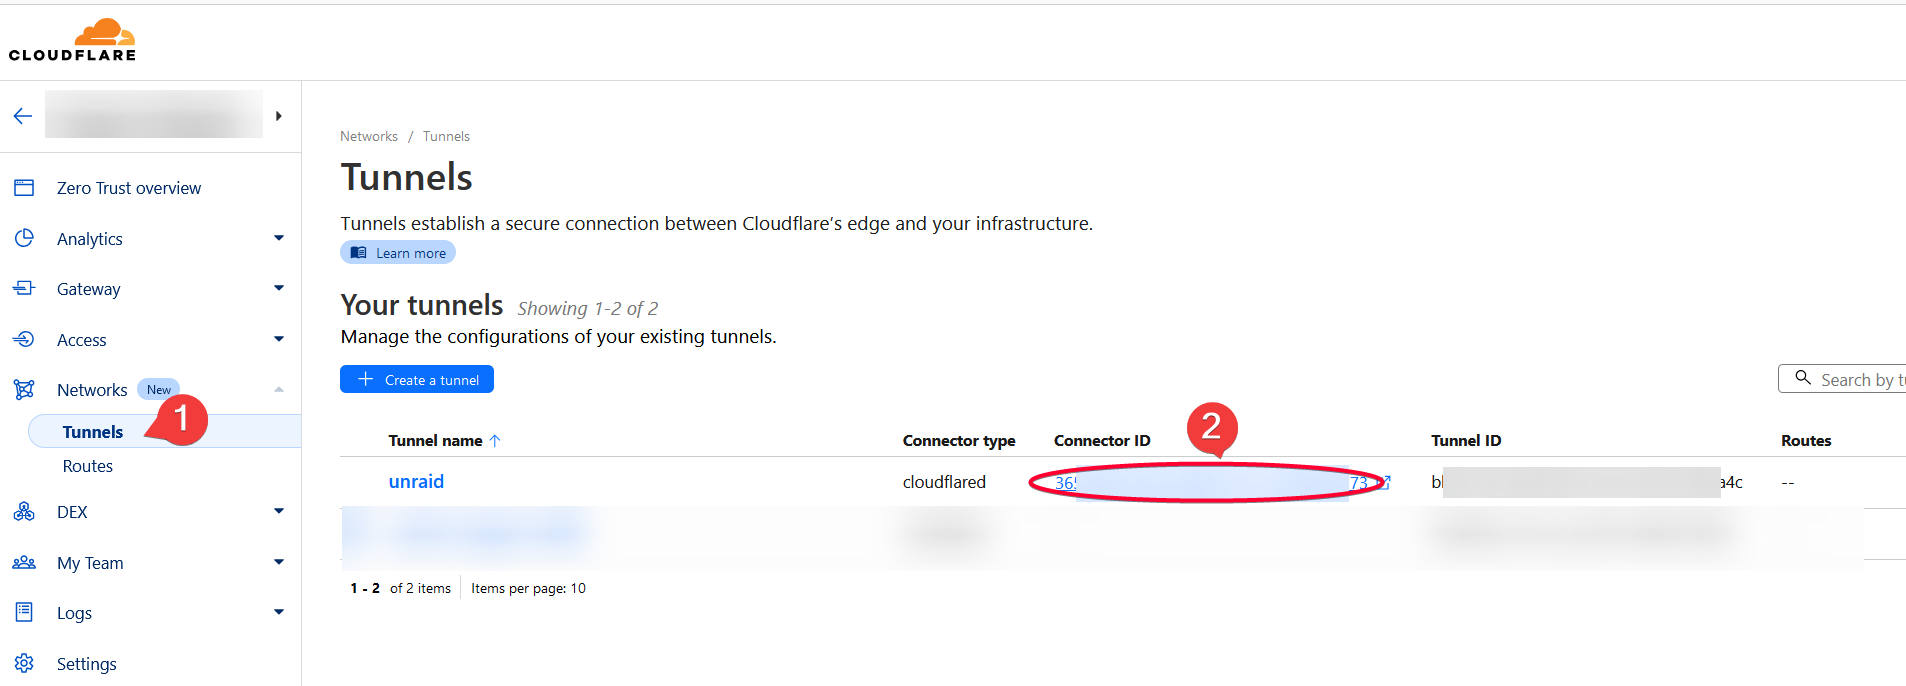
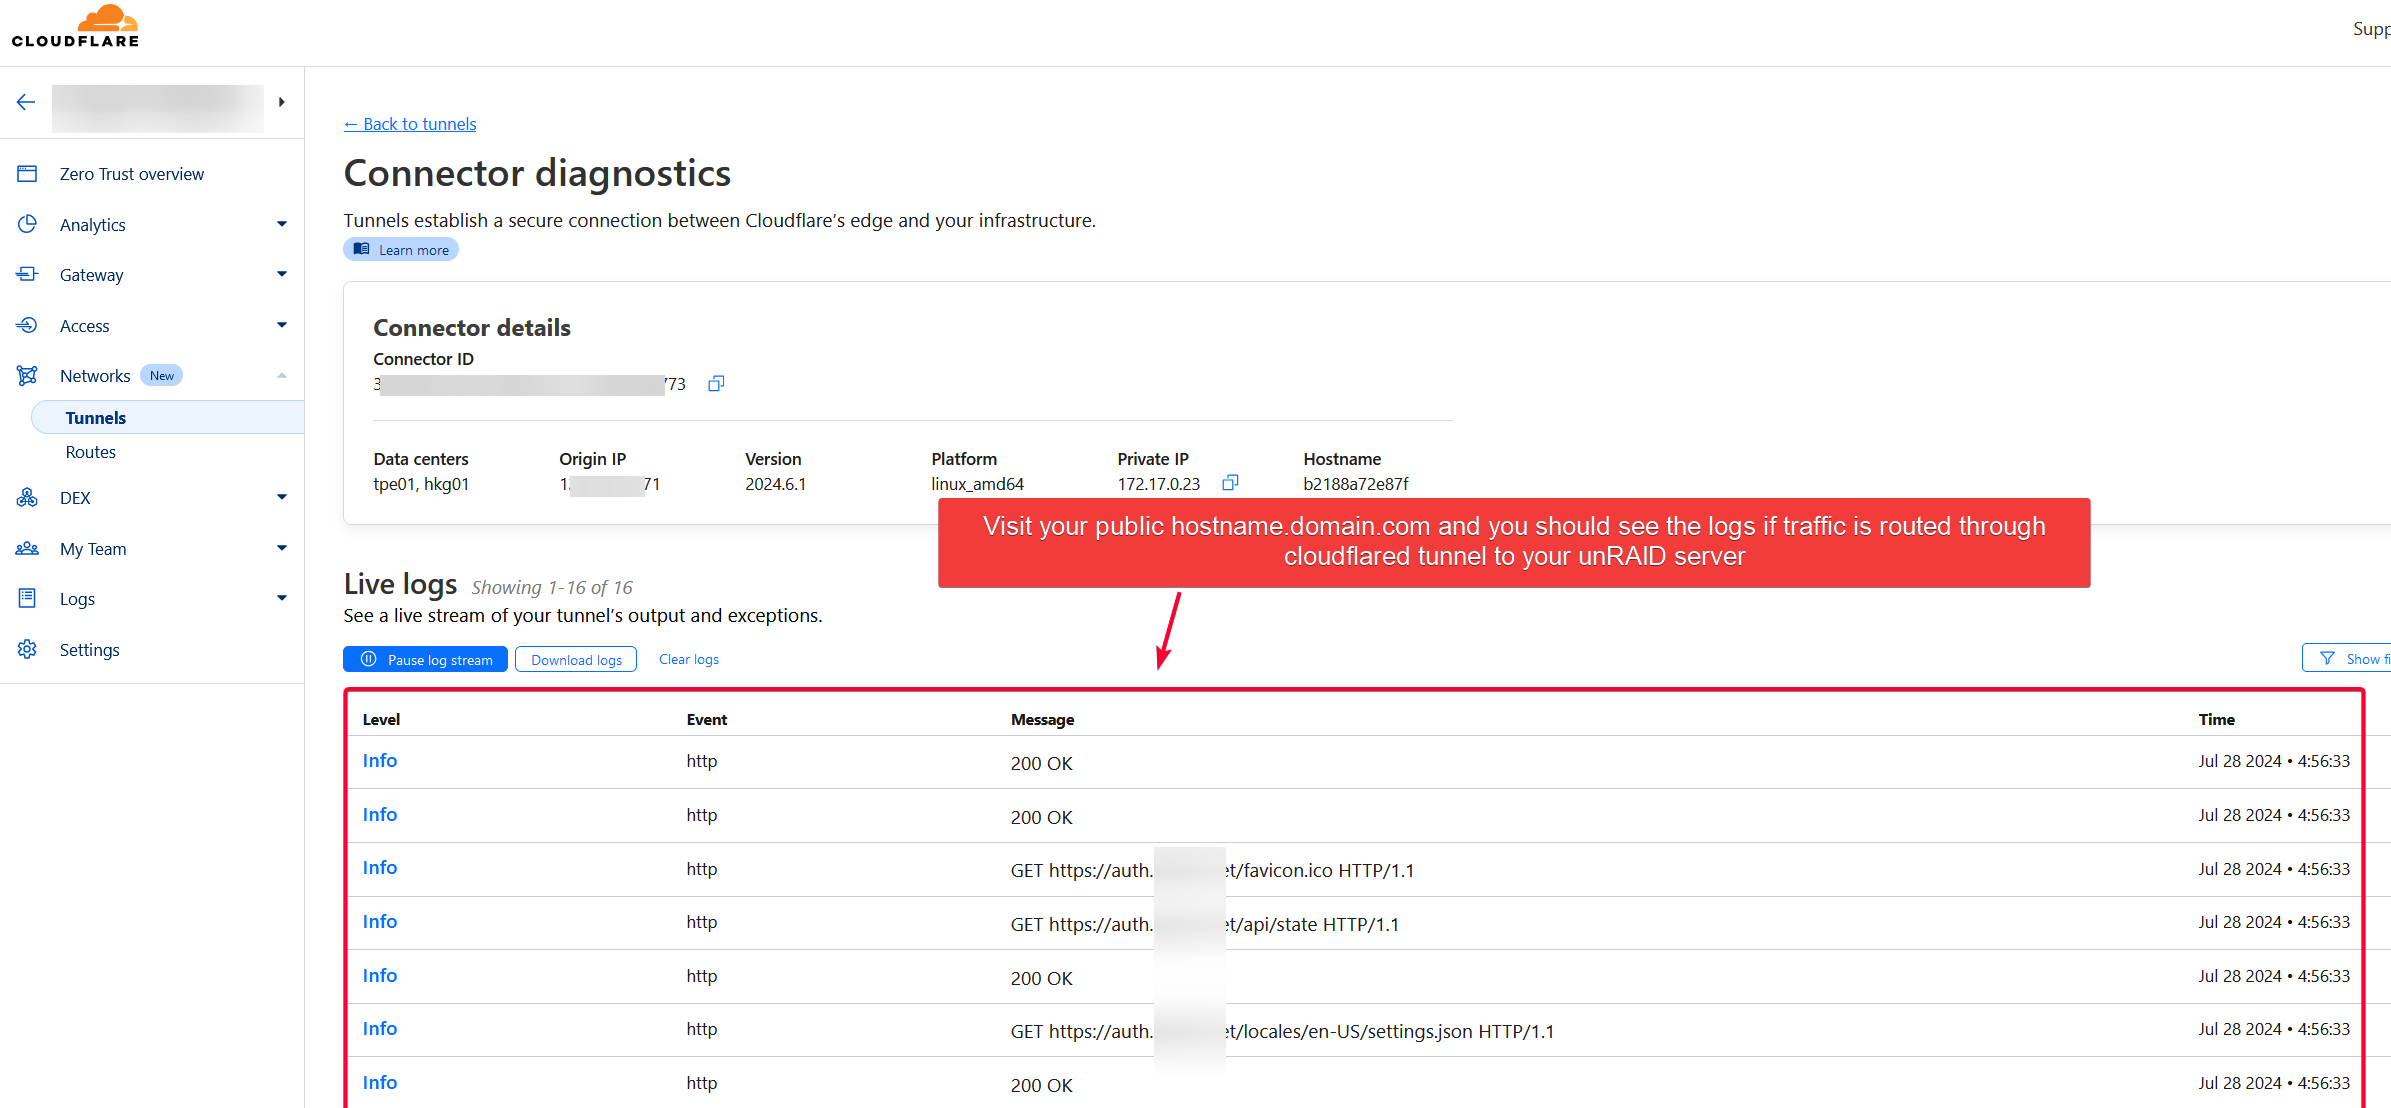
You can also diagnose cloudflared tunnel logs to see if traffic is routed through that tunnel.
Automating DNS Record Insertion to CloudFlare DNS Zone (Optional)
Cloudflare provide a API token as a way for external service to modify DNS record in your root domain. We will use cloudflare-companion.
TIP
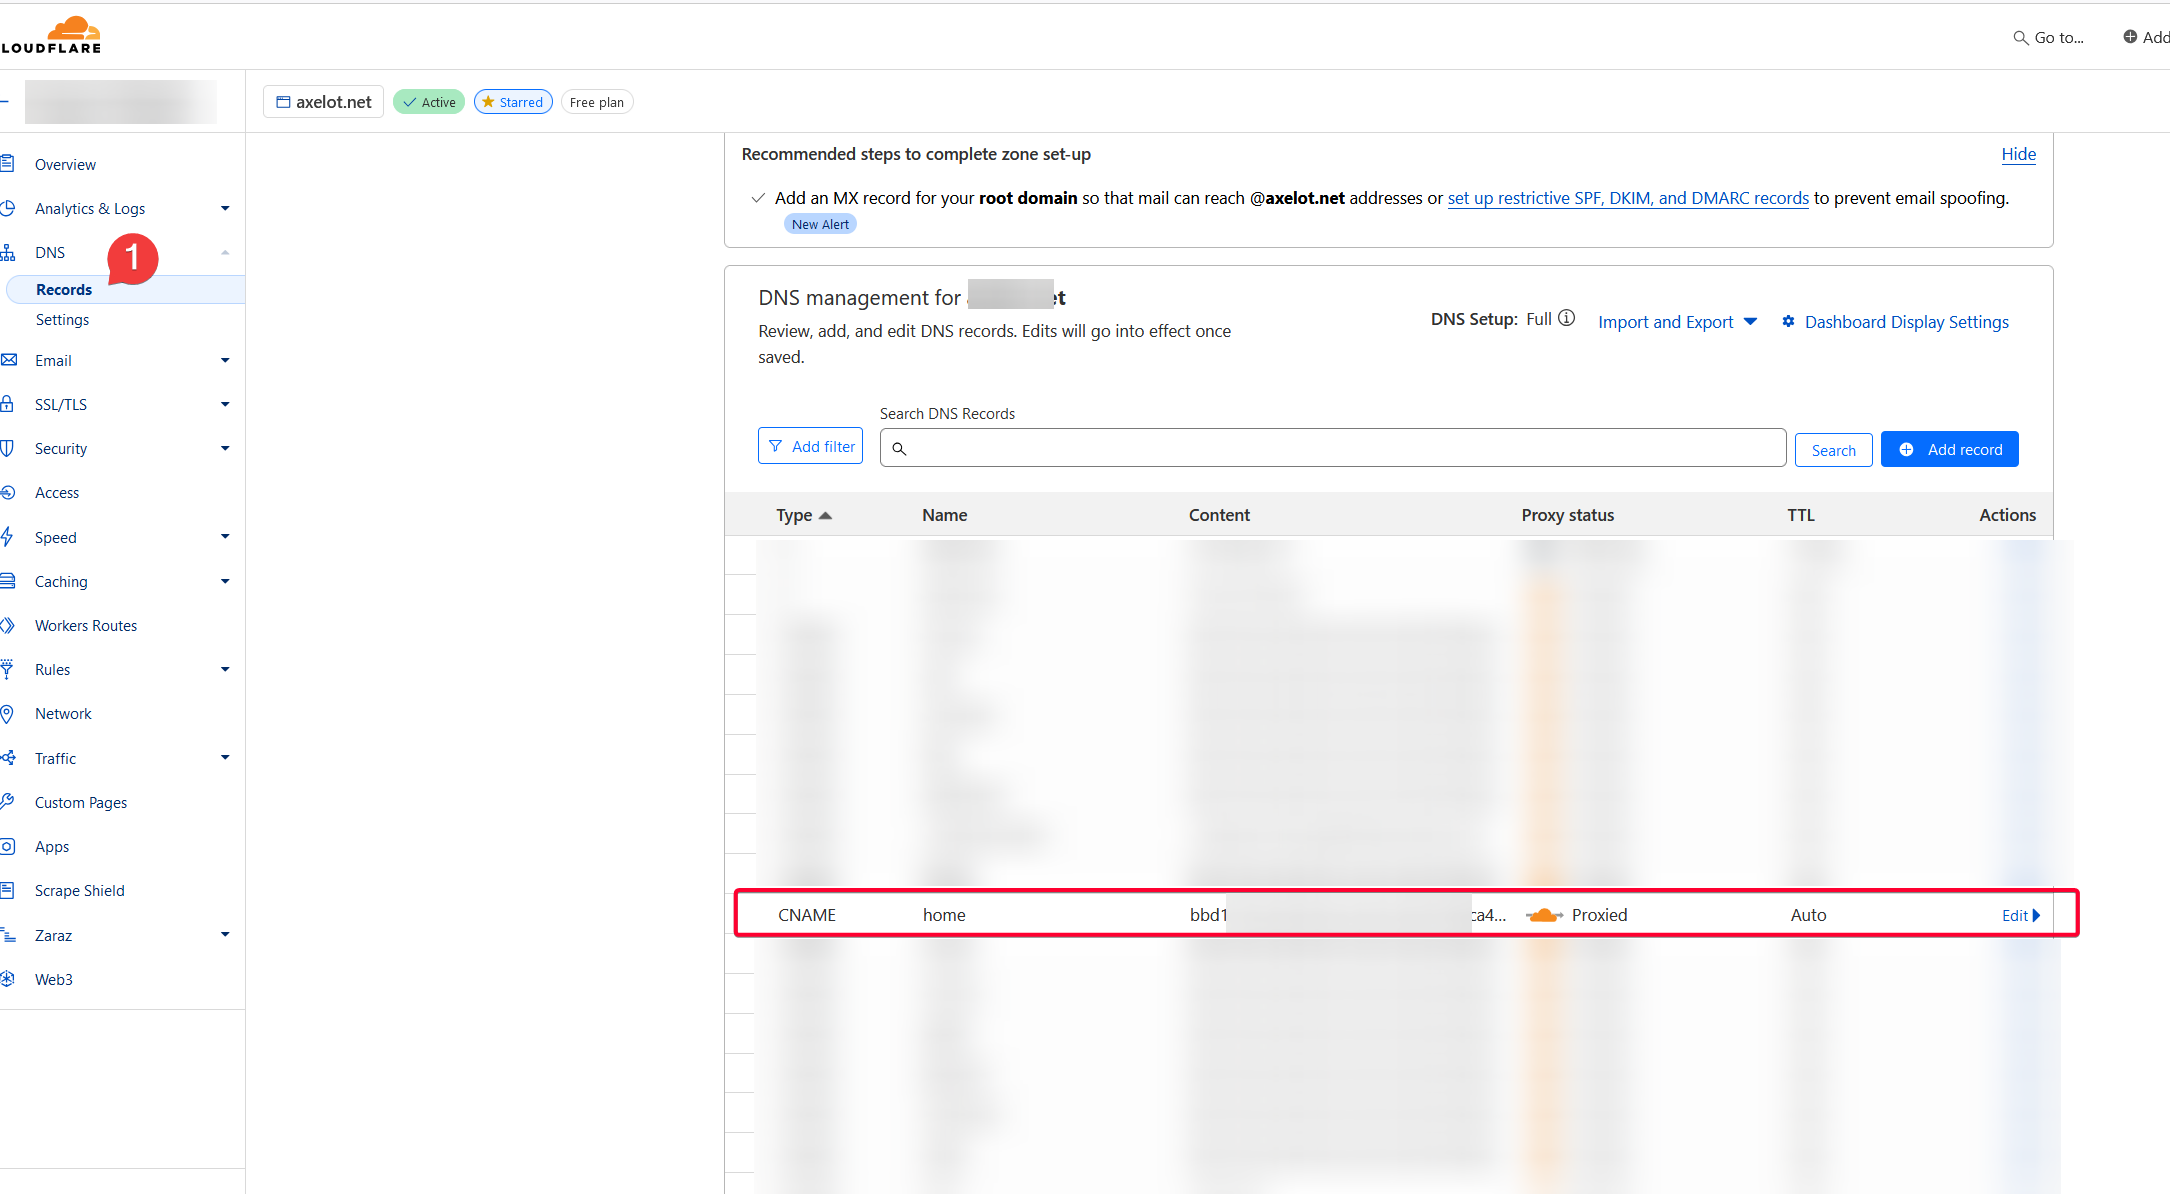
💡 An example for the DNS record on Cloudflare dashboard. cloudflare-companion will add a CNAME record here automatically if some labels were found in the docker container. Very neat feature! Without it, you’d have to manually add a subdomain to the tunnel Public Hostname for each service you wanted to route to Traefik over cloudflared tunnel.
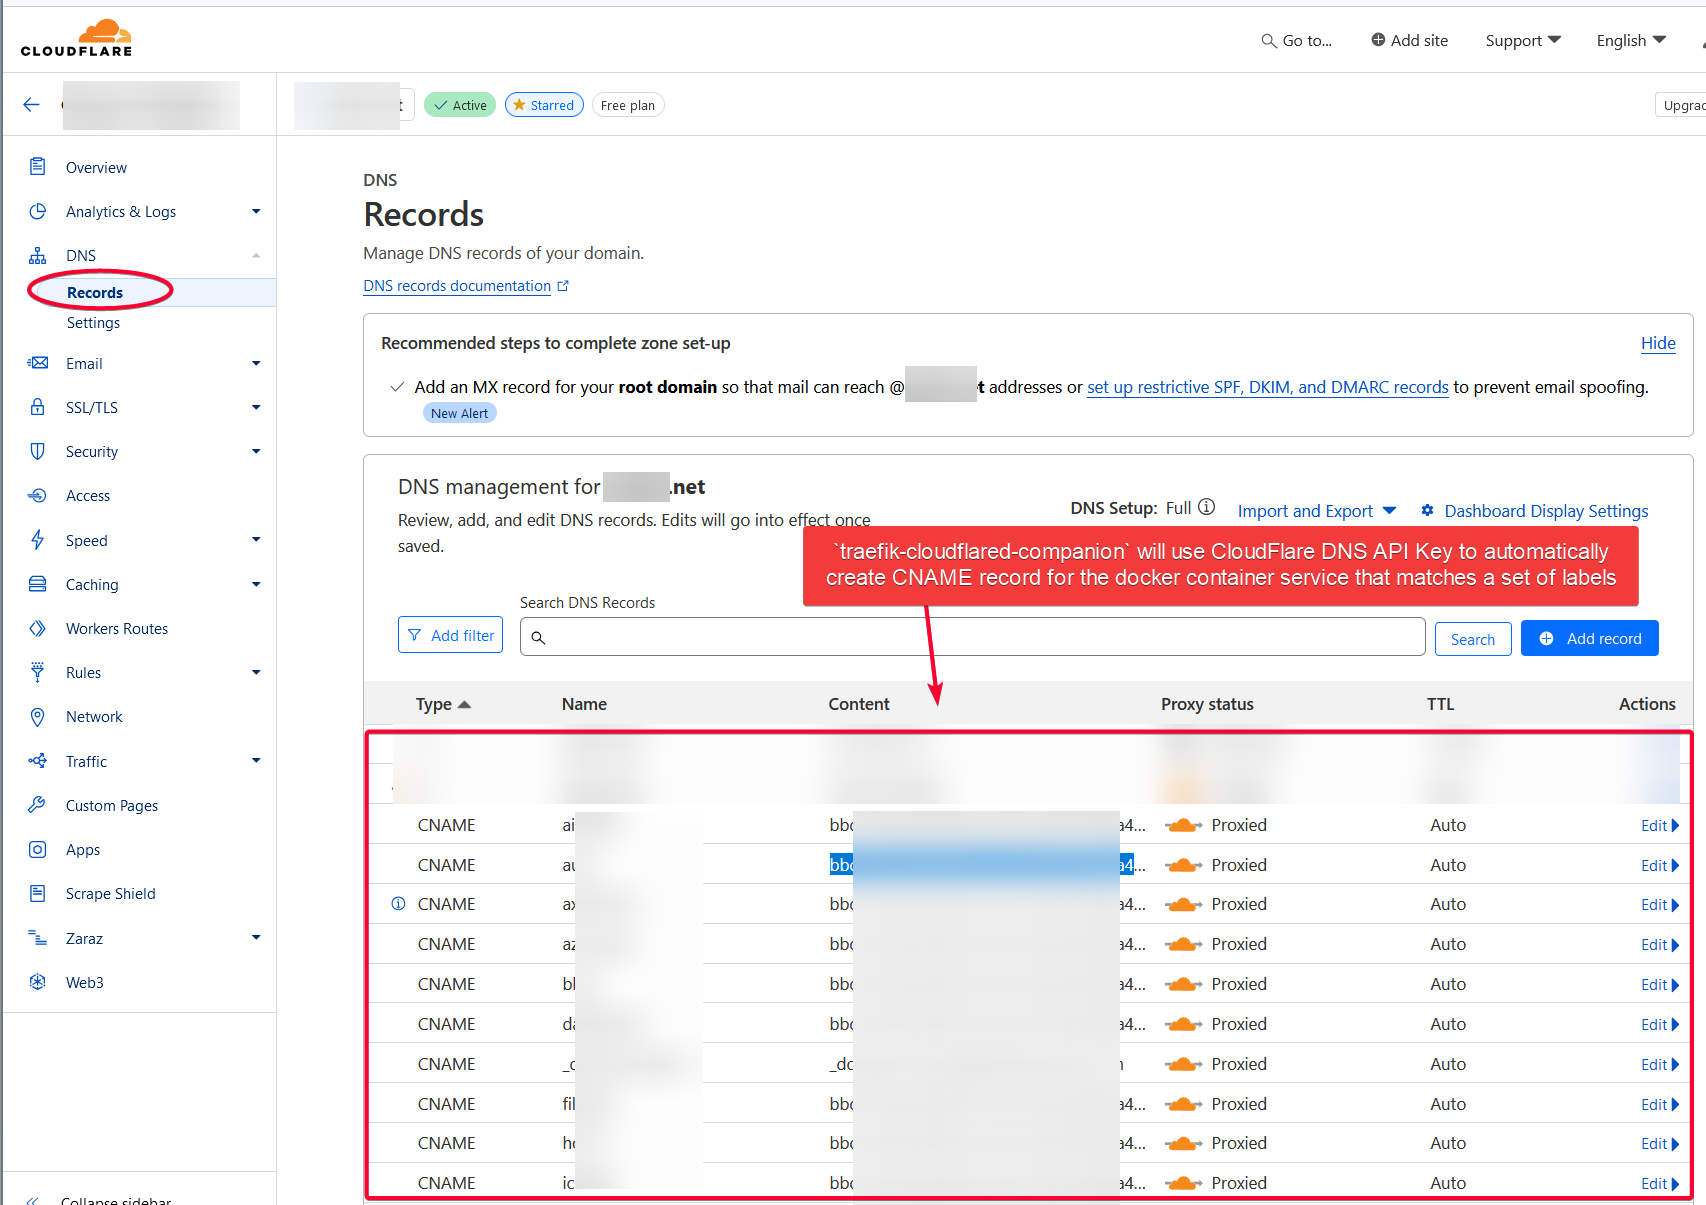
Setup Cloudflare Companion
Instead of having to manually add the subdomain to cloudflare DNS record zone manually each time a service is added to Traefik, we will run docker-traefik-cloudflare-companion service to automate the DNS entry.
TIP
💡 Check that Traefik API is reachable because cloudflare-companion will get Traefik routes via this API. That URL http://<UNRAID_IP>:8183/api/version must return the following result.

Create a new stack
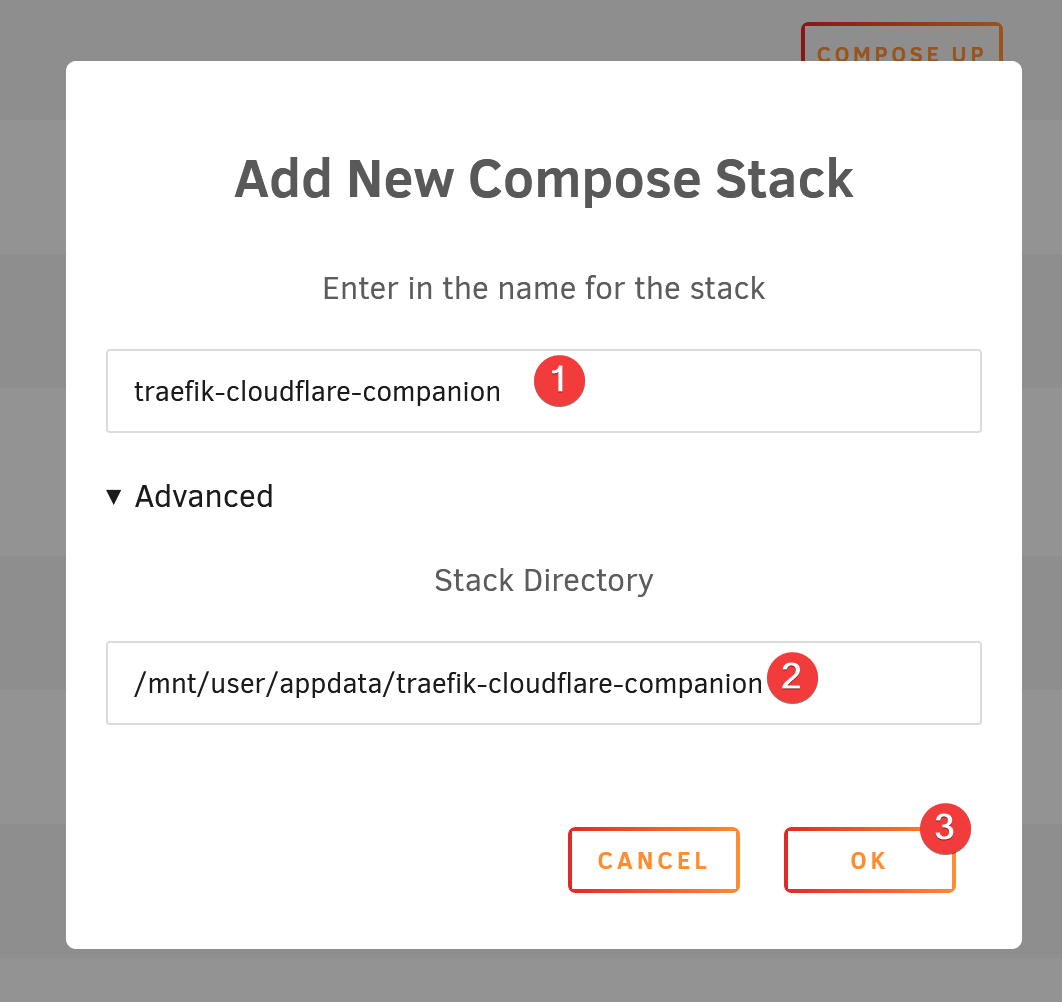
Edit the stack.
services:
  cloudflare-companion:
    image: ghcr.io/tiredofit/docker-traefik-cloudflare-companion:latest
    volumes:
      - /var/run/docker.sock:/var/run/docker.sock
    environment:
      - TIMEZONE=Asia/Taipei // [!code highlight]

      - LOG_TYPE=CONSOLE
      - LOG_LEVEL=INFO

      - TRAEFIK_VERSION=2

      - REFRESH_ENTRIES=TRUE

      - DOCKER_SWARM_MODE=FALSE

      - ENABLE_TRAEFIK_POLL=TRUE
      - TRAEFIK_POLL_URL=http://<UNRAID_IP>:8183/api # Traefik API to reach internally by this container on unRAID, I use my unRAID host IP here
      - TRAEFIK_FILTER_LABEL=traefik.constraint # the label that need to present in the container label so that it will be read and added to CF DNS
      - TRAEFIK_FILTER=proxy-public # the value that must be present for the label above

      # Cloudflare Options
      - CF_TOKEN=<YOUR_CF_TOKEN> # create this from CF Profile
      - RC_TYPE=CNAME
      - TARGET_DOMAIN=<YOUR_DOMAIN> # Use the tunnel ID, must end with cfargotunnel.com. E.g. 93c45d3a-7e5c-4cce-bee1-4689c47f5158.cfargotunnel.com
      - DOMAIN1=<YOUR_DOMAIN> # Root domain #1 you wish to update records for.
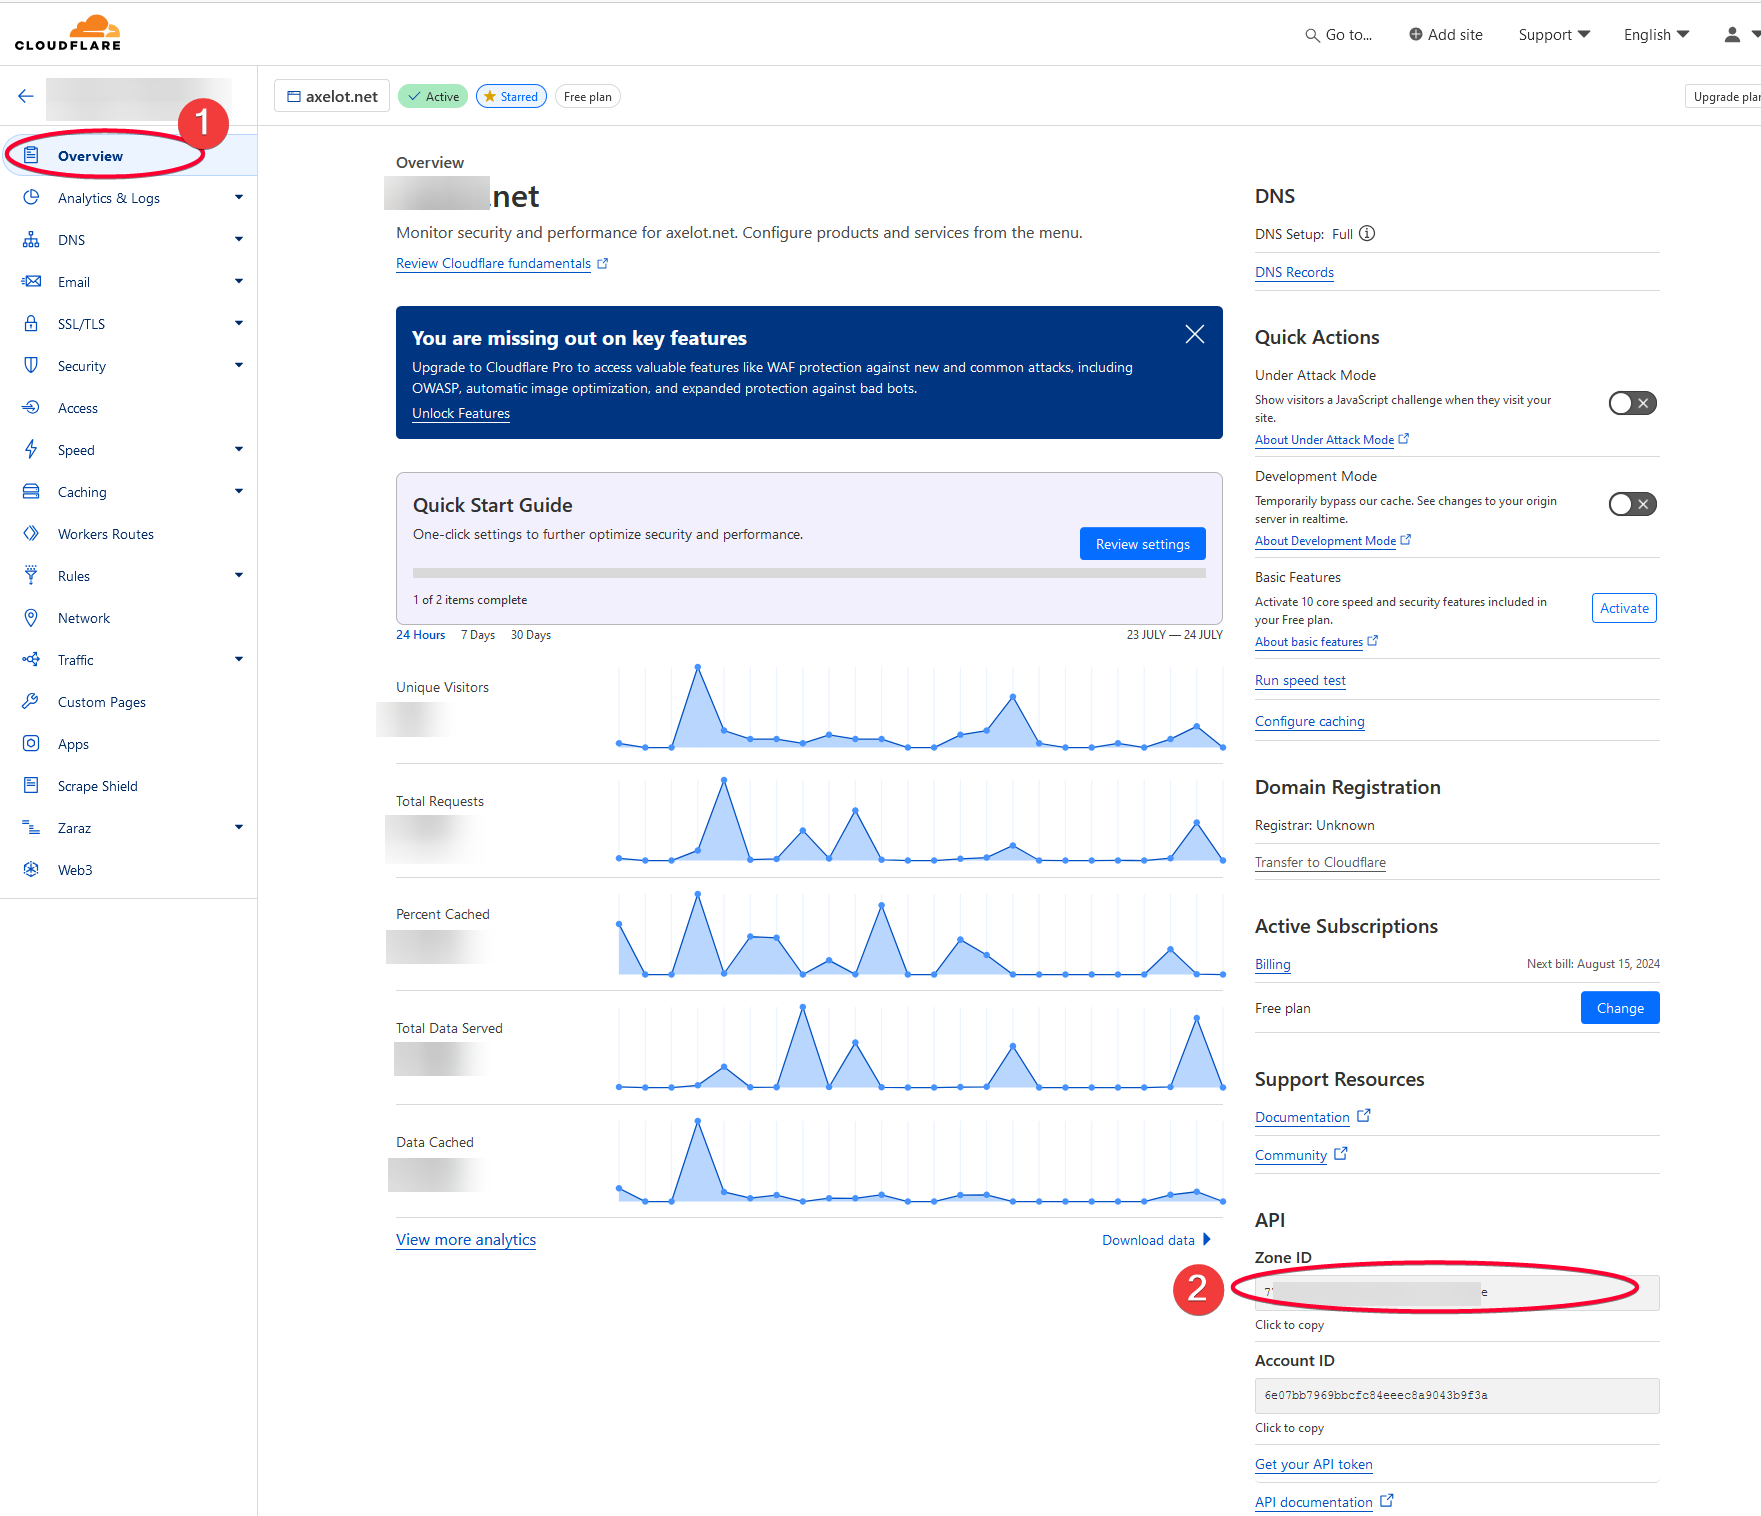
      - DOMAIN1_ZONE_ID=<YOUR_CF_DOMAIN_ZONE_ID> # find this from Cloudflare Domain Zone overview
      - DOMAIN1_PROXIED=TRUE

    restart: always
You can find the DOMAIN1_ZONE_ID from Cloudflare Overview on Dashboard for your domain name.
See https://github.com/tiredofit/docker-traefik-cloudflare-companion for more env vars settings.
Click the Apply button to run the container.
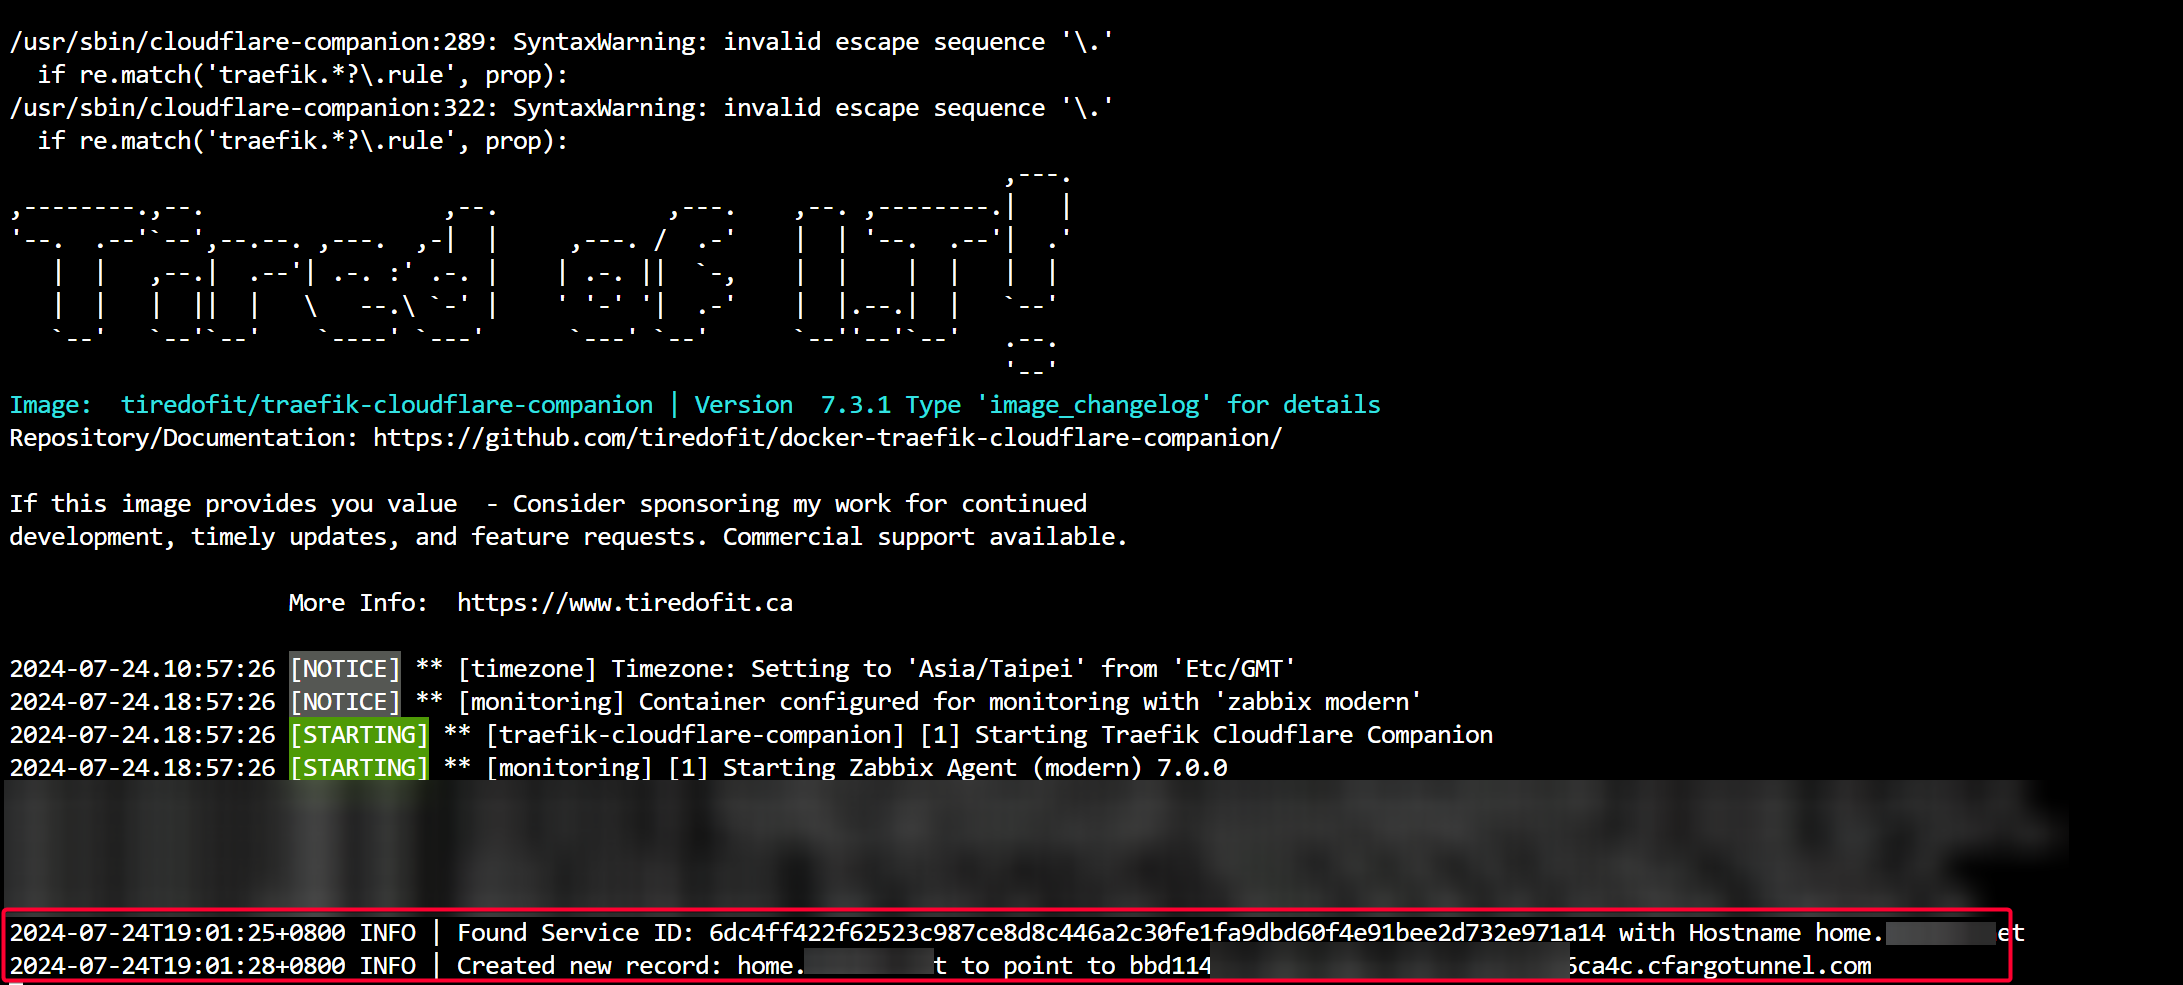
Check the logs.
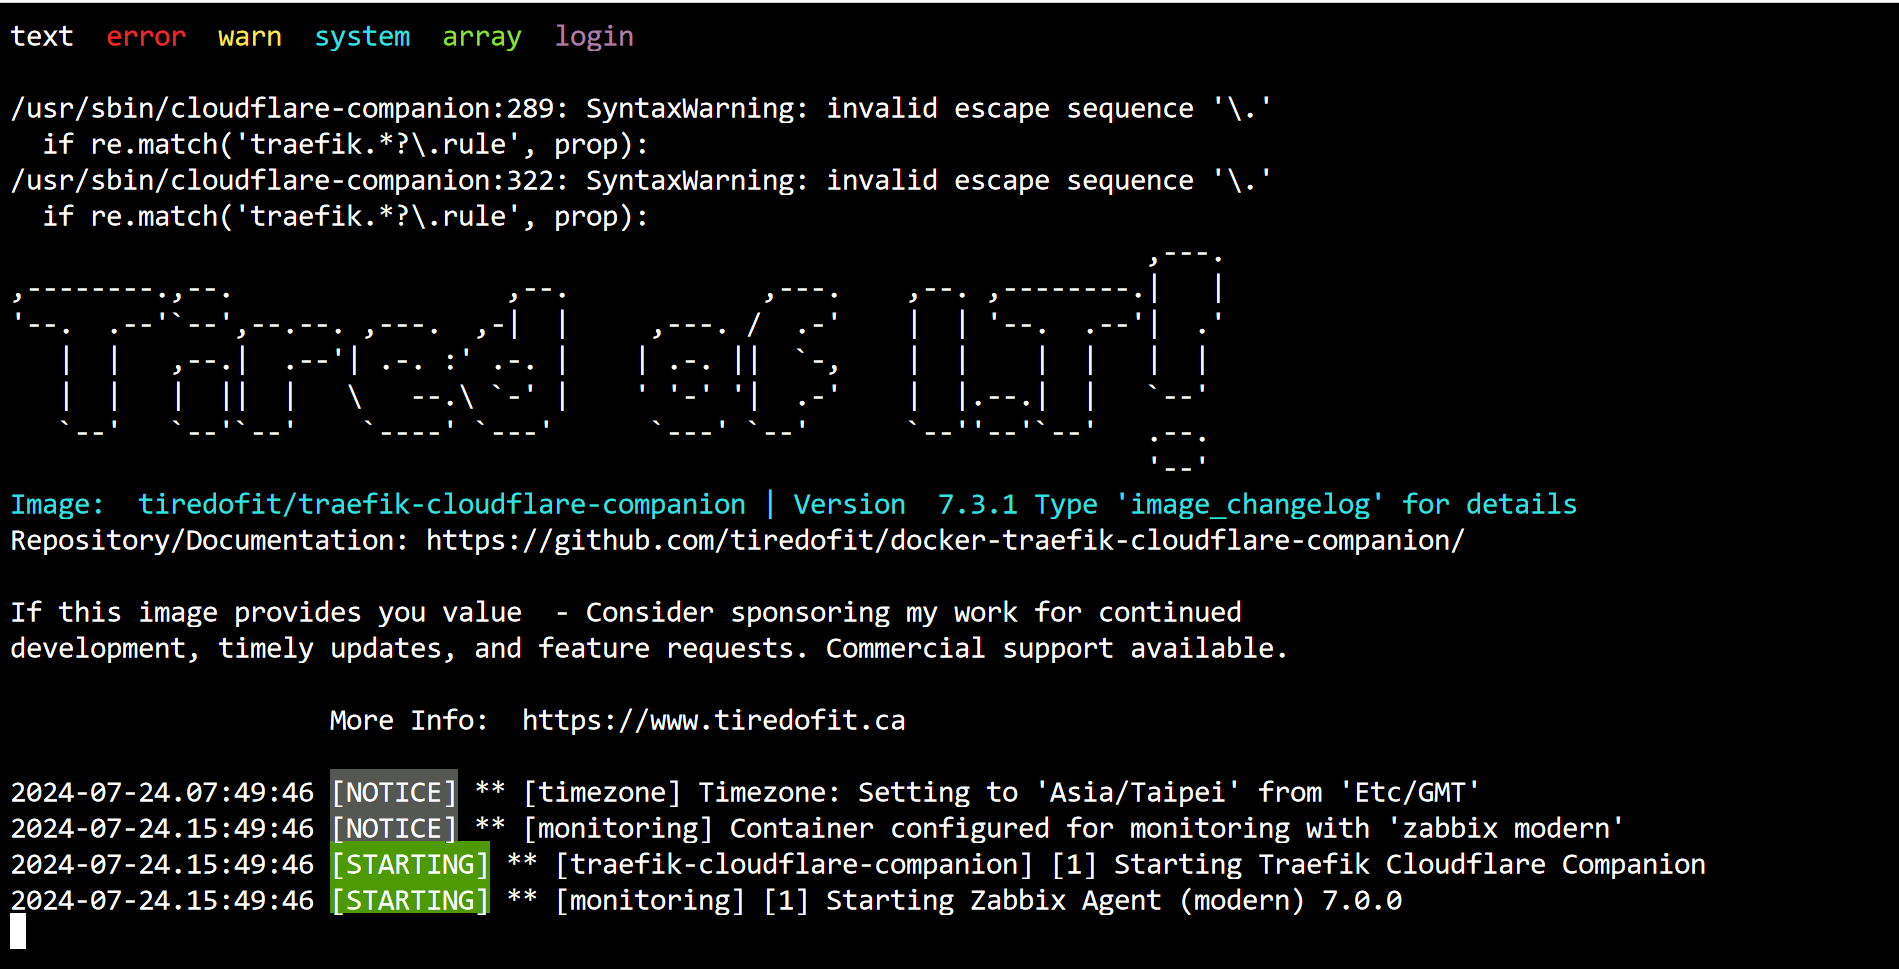
Example
We will use Radarr as example here to test if cloudflared-companion will automatically add the public hostname to CloudFlare DNS zone record by adding Labels to Radarr container template.
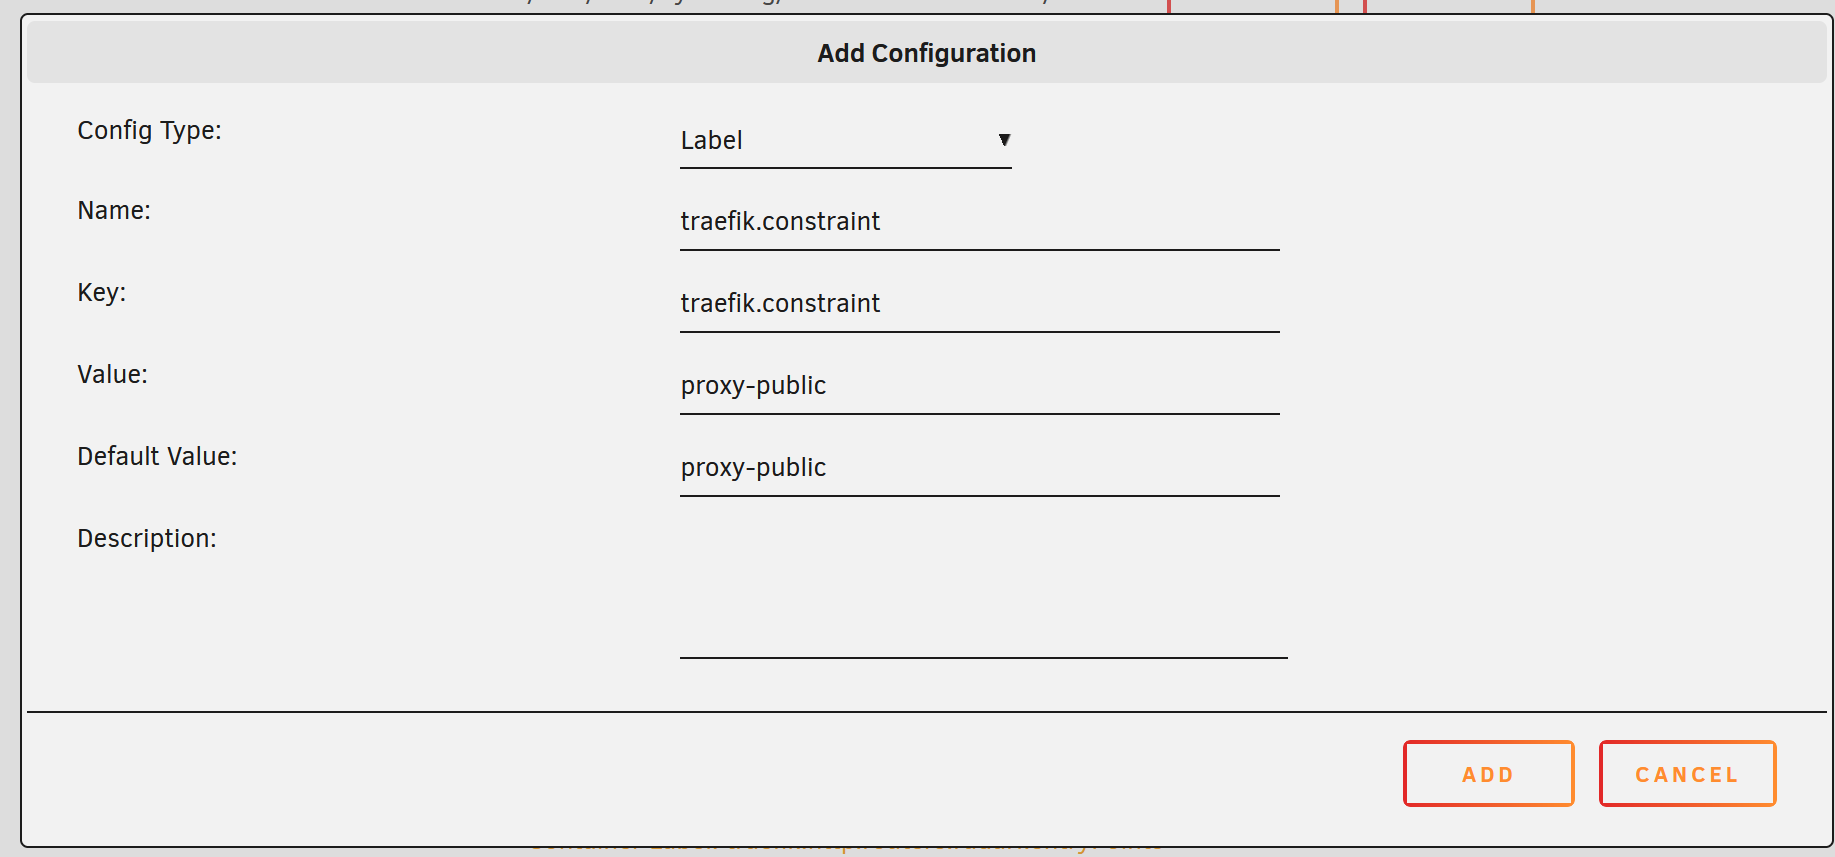
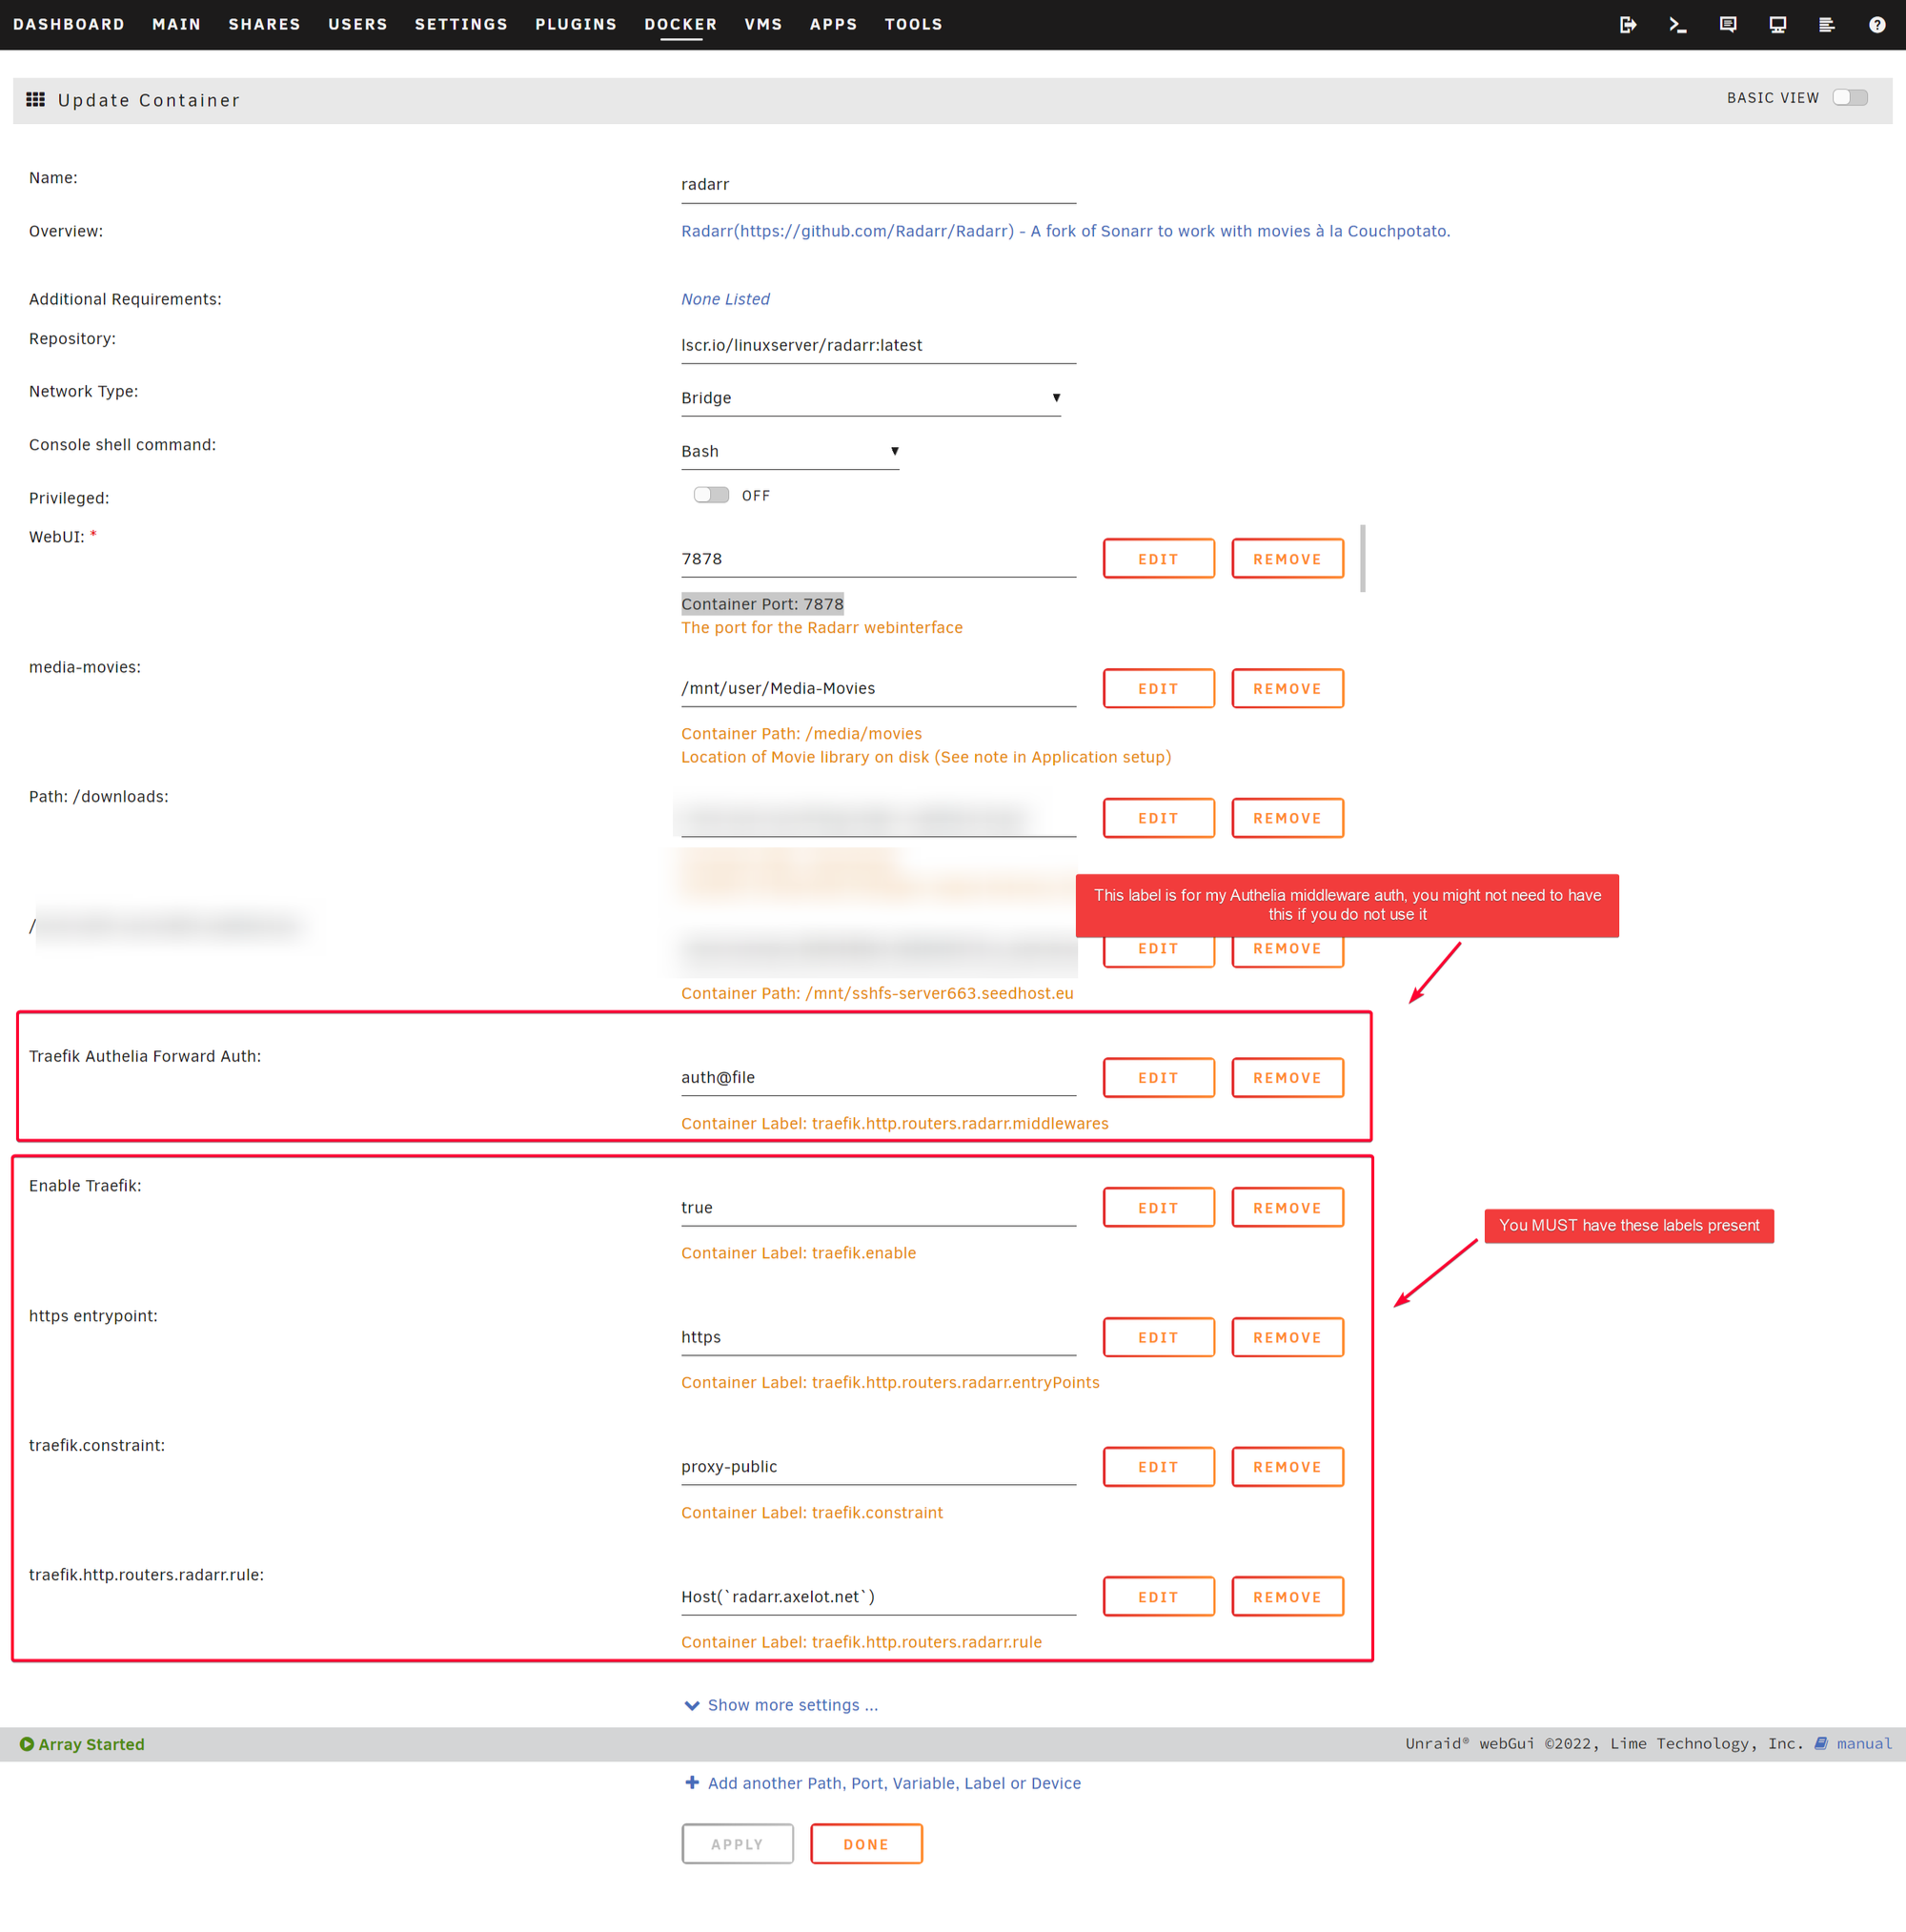
Add the following additional Labels to Radarr app.
TIP
💡 The traefik.constrant key with proxy-public value will signal cloudflare-companion to query Traefik API and find any services that contains the label Host(APP.DOMAIN.COM) , then add it to CloudFlare DNS Record via CF DNS API token.
The traefik.constrant key and proxy-public value can be changed by modifying TRAEFIK_FILTER_LABEL and TRAEFIK_FILTER in the env section on the docker-compose file.
The complete Radarr labels in container template.
Wait a couple of second and check that the DNS Record dashboard on Cloudflare has the public hostname that we just created.
Check the logs for docker-traefik-cloudflared-companion container and you should see an entry where it created the said DNS record.
