Overview
Universal Control Remapper is a complete rewrite of the original UCR, created in collaboration with evilC.
Universal Control Remapper is a Windows application which allows the end-user to remap any inputs from devices, such as keyboards, mice, joysticks, racing wheels, eye trackers, etc. to virtual output devices. Remapping is achieved by transforming inputs through plugins to a desired output device.
I used this to emulate a virtual Microsoft XBox controller for Xbox xemu emulator. This is the most stable virtual controller that I have tested among all others such as Virtual Controller, which crashes randomly.
TIP
Read vJoy post here post to create a virtual vJoy device as UCR output device.
Install UCR
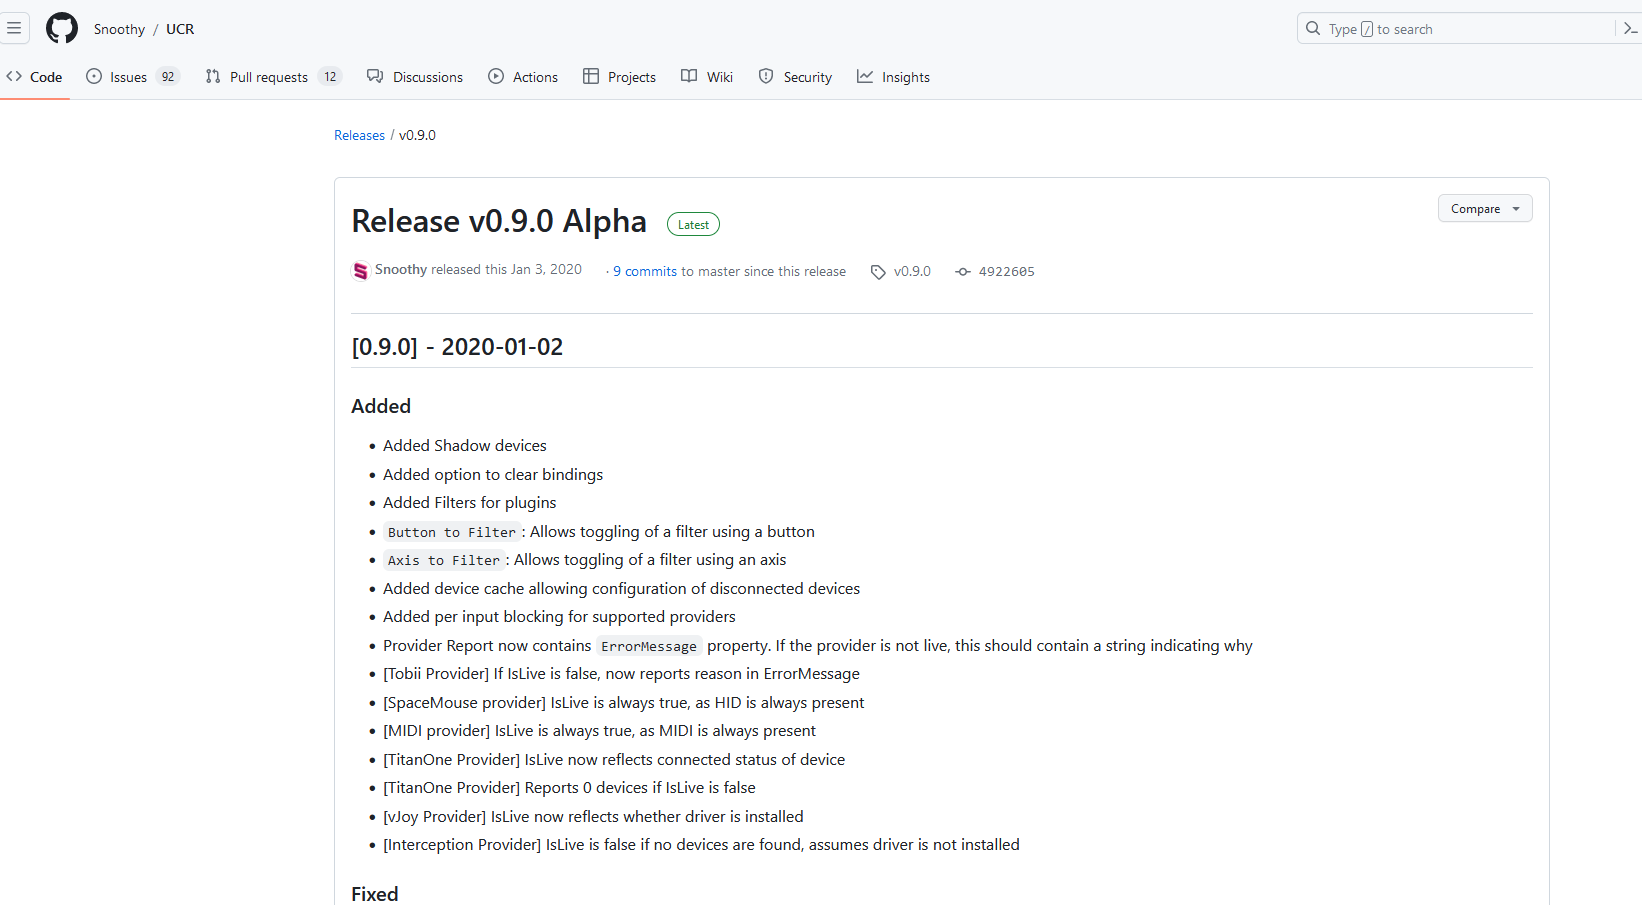
Download the latest version v0.9.0 Alpha from https://github.com/Snoothy/UCR/releases/tag/v0.9.0
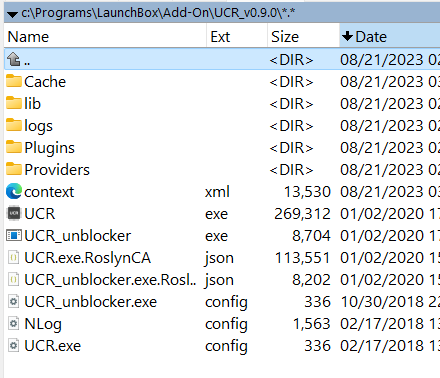
I suggest extracting it to your Launchbox/Add-Ons folder
Before opening UCR.exe, we have to install several providers first. We want to use keyboard / WinIPAC as input, and output to a virtual Microsoft Xbox 360 controller. This virtual Microsoft Xbox 360 controller can then be detected by Xemu emulator.
Download Providers
Providers provide input/output to UCR. We need to download two:
Interception
This provider enables using keyboard and mouse as input/output. If you have Sinden Lightgun, it will show up here too because it is a mouse!
Installation Steps (from https://github.com/snoothy/ucr/wiki/Core_Interception)
- Download the latest
interception.zipfrom the Interception Releases Page - Unzip this to a folder of your choice
- Open a command prompt as administrator
- In the command prompt, navigate to the folder you created in step 2, then to the
command line installerfolder - Type
install-interception.exe /installand hit ENTER. - You should see
Interception successfully installed. You must reboot for it to take effect. - Reboot
ViGEm
Enables emulation of virtual gamepads using Nefarius' Bus Driver. Currently only Xbox360 and DualShock4 are supported, but theoretically it can emulate anything.
Installation Steps (from https://github.com/snoothy/ucr/wiki/Core_ViGEm)
- Install ViGEm using the installer.
- Reboot
Create Profiles
We will now create three profiles for different purposes:
- IPAC2Xbox: Map keyboard keys to virtual Microsoft XBox device. Used by
xemuMicrosoft Xbox emulator. - NONE: Remove any virtual device mapping. Switch to this profile after exiting any emulator.
- DRIVING: Map mouse to virtual joystick. Create this if you have rotary device such as Ultimarc SpinTrak with Steering wheel, as this allow you to use the SpinTrak as steering wheel input for arcade driving games
IPAC2Xbox Profile
Once you have downloaded those two providers, you should be able to use them in profile.
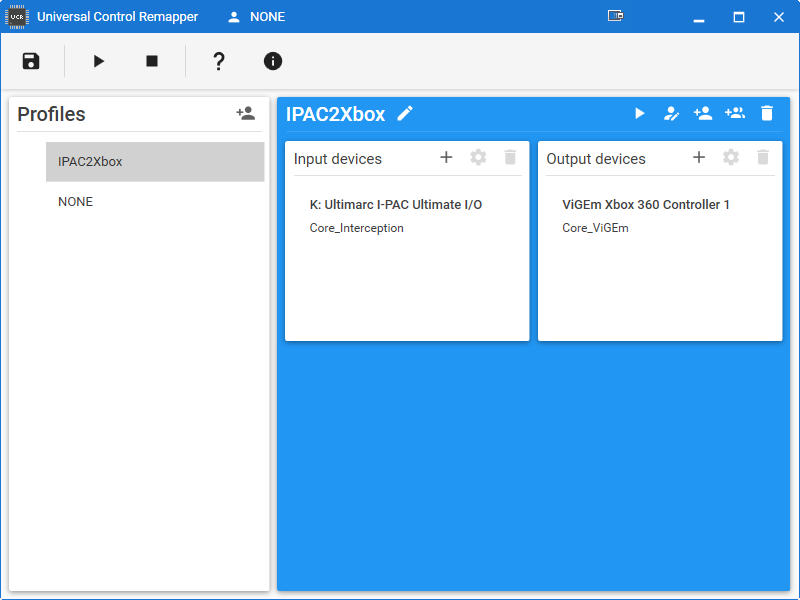
I created a new profile called IPAC2Xbox which send IPAC keys to Xbox virtual device.
Start by selecting your keyboard or Ultimarc I-PAC Ultimate I/O keyboard encoder as Input devices. Then ViGEm Xbox 360 Controller 1 as the output devices.
Assigning Buttons
Now is the interesting parts. UCR does not have an intuitive controller image with buttons that you can click, so you have to assign those keys manually.
Then, double click the profile name and you should see the following screen.
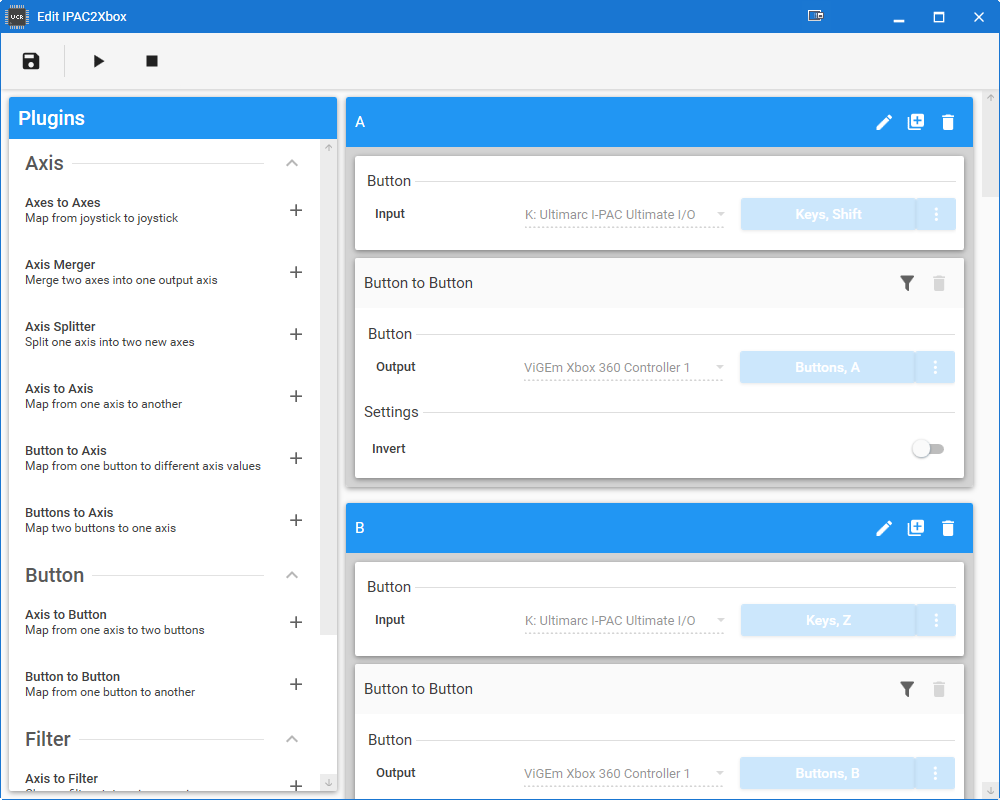
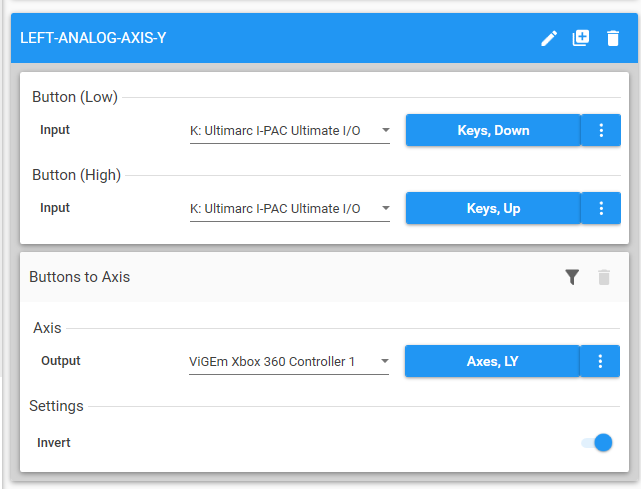
The screenshot above shows that I had already assigned the keys. If you are new, start by clicking Button > Button to Button to assign the ABXY, Start, Back, LS and RS digital keys.
Then assign Axis by clicking Axis > Buttons to Axis. Be sure to click Buttons to Axis instead of Button to Axis because we wanted to map two buttons to a single axis. E.g. Up and Down keys to LX. Notice I also check the Invert button because I treat Button (Low) as the left key in Y-Axis.
Test Profile
Once you saved the profile, select the newly created profile, then click the Play icon on UCR main menu. You should then hear the familiar USB device insert tone.

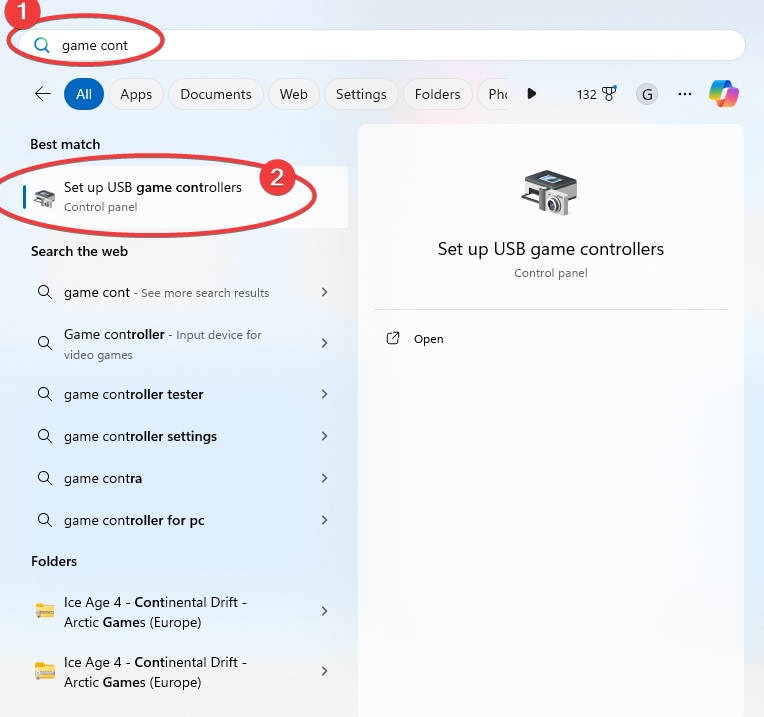
Next, search for game controllers in your Windows Search menu, then click Set up USB game controllers.
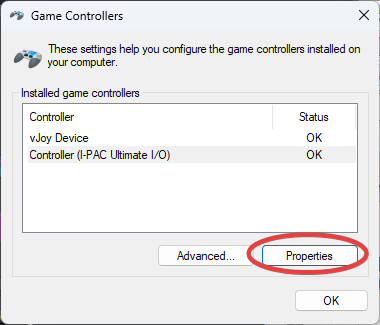
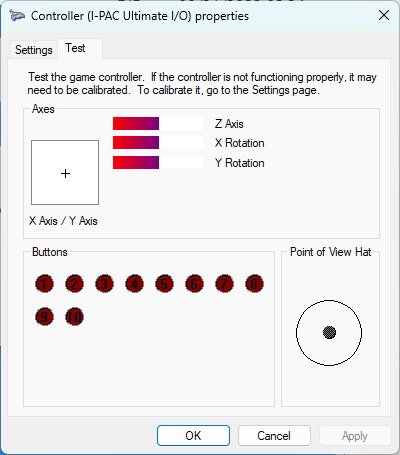
From the window, select the new Controller, then click Properties.
Press any keys and the button should light up!
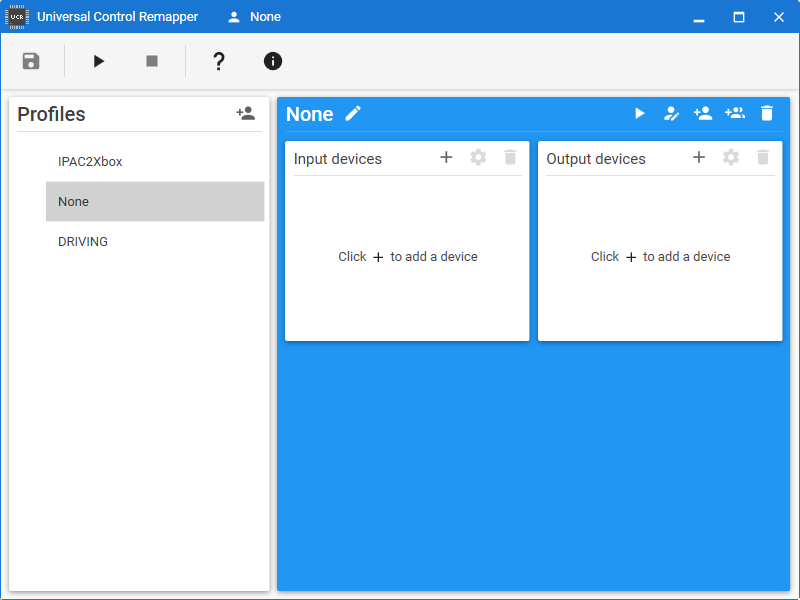
NONE Profile
I also created a NONE profile with no keys assigned. The reason is I wanted UCR to use the IPAC2XBOX profile only if I am launching xemu emulator, then switch to NONE profile after the emulator exit.
In the profile settings, DO NOT select any Input or Output devices.
DRIVING Profile
Create this DRIVING profile to use your Mouse as Driving wheel.
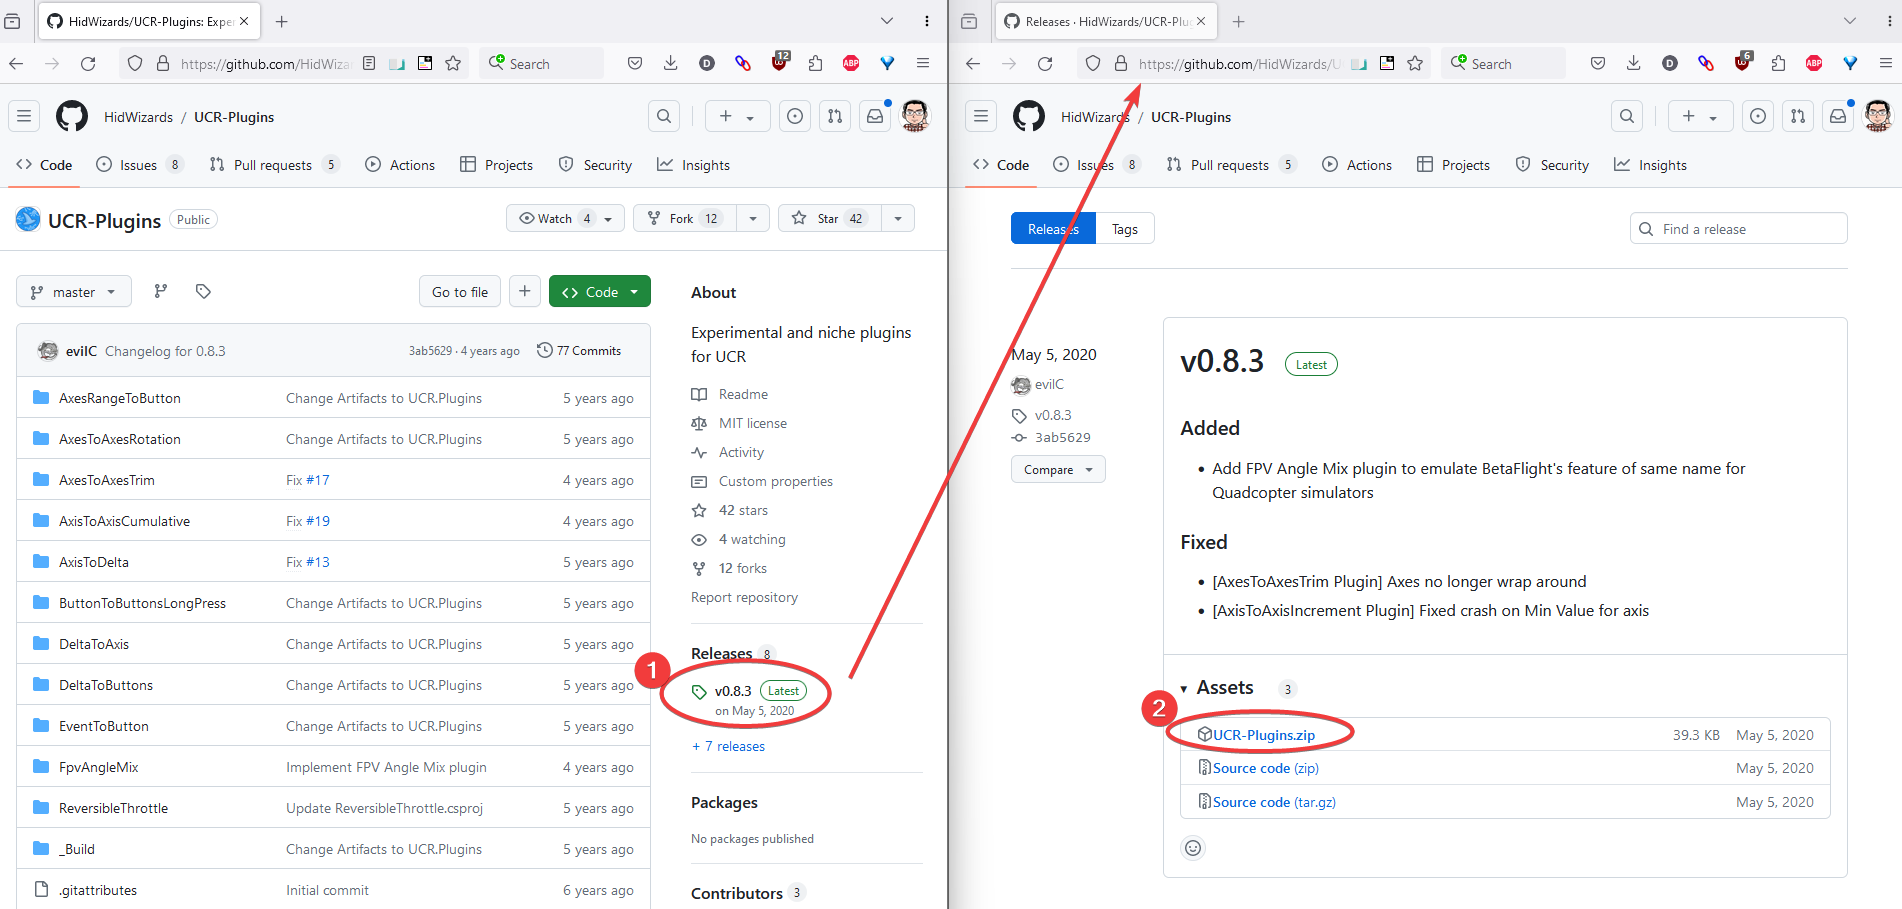
Download UCR-Plugin from https://github.com/HidWizards/UCR-Plugins/releases. These plugins will enable us to map mouse inputs to Axis inputs.
TIP
Following were copied from UCR-Plugins README. These are the additional .dll files that UCR can use when mapping inputs.
AxisToDelta
Joystick to Mouse.
Known unstable. Keep profile GUI minimized while using to reduce CPU usage
DeltaToAxis
Mouse to Joystick.
Known unstable. Keep profile GUI minimized while using to reduce CPU usage
ButtonToButtonsLongPress
Long Press version of ButtonToButton
Niche Plugins
AxesRangeToButton
Allows you to define a position in X/Y space that triggers a button.
Intended for use with eg rose selection menus, virtual H shifters etc.
AxesToAxesRotation
Rotates a joystick by a certain number of degrees.
This is to try and counter the issue using console controller thumbsticks where your thumb axis does not line up with the stick axis, typically resulting in you inputting up-right when you meant to input up.
AxesToAxesTrim
Allows you to set the center point of a stick on the fly.
Has two axis inputs, plus a "Trim" button and a "Reset Trim" button.
At the instant you press the trim button, the current stick position is recorded.
Upon release of the trim button, this trim is applied to the stick.
Subsequent trims will alter the existing trim setting.
The Reset button removes all trim.
Requested by hon0 in Discord.
AxisToAxisCumulative
Allows you to map one axis to another in "Cumulative" mode.
When you move the input axis, the amount of deflection determines how quickly the output axis moves in that direction.
Useful, for example, if you wish to use a stick which springs back to center to control a throttle.
Requested by Spadino
ReversibleThrottle
Used if you have a throttle / pedal like input device, but the game uses one axis for forward / reverse (Mid point is stop, max is forwards, min is reverse).
On press of a button, the throttle switches between the following modes:
Normal: Minimum throttle is stop, push throttle forward to move forwards
Reverse: Minimum throttle is stop, push throttle forward to move backwards
FpvAngleMix
This emulates BetaFlight's "FPV Angle Mix" feature.
First Person View (FPV) racing / freestyle quadcopters typically have their camera tilted up, so that when flying forwards (nose down), you can still see where you are going. This, however, impacts roll and yaw inputs as these inputs are relative to the craft, not to the camera view - such that, for example, at 90 degrees of camera up-tilt, roll becomes yaw and yaw becomes roll (From the perspective of the camera).
The FPV Angle Mix of BetaFlight corrects for this by converting roll input to yaw input and vice versa, as needed, to ensure that stick input is relative to the camera.
However, most simulators do not support this feature, so this plugin simulates it
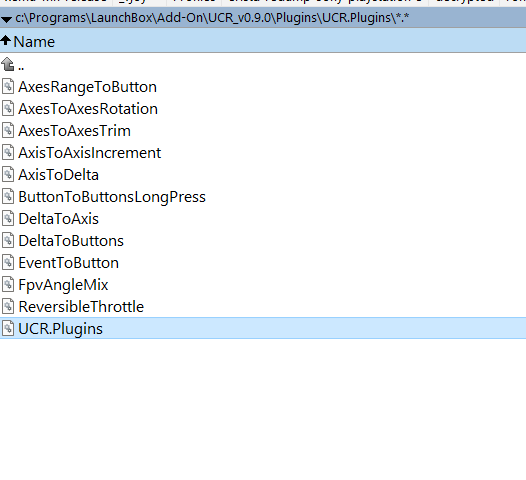
Extract it to UCR_v0.9.0/Plugins folder.
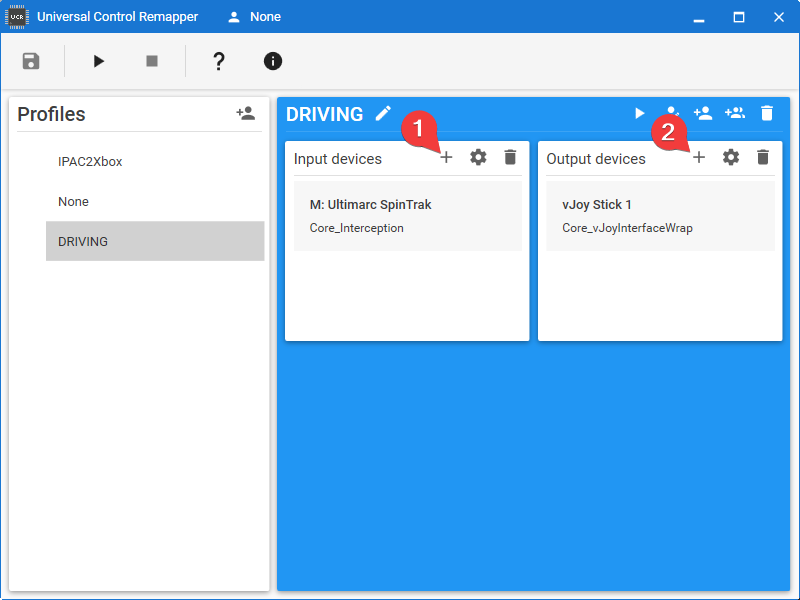
Launch UCR.exe and create a new Profile.
In the Input devices option, click the + button and select Ultimarc SpinTrak.
In the Output devices, click the + button and select vJoy Stick 1
Assigning Buttons
Double click on DRIVING profile item.
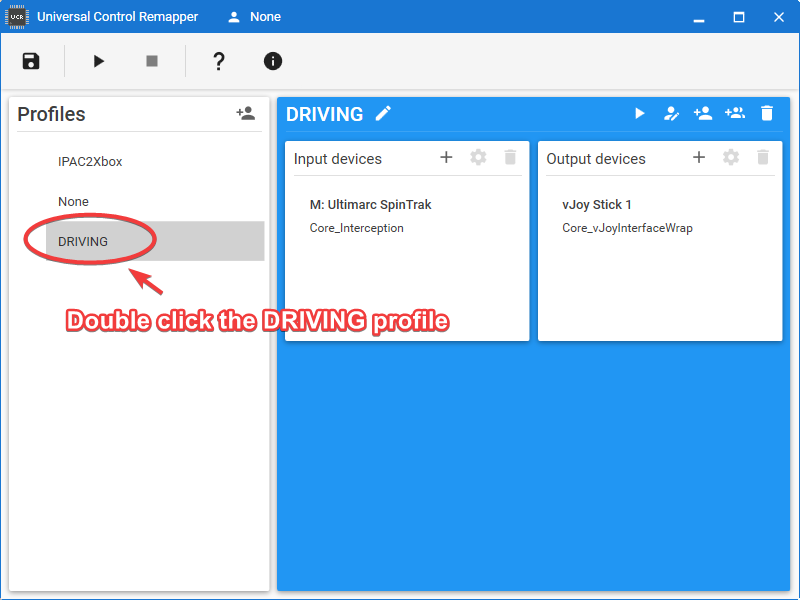
From the left Plugins section, select Delta to Axis since we want to map a mouse axis to a joystick axis.
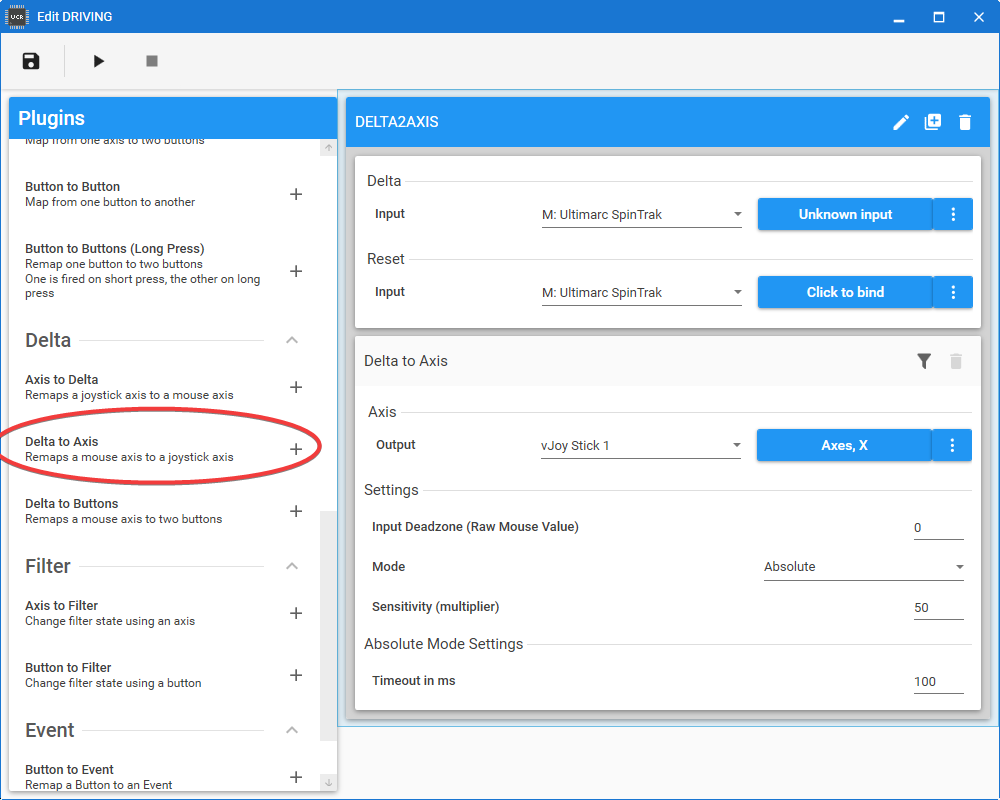
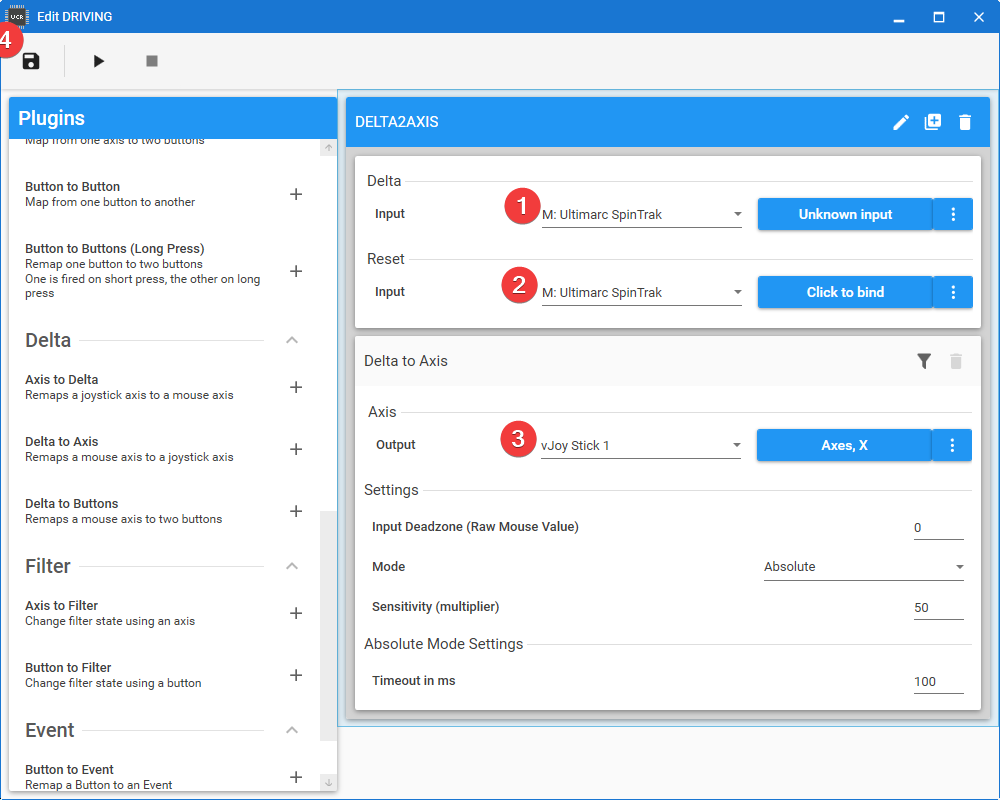
Set Delta > Input to Ultimarc SpinTrak.
Set Delta to Axis > Axis > Output to vJoy Stick 1.
Click the top left Disk icon when done to save the settings and go back to UCR main menu.
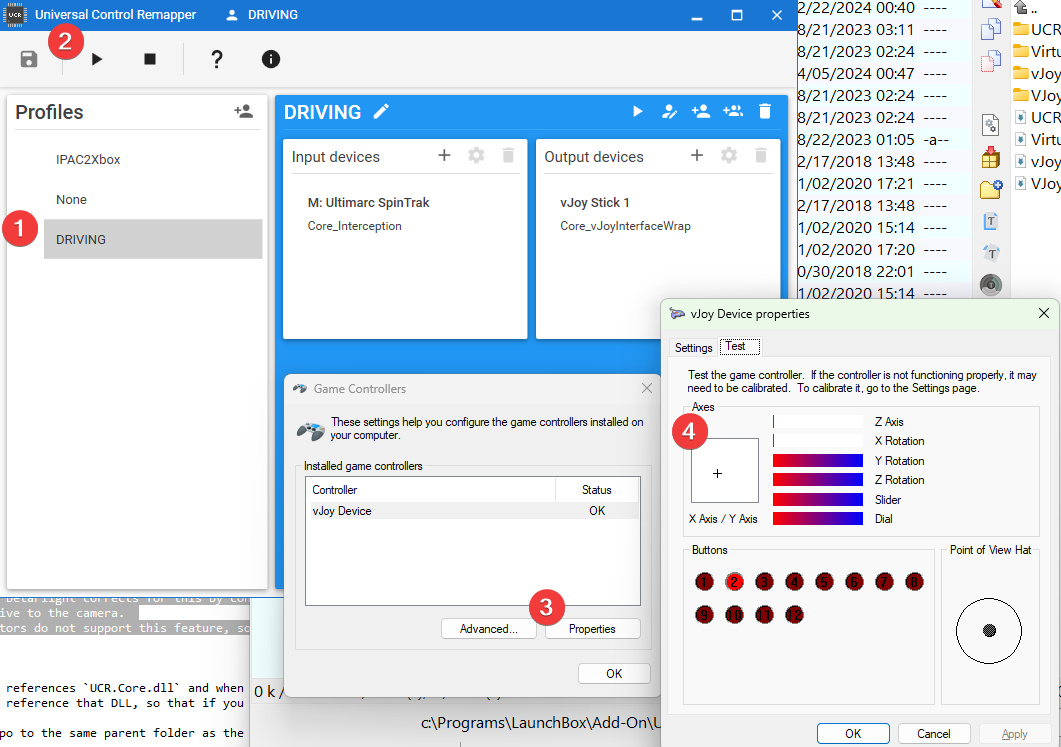
Test Profile
Select DRIVING profile then press the Play icon to start the profile. Next open Game Controller settings, select vJoy Device > Properties and move your mouse. You should see the + movement on the Axes section.
CLI
You can use CLI to start a profile.
Run "C:\Programs\LaunchBox\Add-On\UCR_v0.9.0\UCR.exe" -p "IPAC2XBOX"To use the NONE profile.
Run "C:\Programs\LaunchBox\Add-On\UCR_v0.9.0\UCR.exe" -p "NONE"Autorun UCR when launching emulator
A practical example to use UCR CLI to switch between profile is when using emulator such as xemu XBox emulator that can only received gamepad inputs, but not direct keyboard keys.
For that emulator. I wanted to load IPAC2XBOX profile before launching the emulator so it can detect the virtual Microsoft Xbox controller, then switch back to NONE profile after the emulator exit.
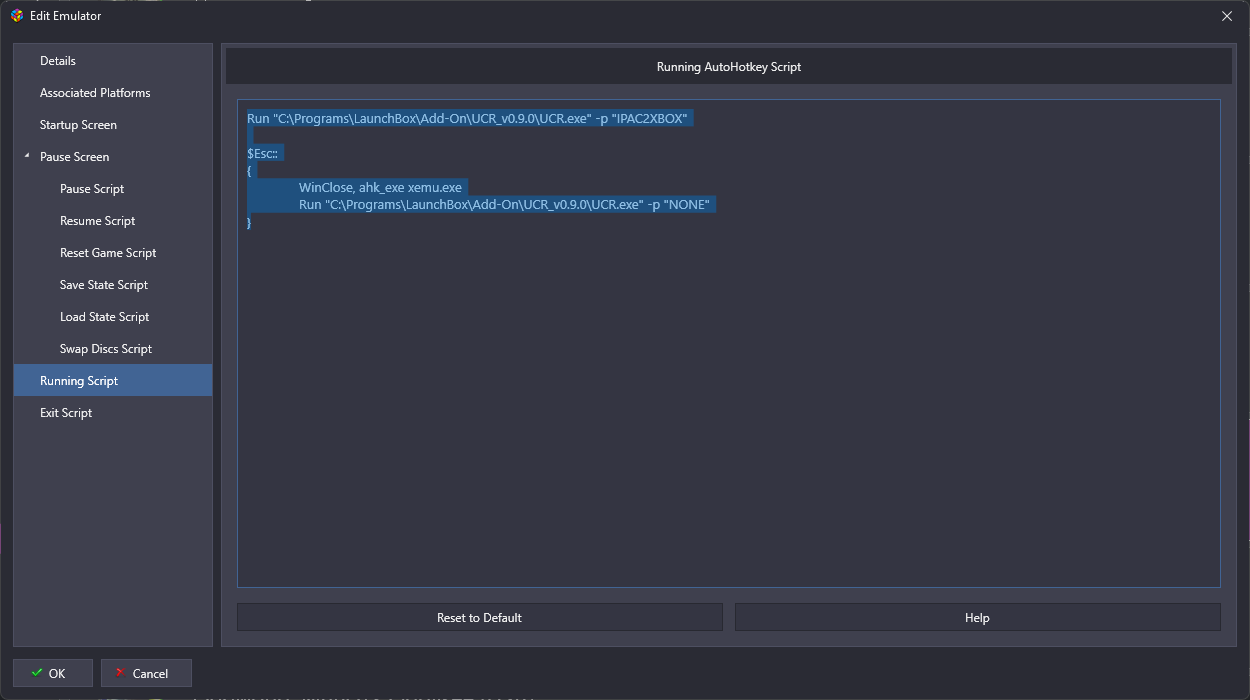
Copy and paste the following to Emulator Running Script
Run "C:\Programs\LaunchBox\Add-On\UCR_v0.9.0\UCR.exe" -p "IPAC2XBOX"

$Esc::
{
	WinClose, ahk_exe xemu.exe
	Run "C:\Programs\LaunchBox\Add-On\UCR_v0.9.0\UCR.exe" -p "NONE"
}
More Readings
Read https://medium.com/@thedoteater/ucr-x360-controller-support-for-multiplayer-from-single-hid-tutorial-c4801663b89f for more interesting setup!