VitePress
Plugins
Following is the plugin I used:
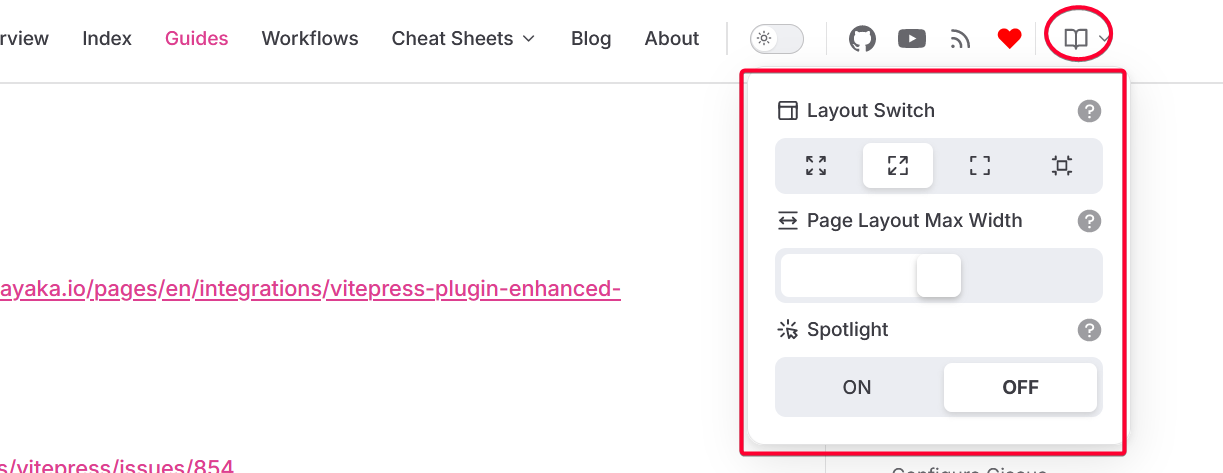
Enhanced Readabilities
This will enable a page layout switcher for the viewer to adjust the website sidebar and page width.
medium-zoom
@ref: https://github.com/vuejs/vitepress/issues/854
I used it because https://github.com/T-miracle/vitepress-plugin-image-viewer doesn't work.
// medium-zoom
import { onMounted, watch, nextTick } from 'vue';
import mediumZoom from 'medium-zoom';
const theme = {
extends: DefaultTheme,
// Layout,
Layout: () => {
...
},
async enhanceApp({app, router}) {
...
},
setup() {
// get frontmatter and route
const { frontmatter } = useData();
const route = useRoute();
// zoom-medium START
const initZoom = () => {
mediumZoom('.main img', {
background: 'var(--vp-c-bg)',
margin: 0,
});
};
onMounted(() => {
initZoom();
});
watch(
() => route.path,
() => nextTick(() => initZoom())
);
// zoom-medium END
},
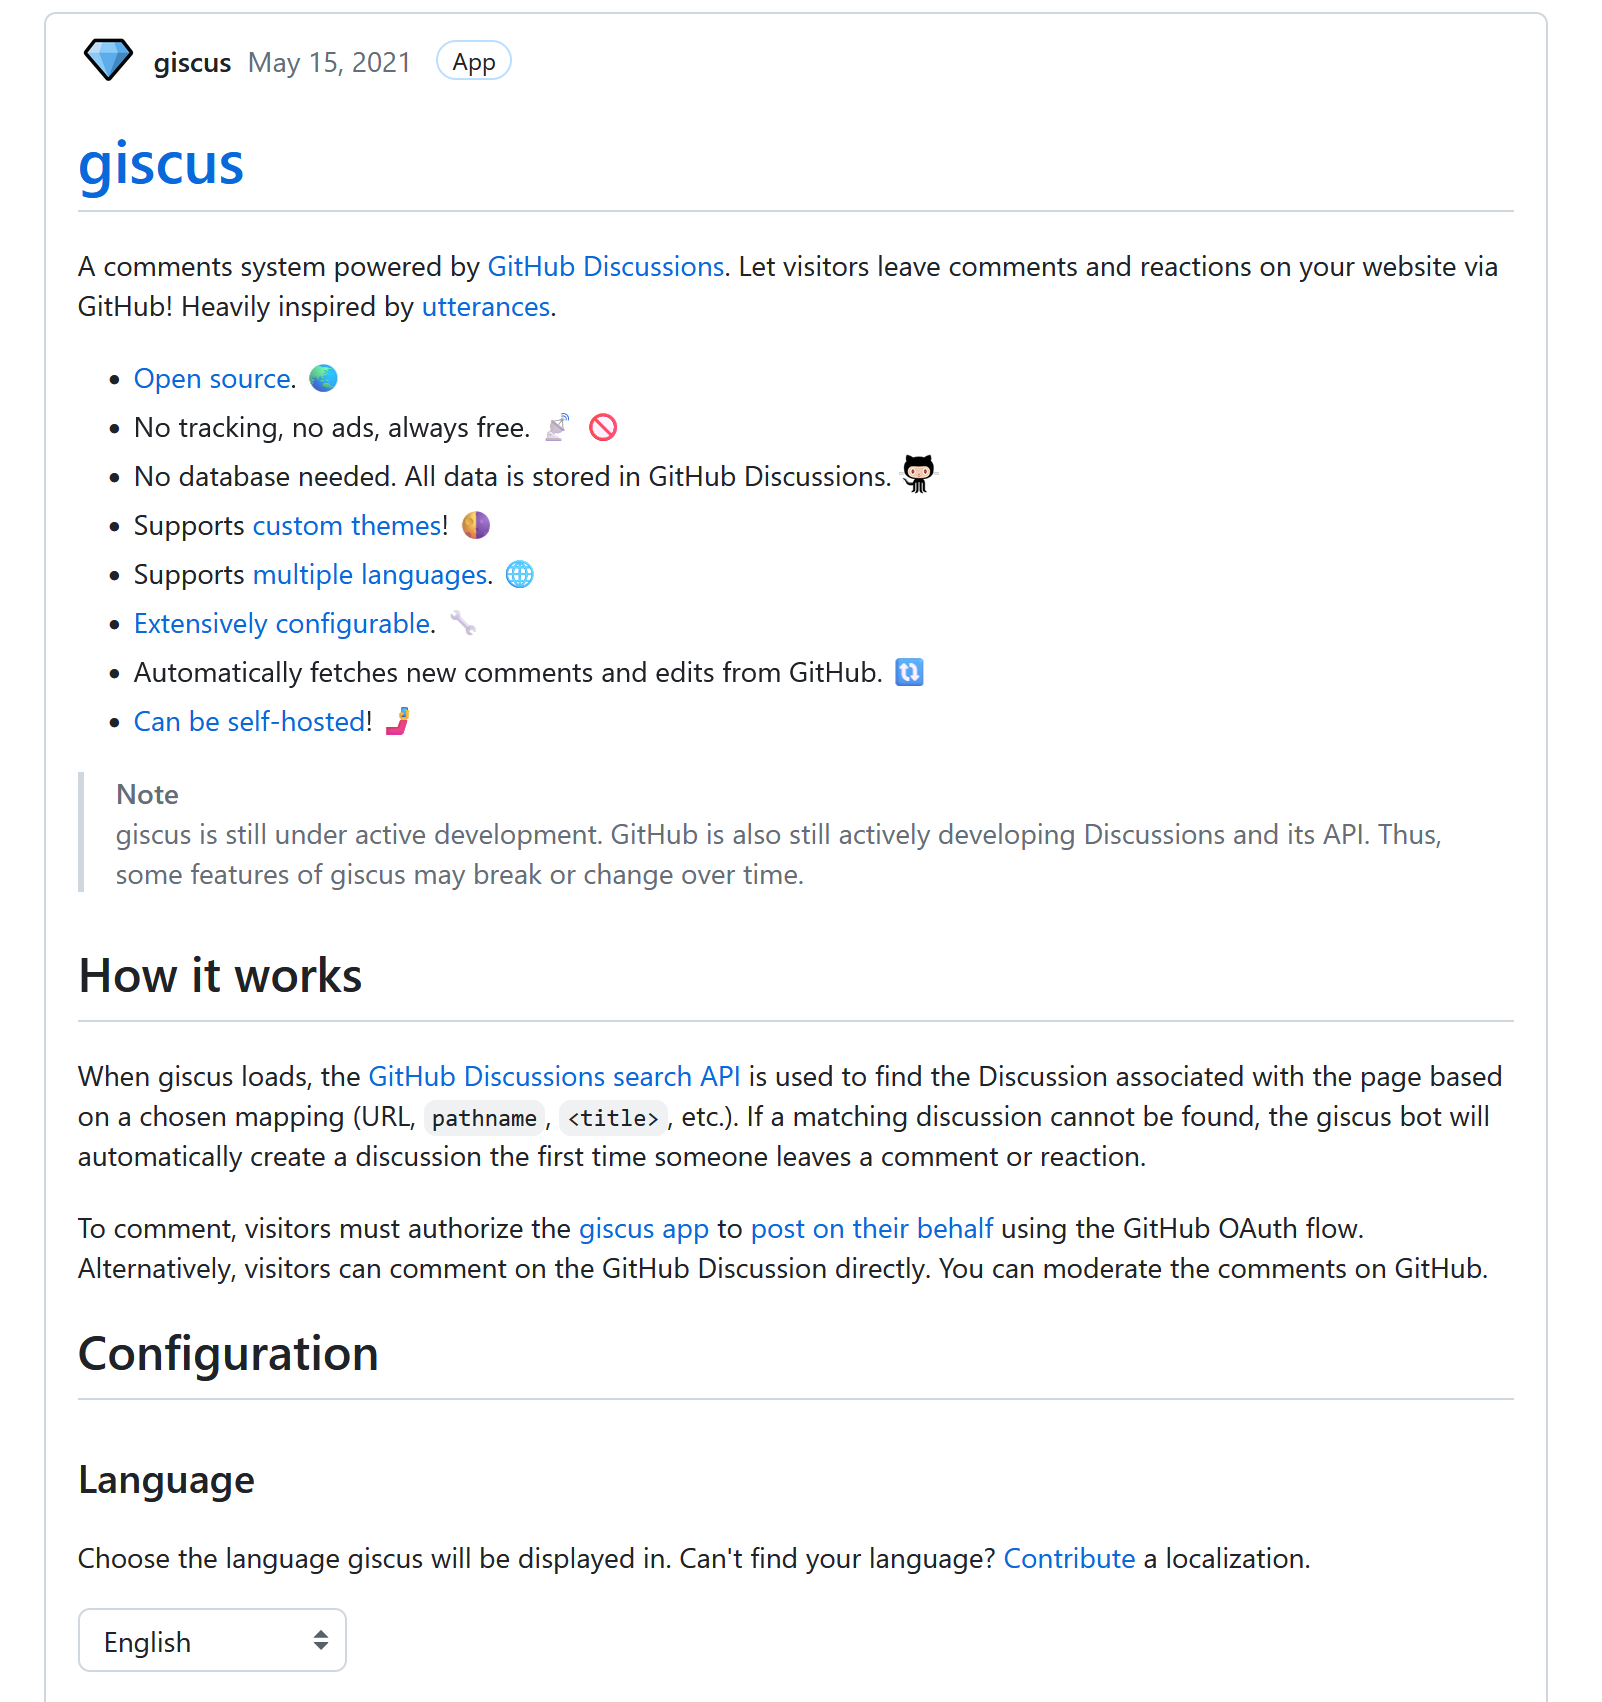
};Giscus plugin
I used this to enable Comment feature on the bottom of any markdown doc.
Home page: https://giscus.app/
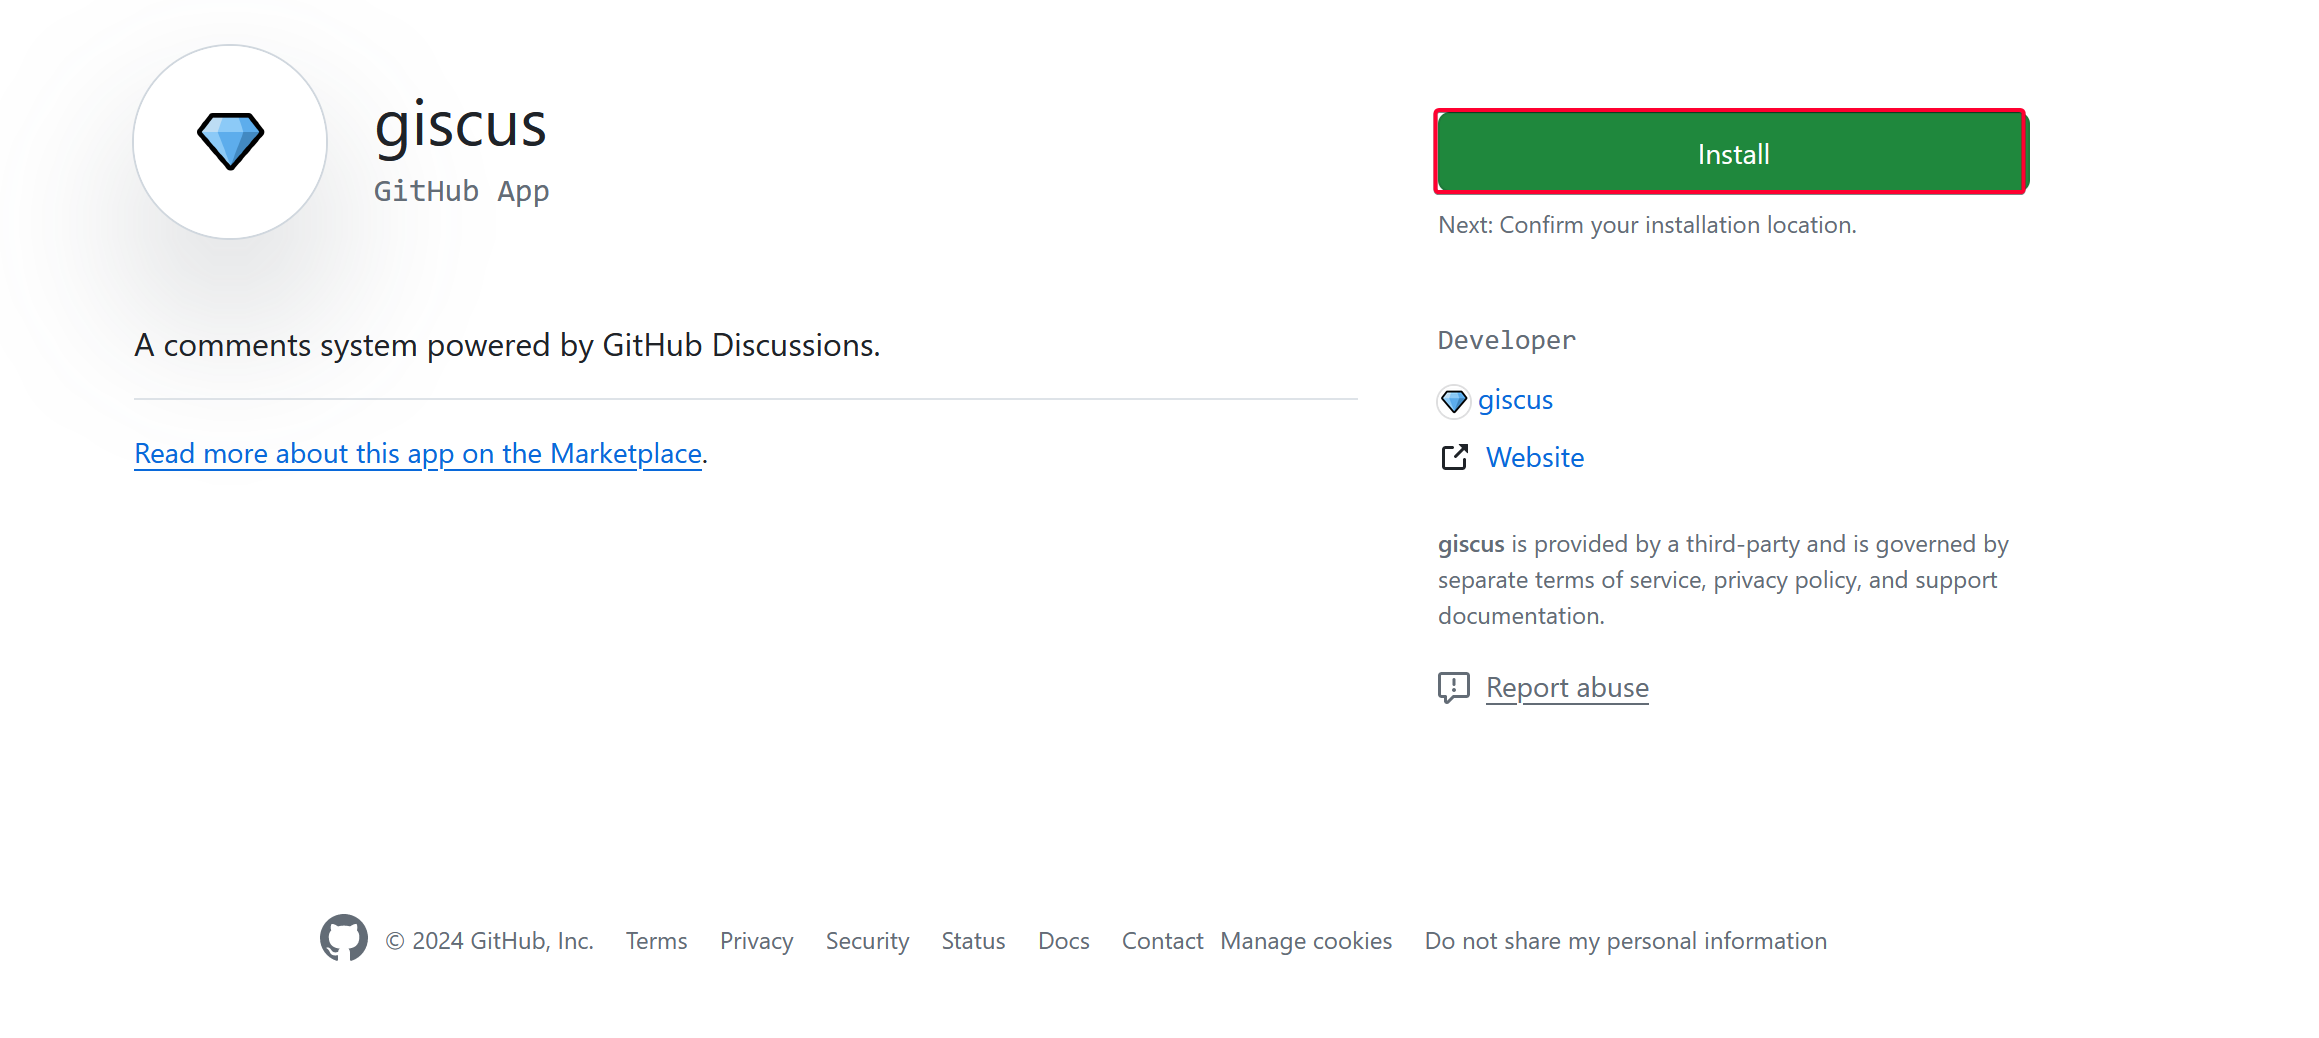
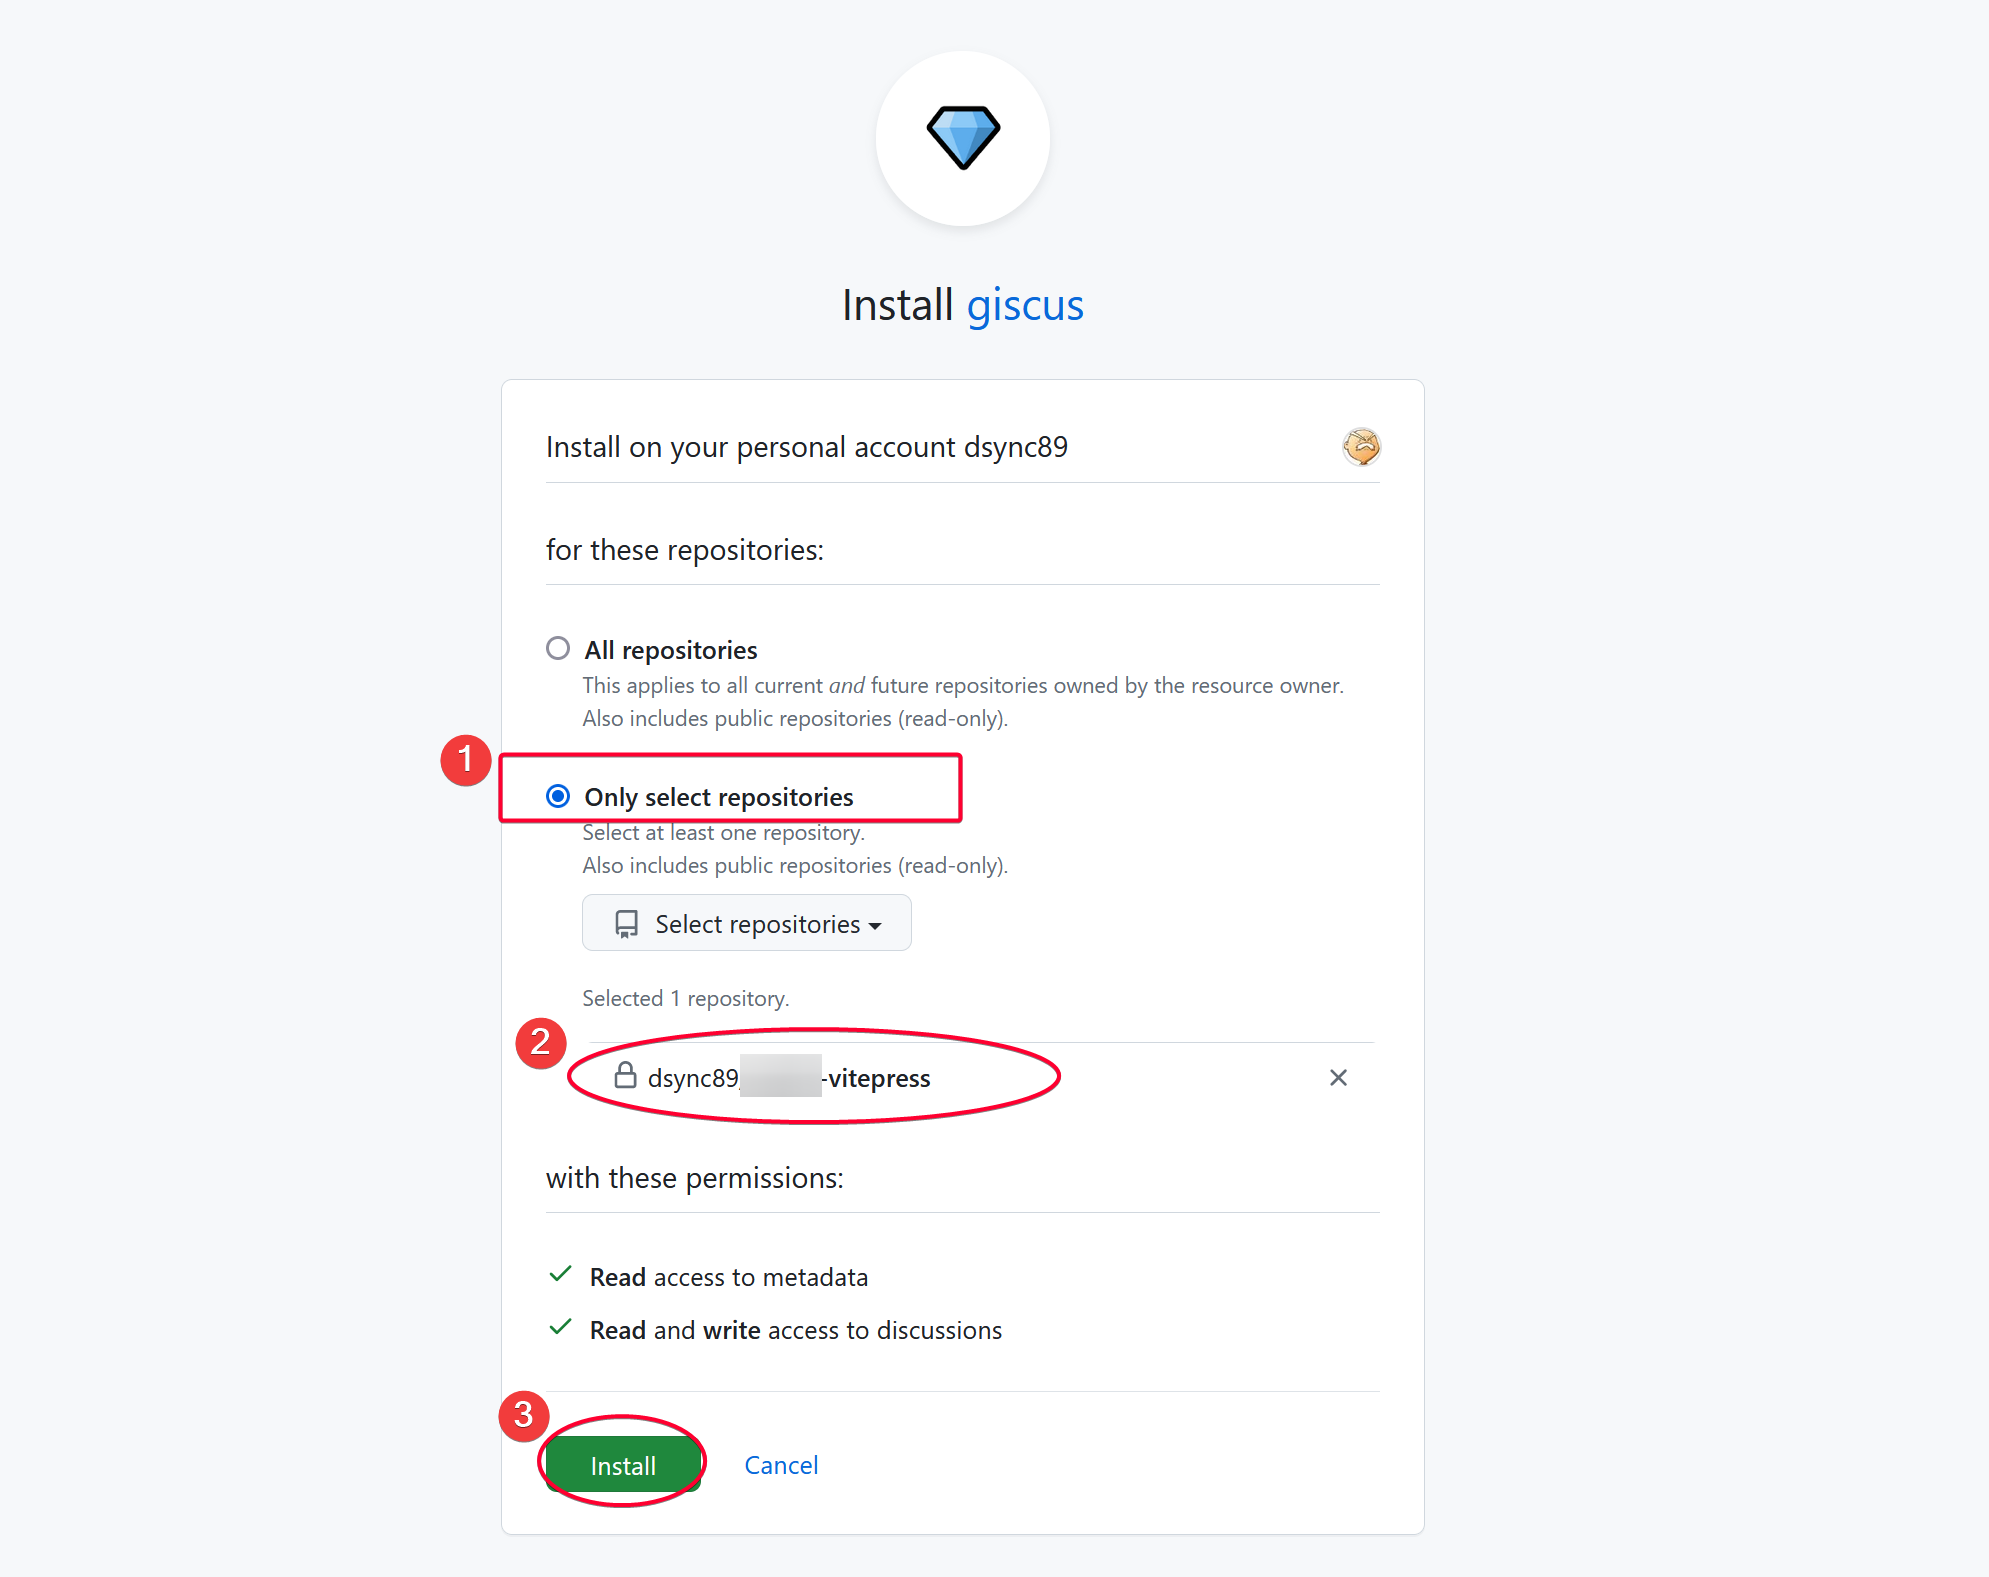
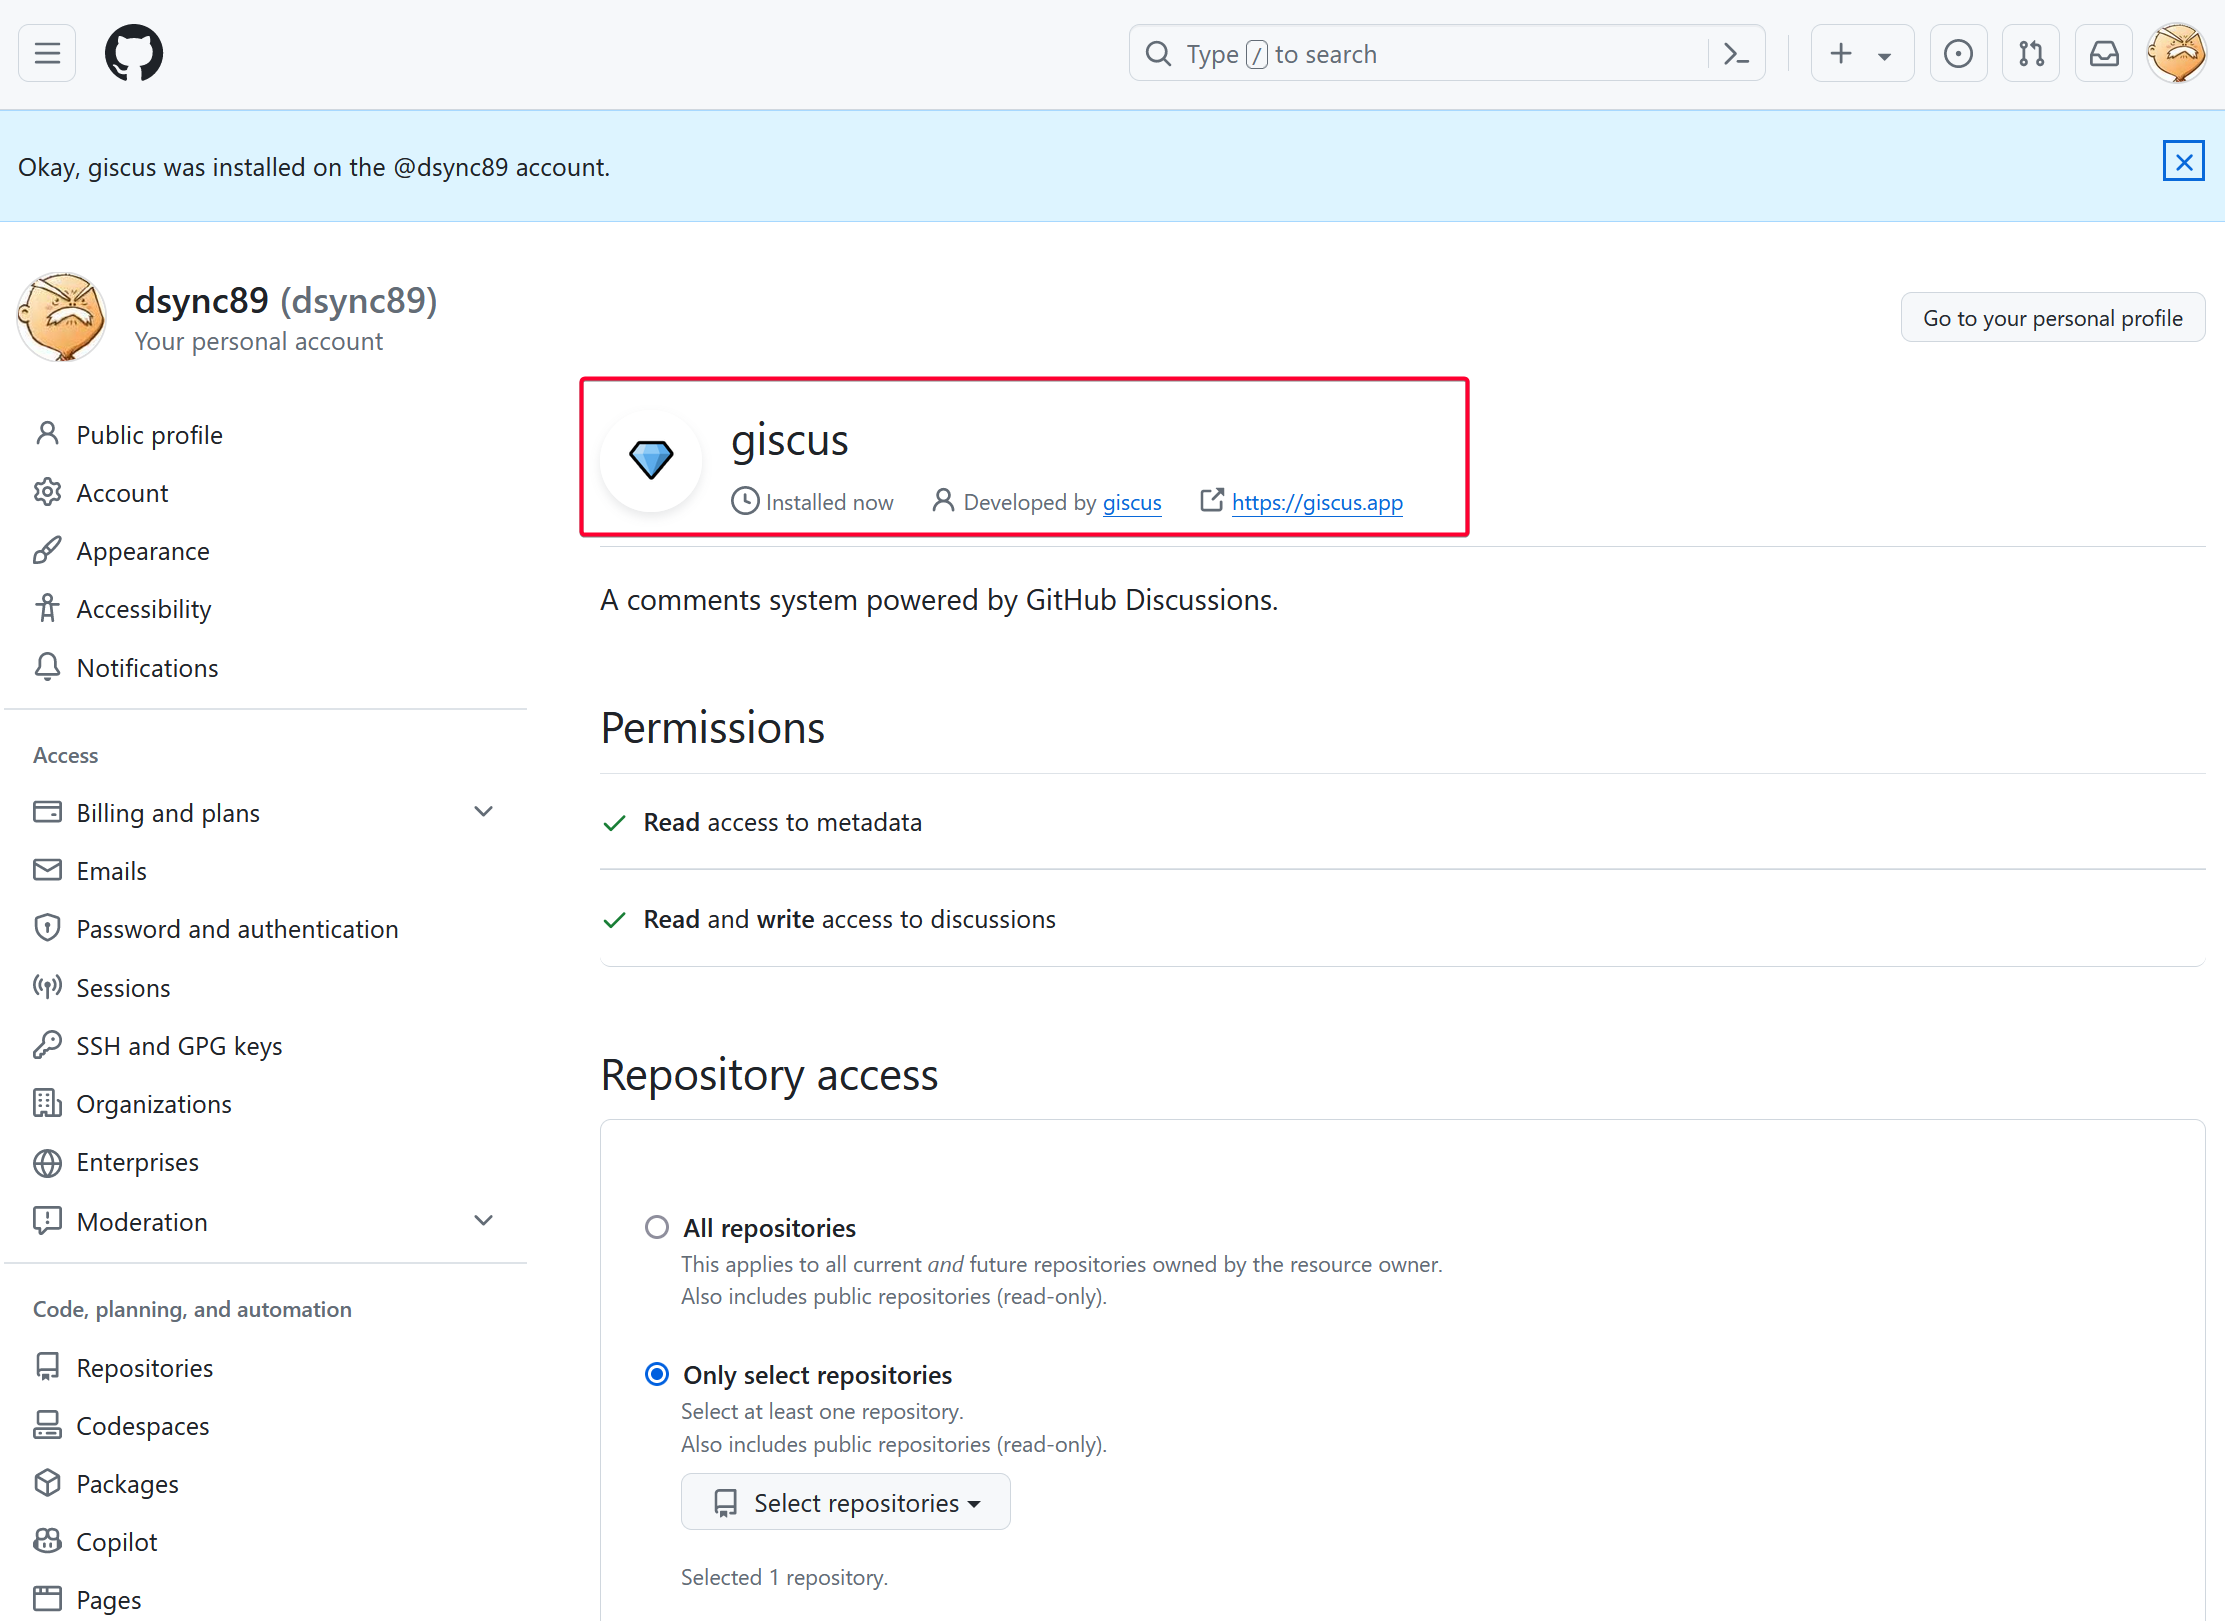
Link Giscus with Github Repo
Visit https://github.com/apps/giscus and click the Install button.
Prerequisite
Before we configure Giscus, we need to first enable Discussion feature in our repository where we want to store all the discussion.
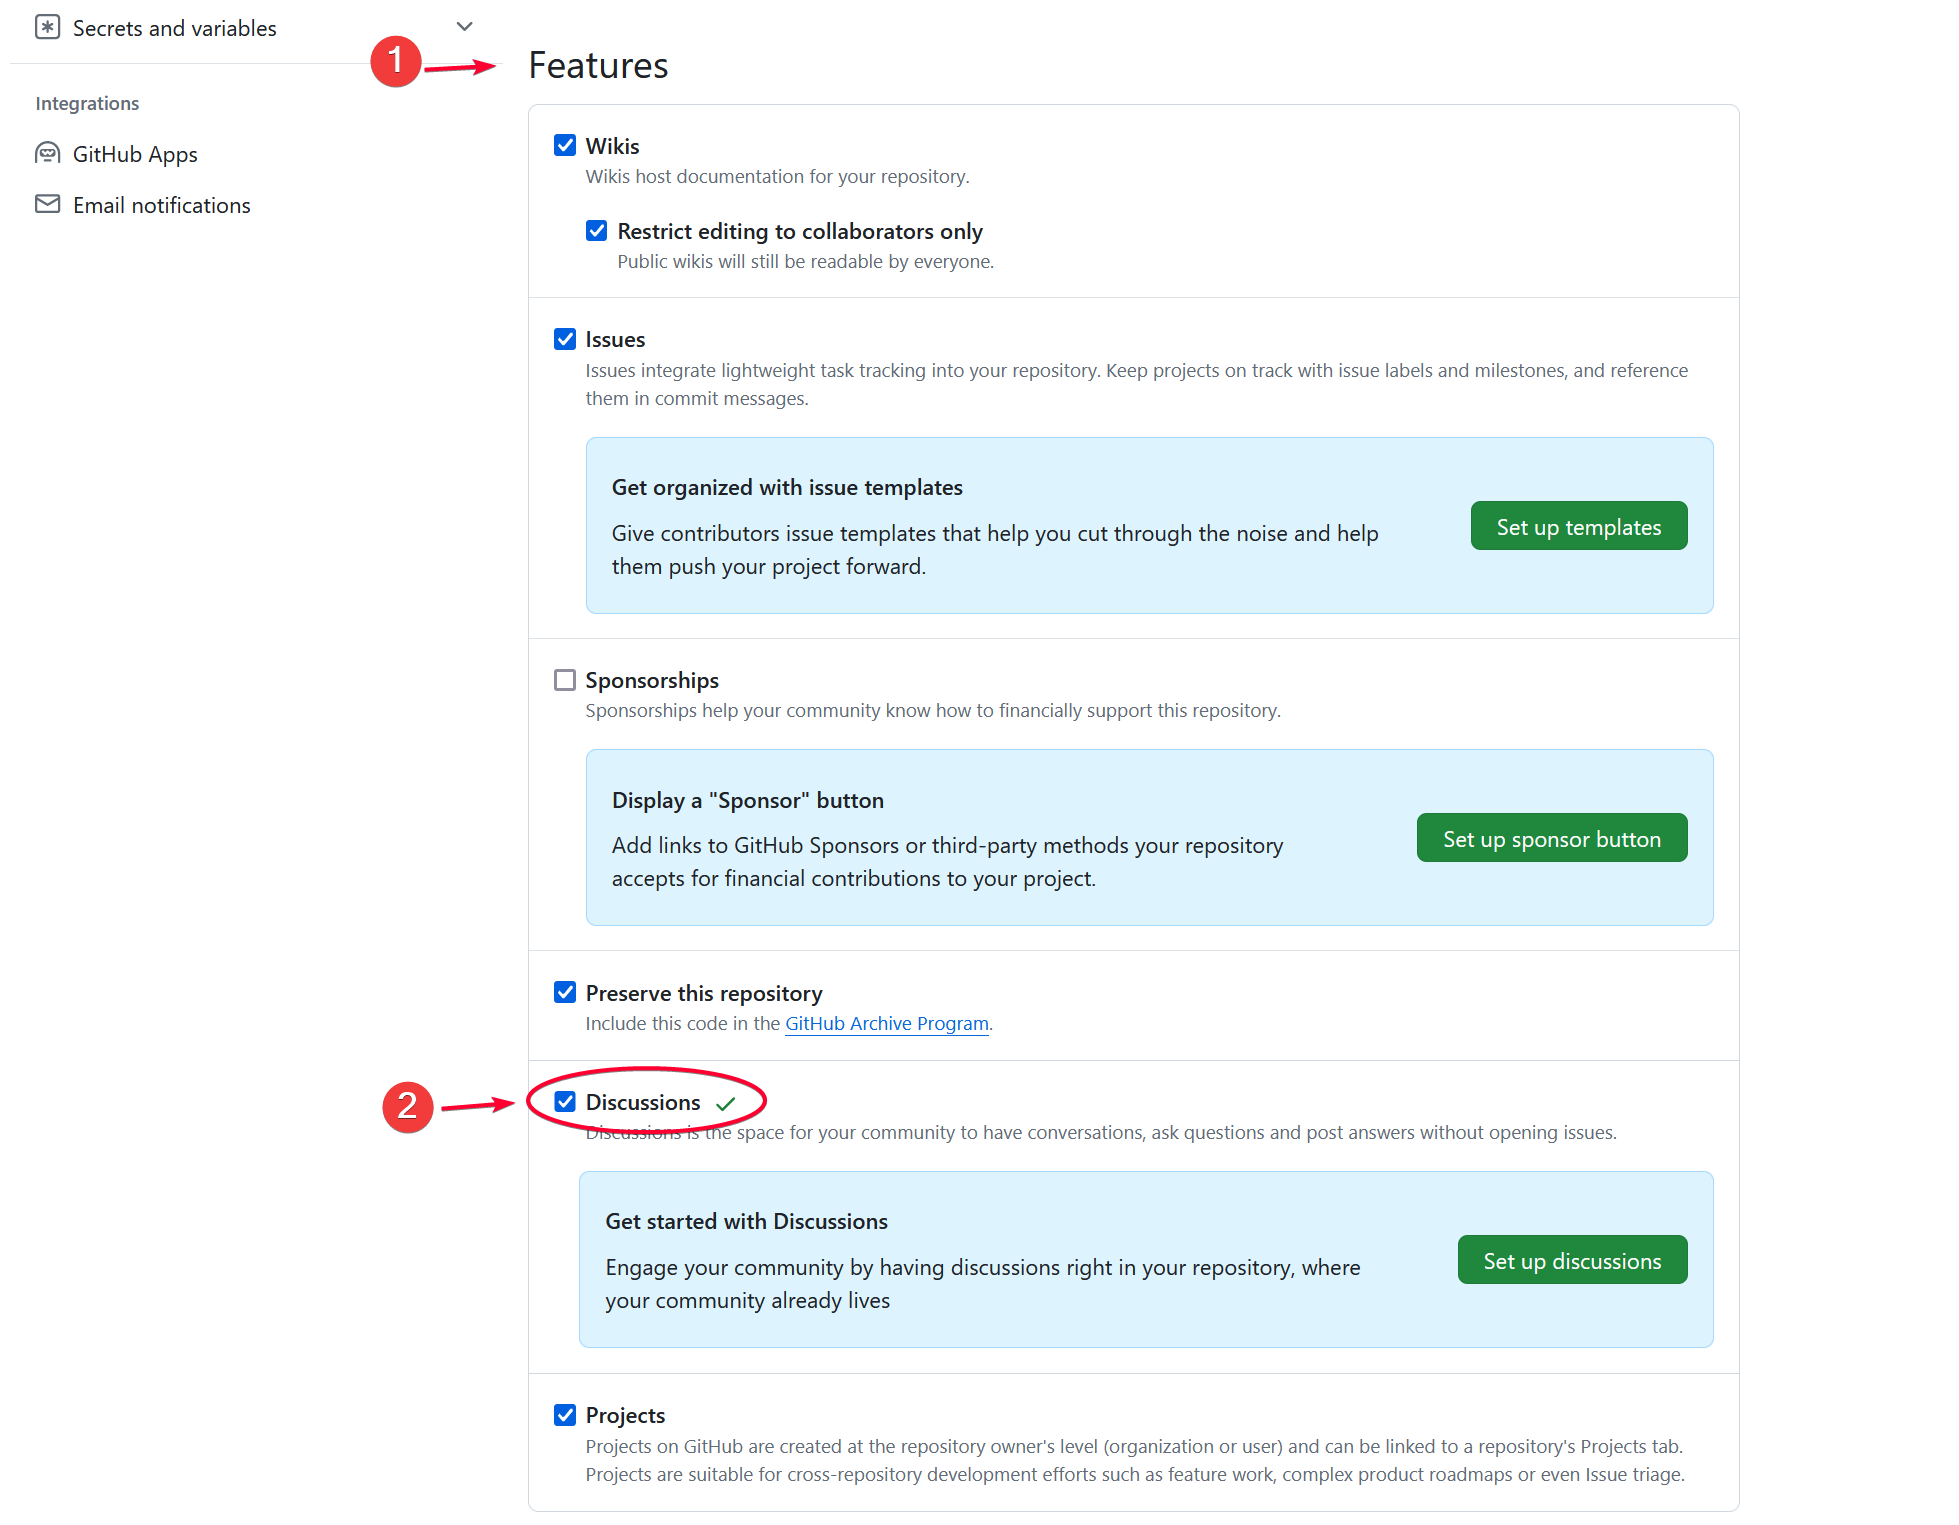
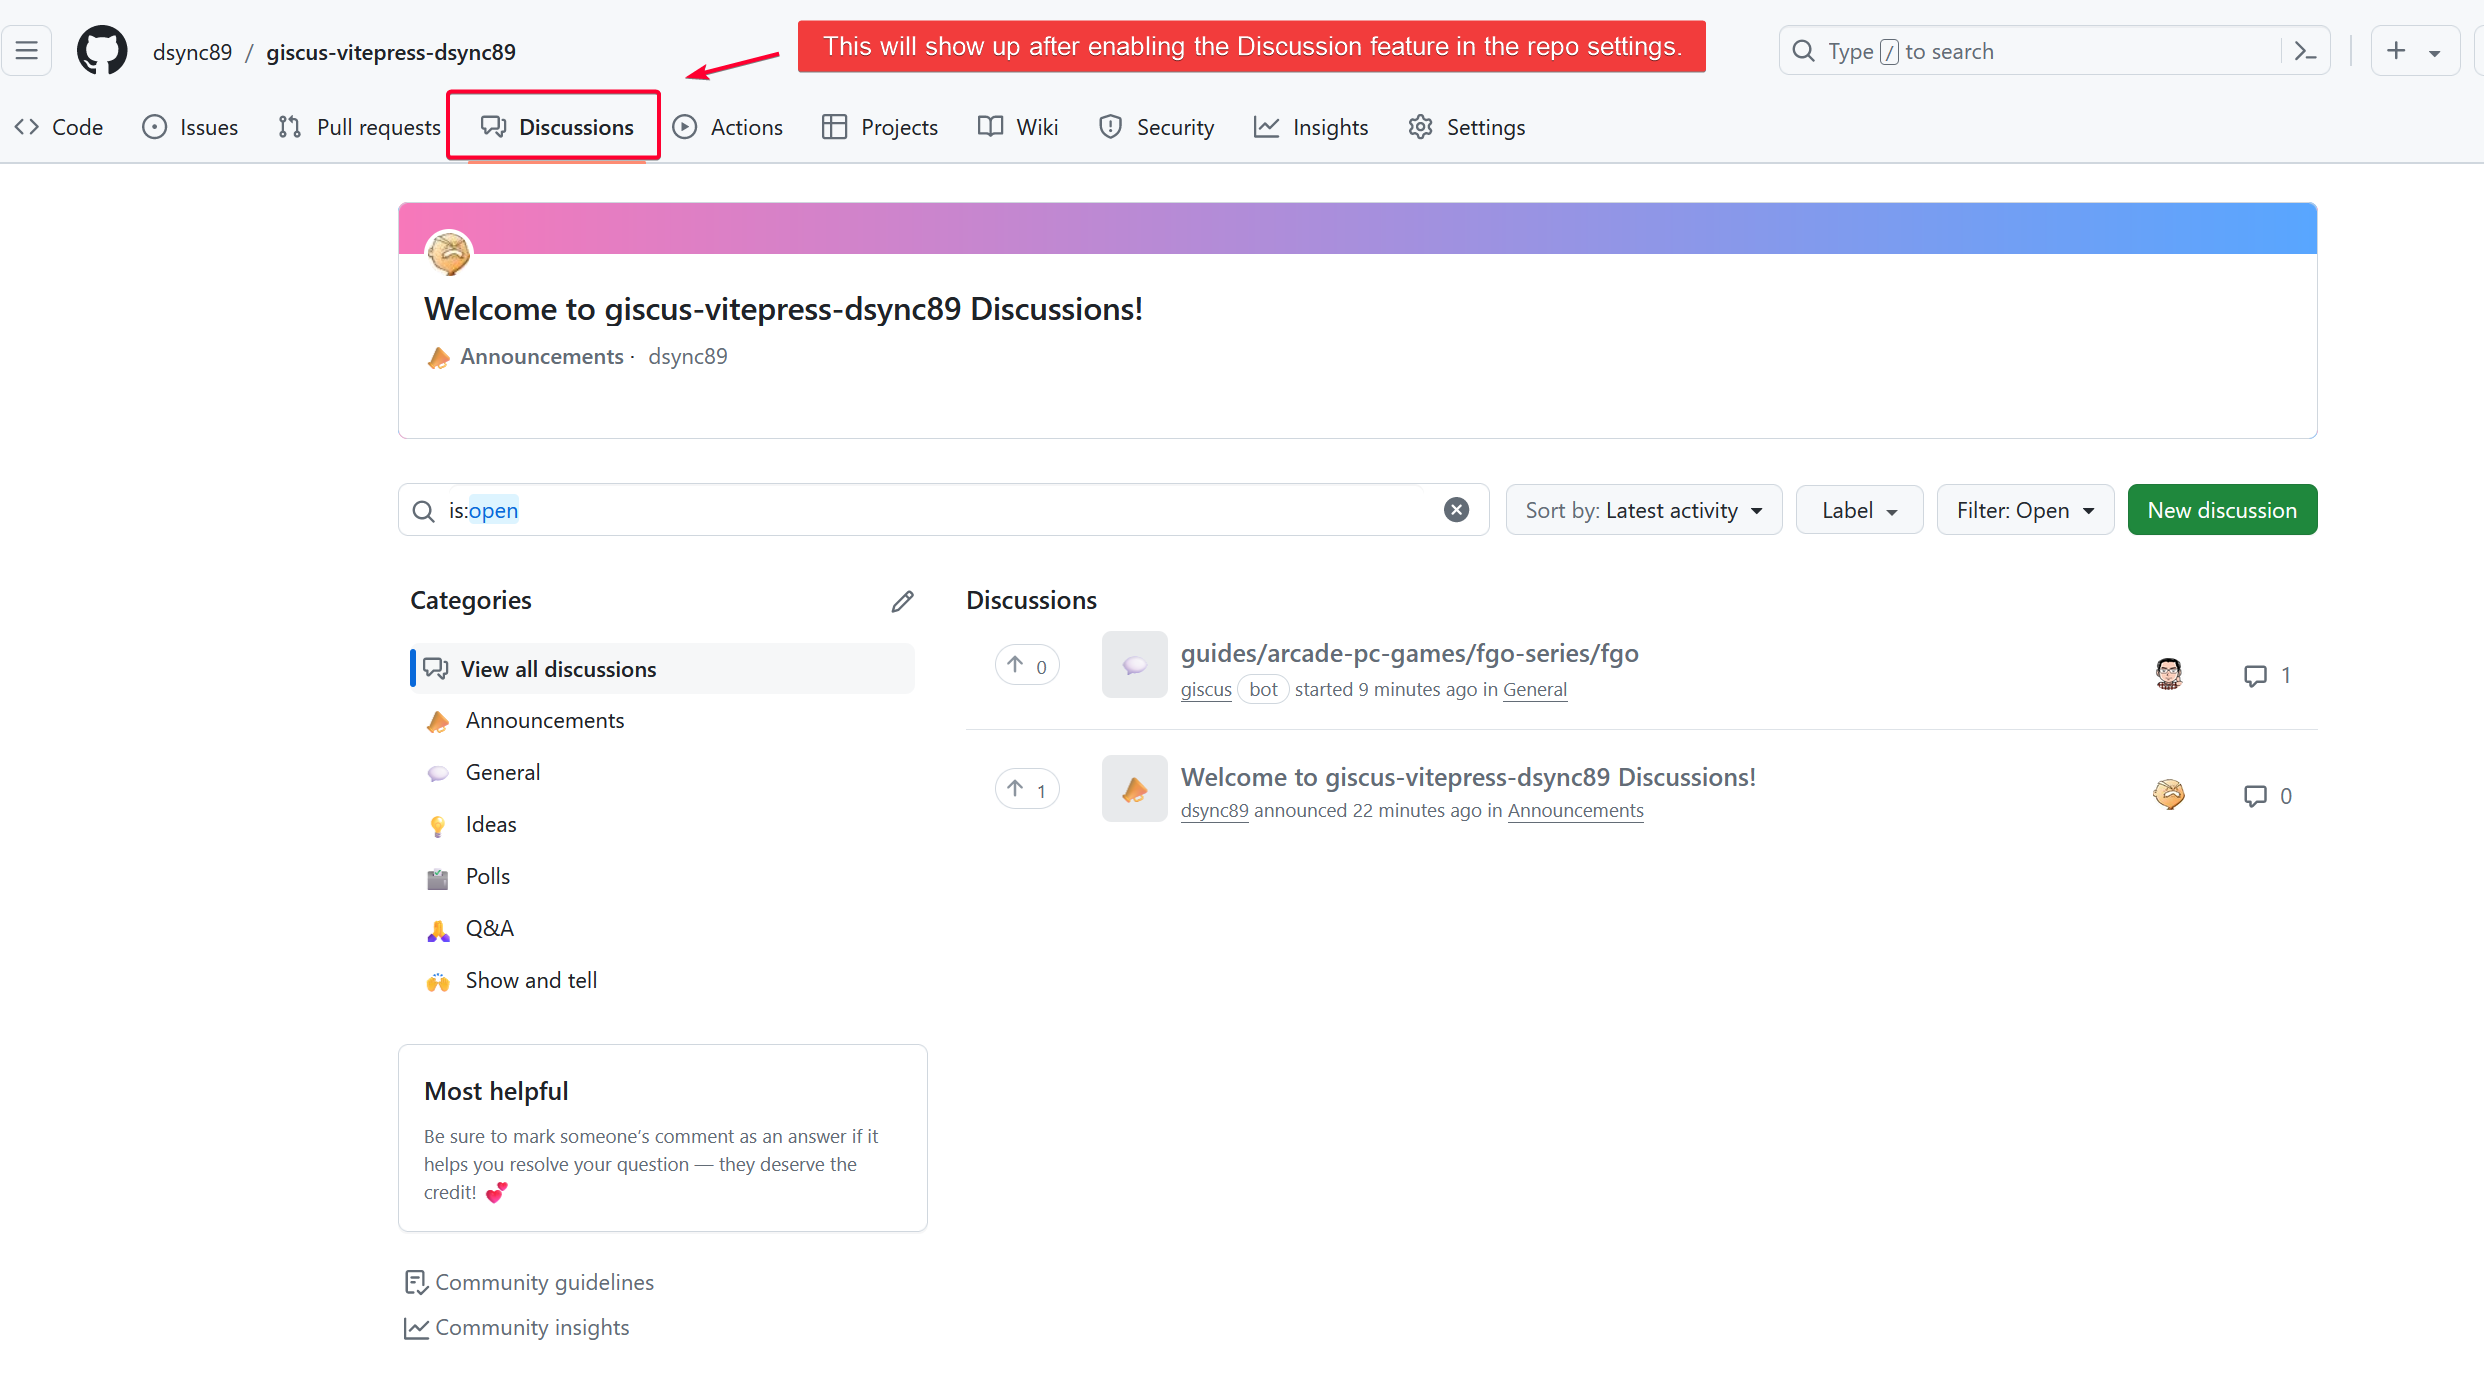
You should see a Discussion page appearing on the repo menu.
Configure Giscus
Next, we will configure Giscus via https://giscus.app/ so that it will output a Giscus configuration settings that we will then copy to the vitepress-plugin-comment config on our theme config file.
Visit https://giscus.app/ and enter the github_username/repo_name to the Repository field. Giscus will check if the requirements are met.
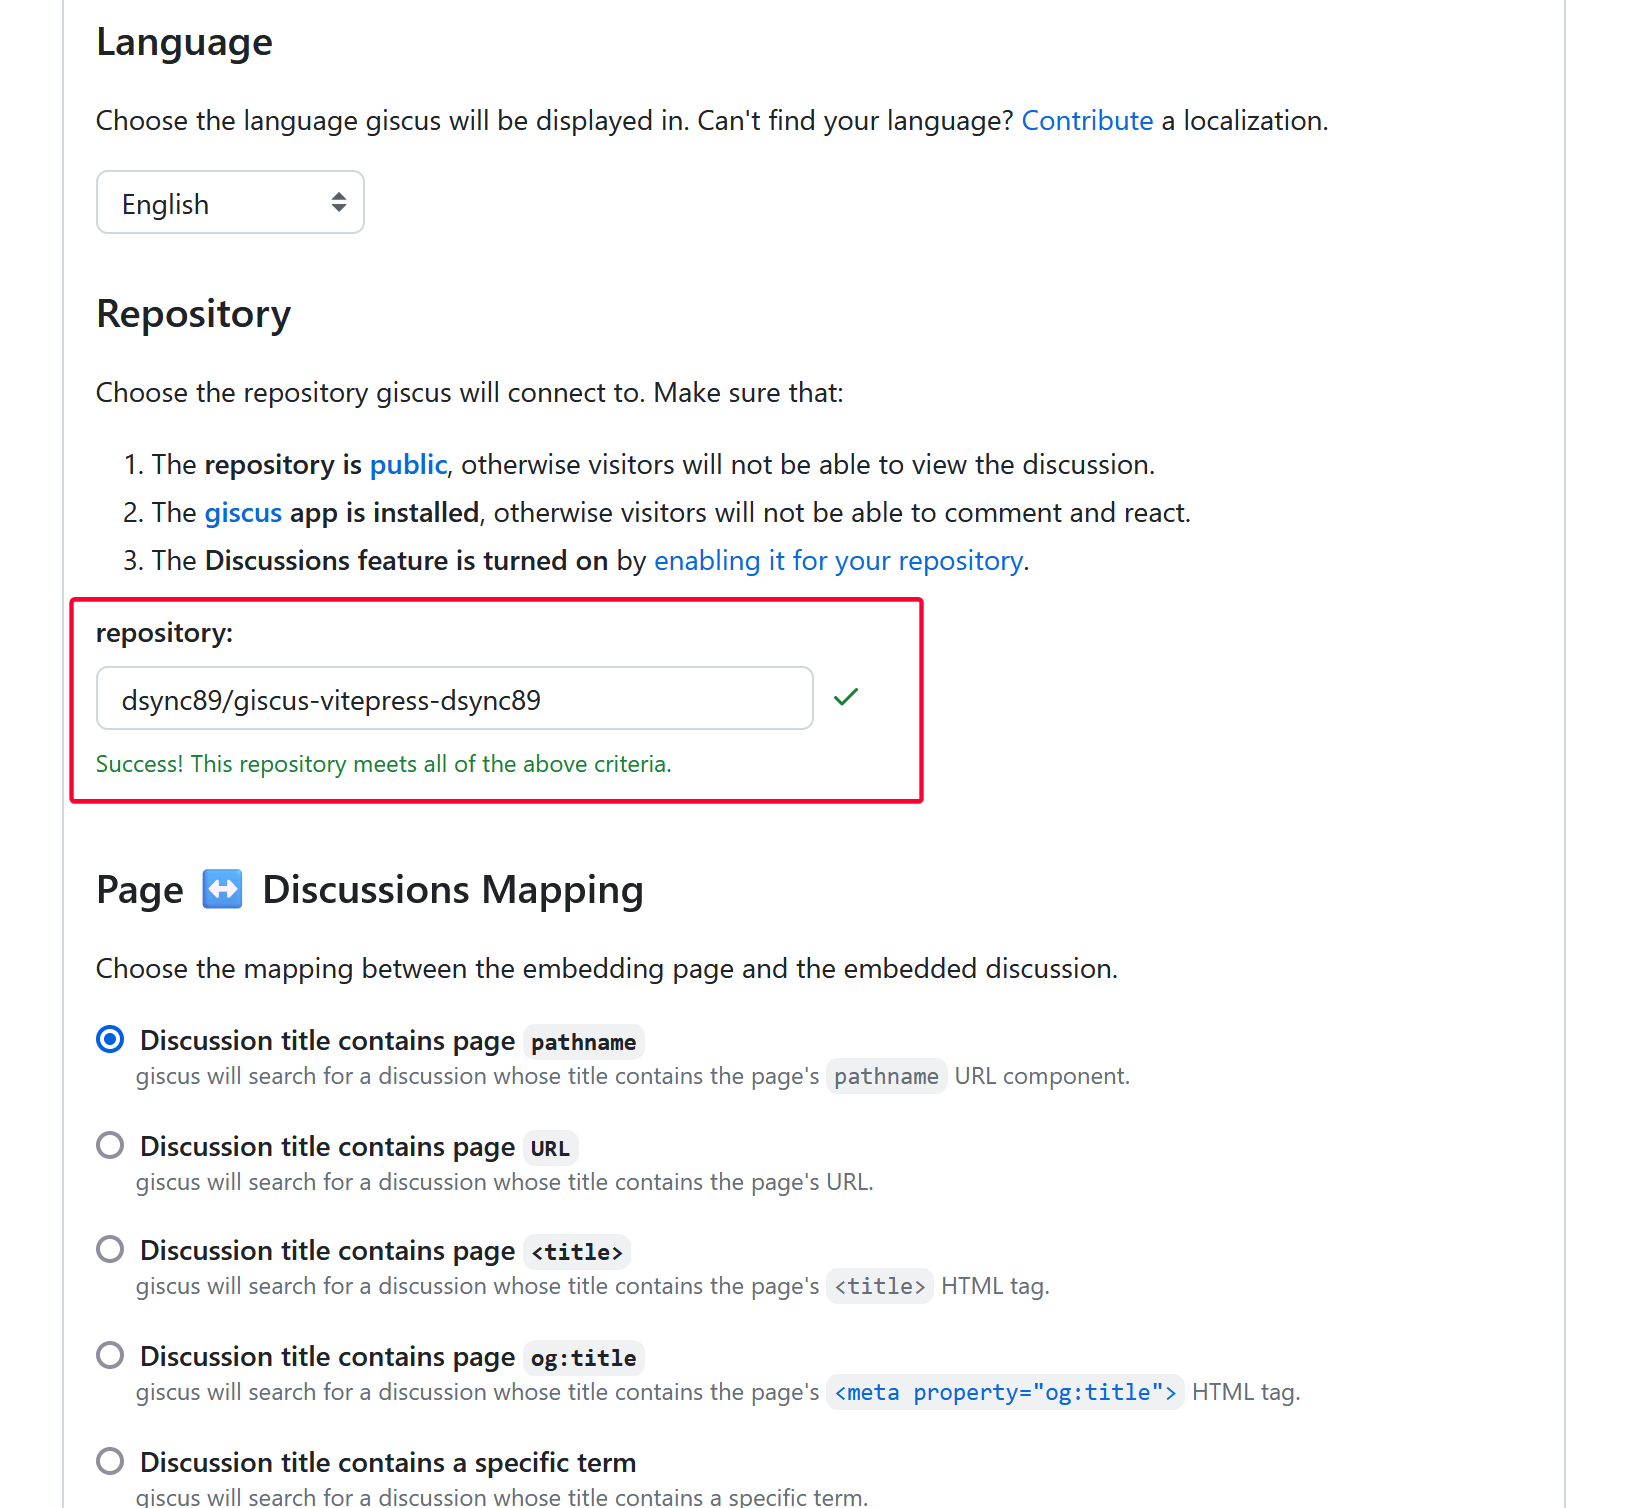
In my case, I set the default location where the comment is posted to General category. The default category is Announcements.

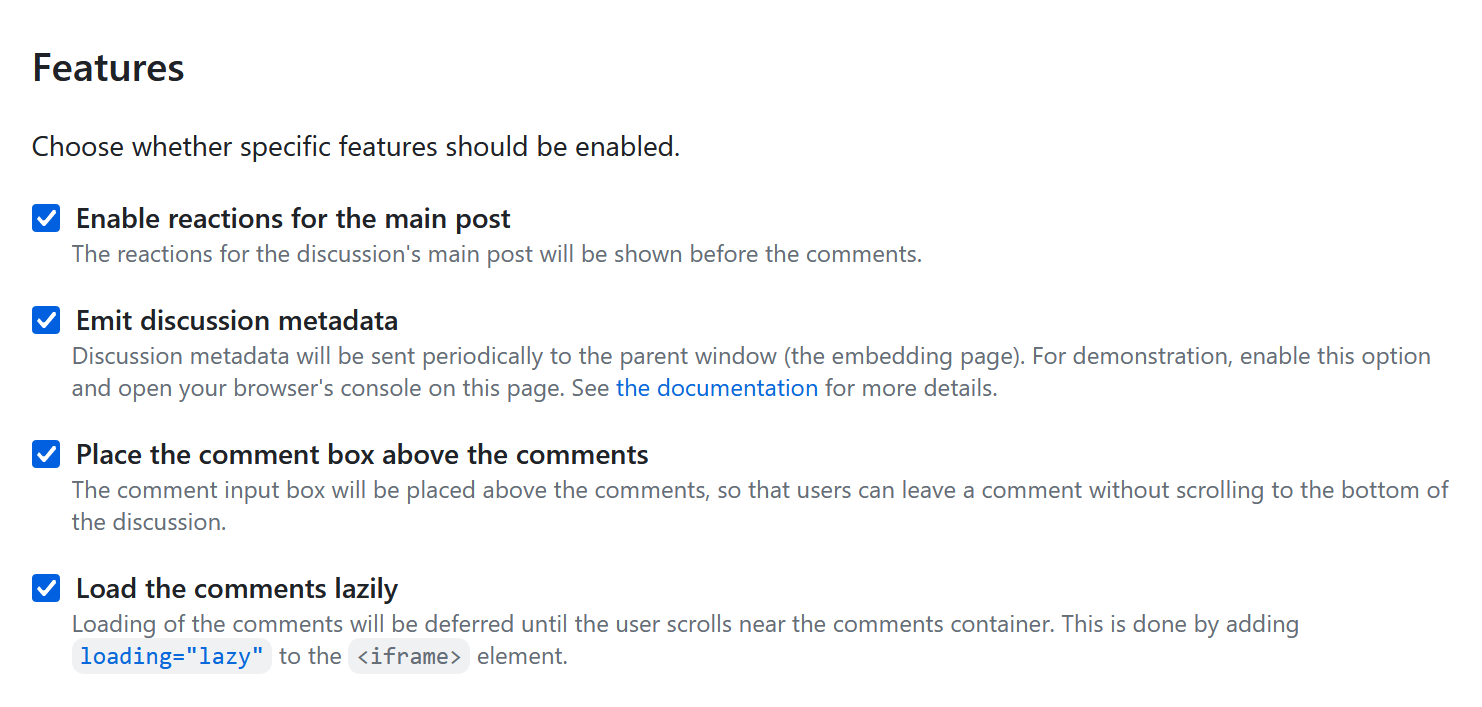
By default these are disabled, so I enabled them all. YMMV.
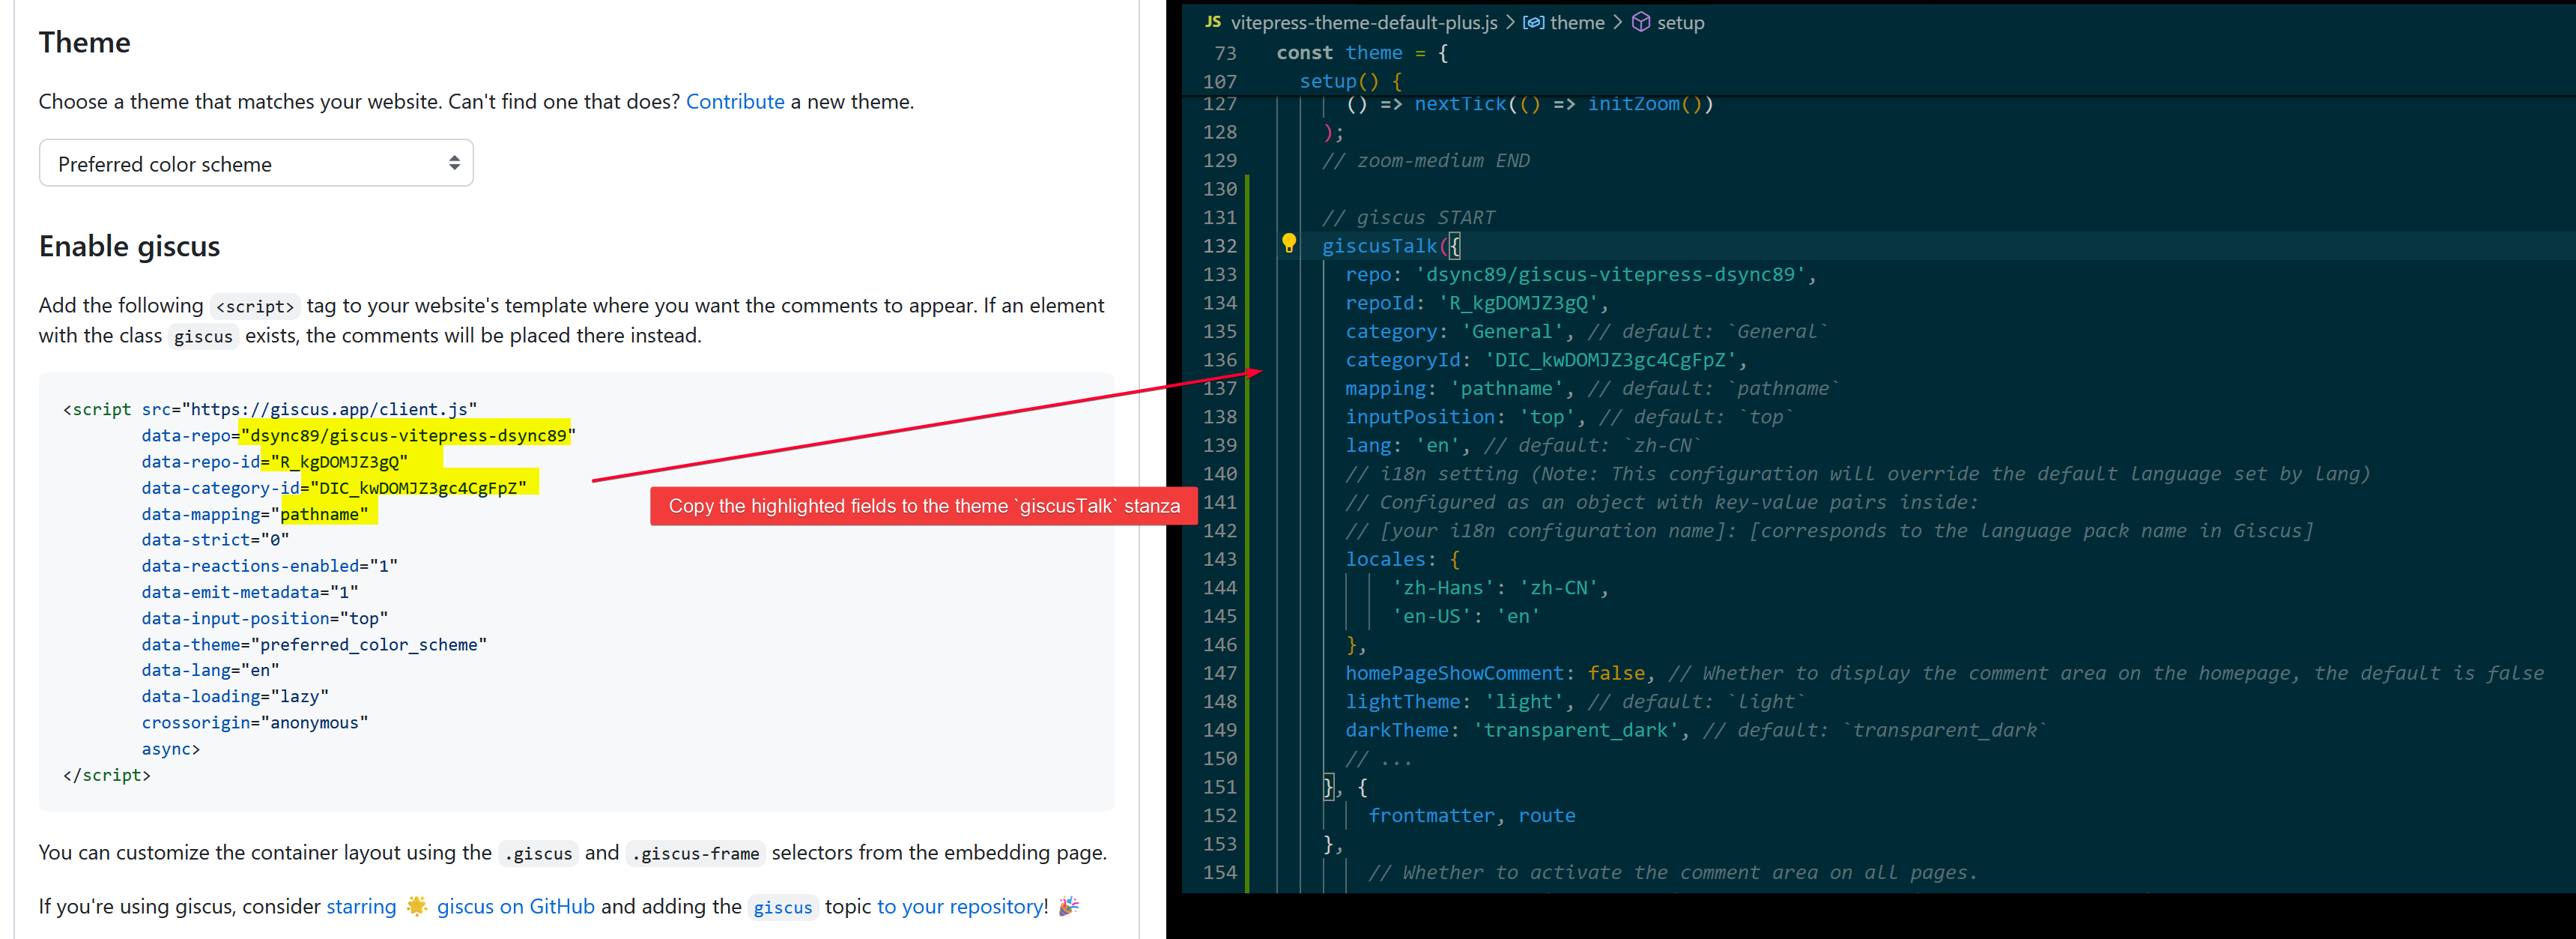
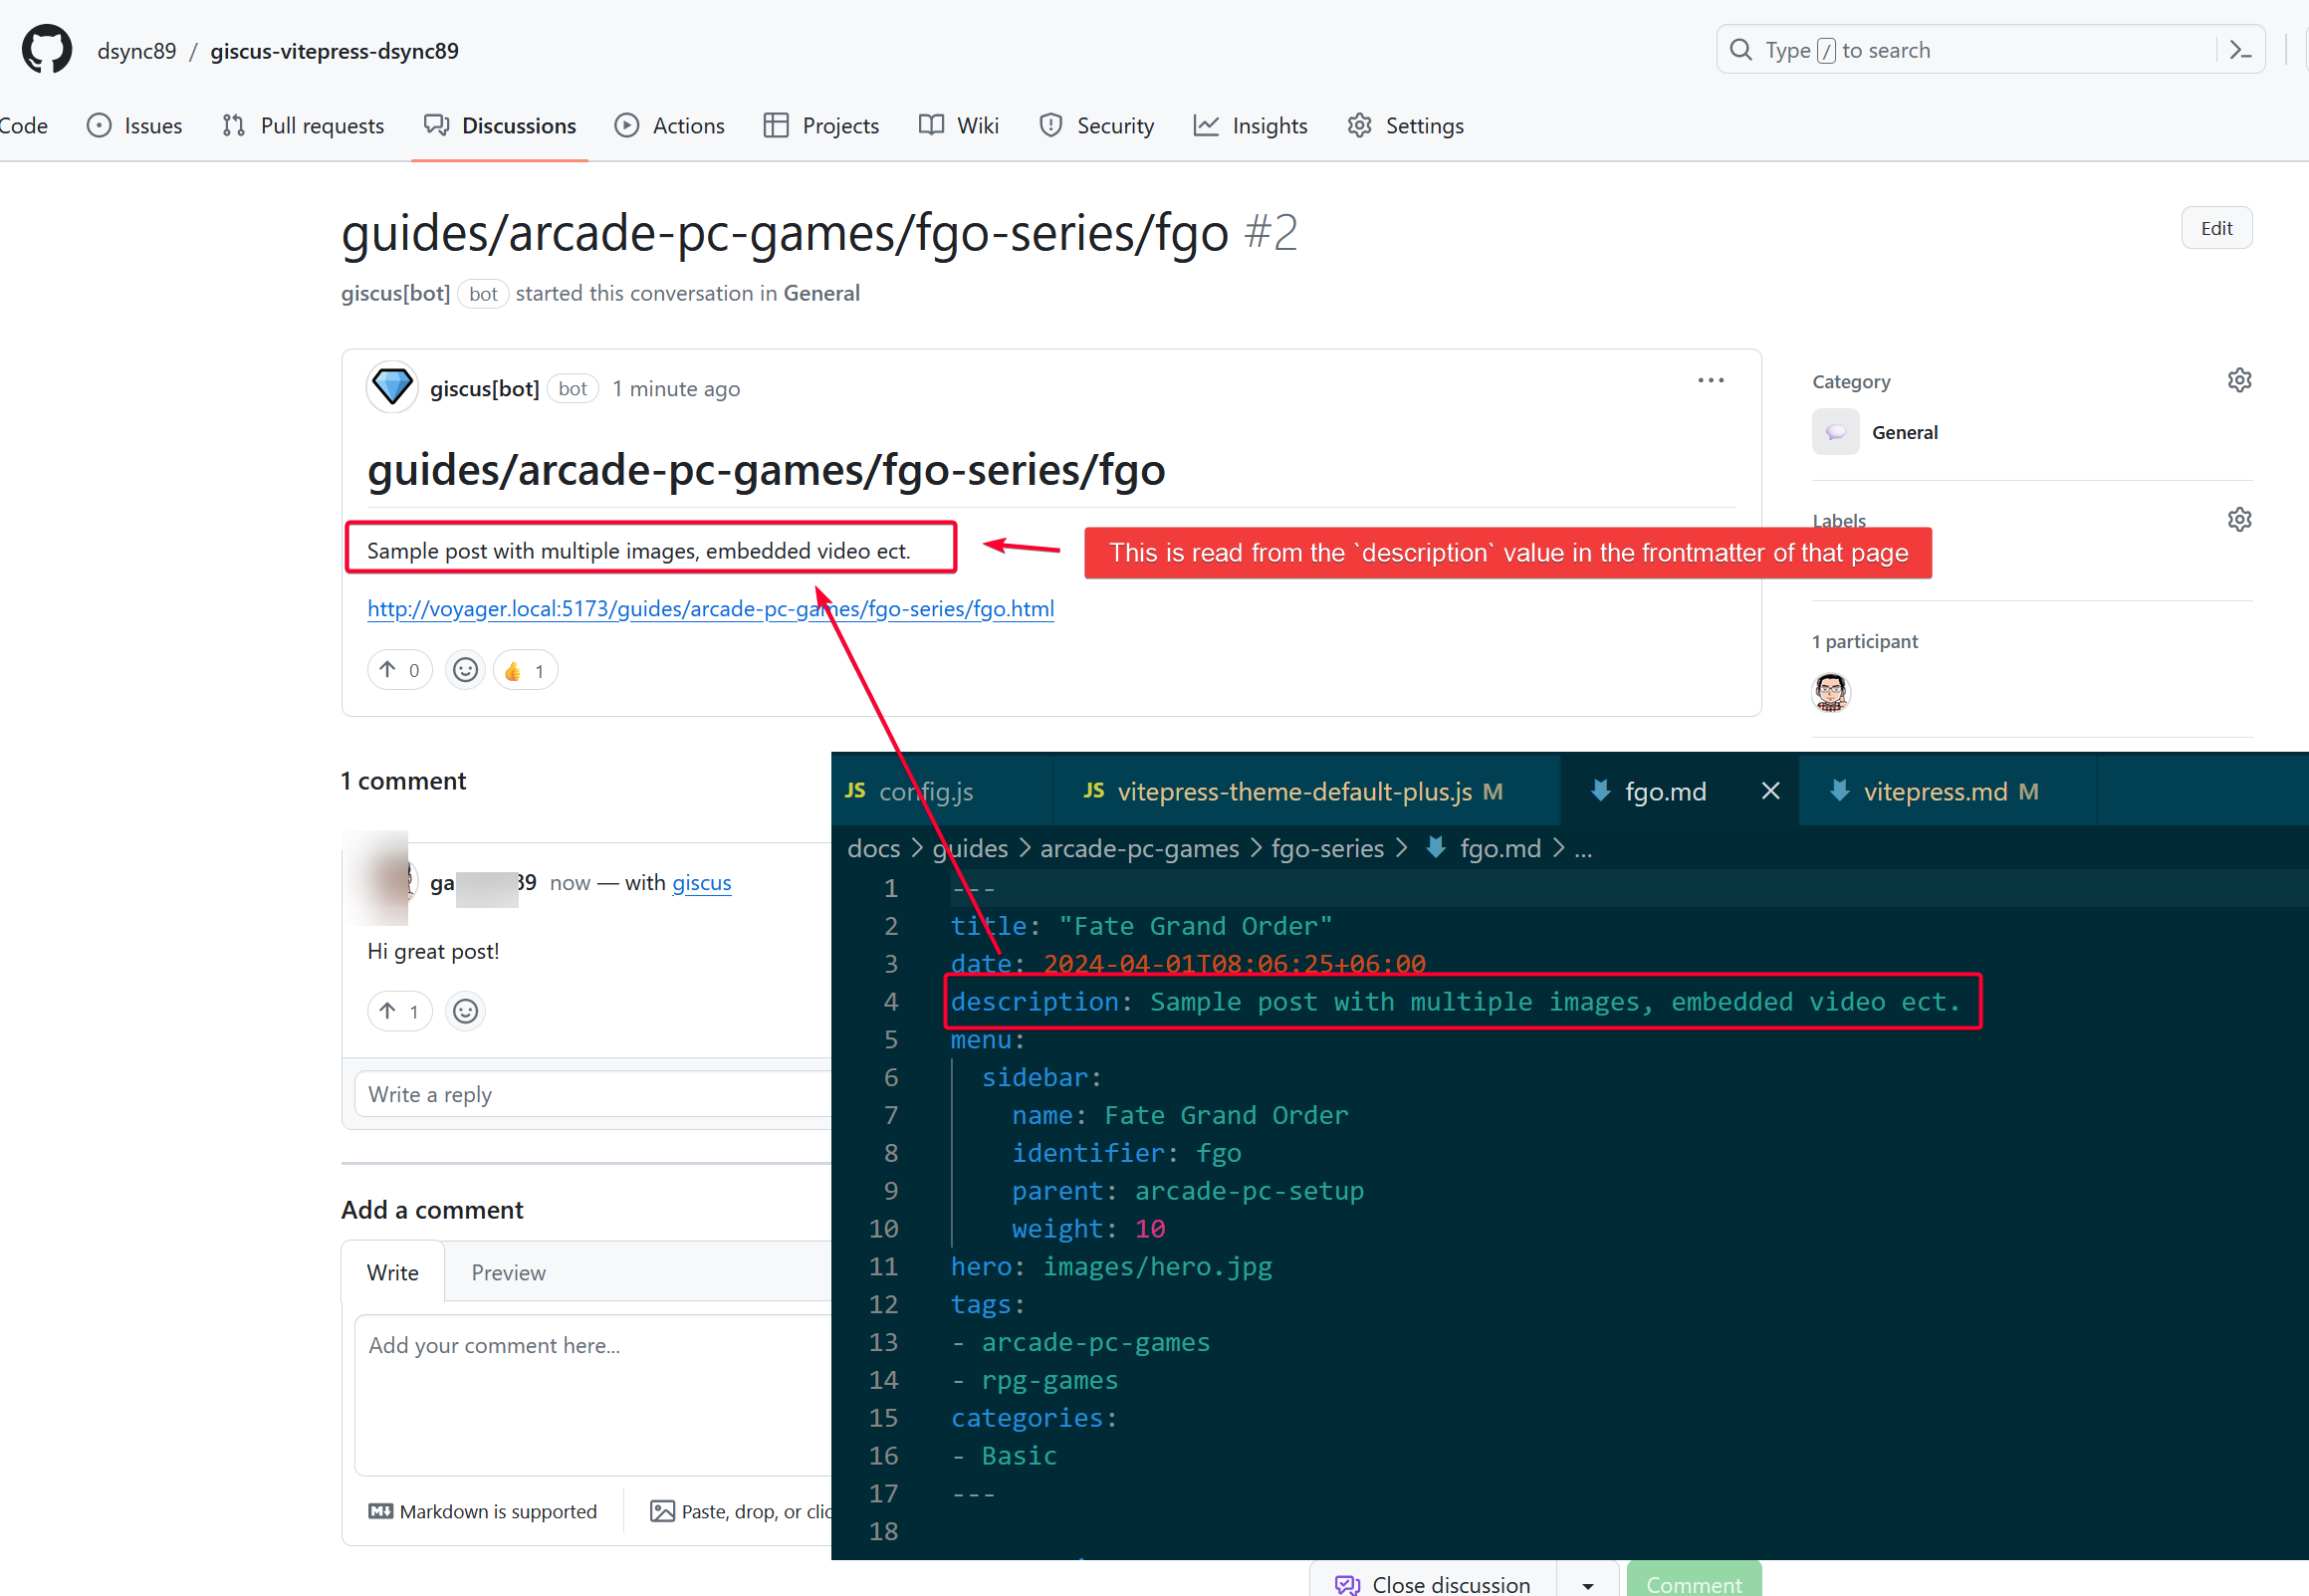
Copy and paste the highlighted values over to the theme file.
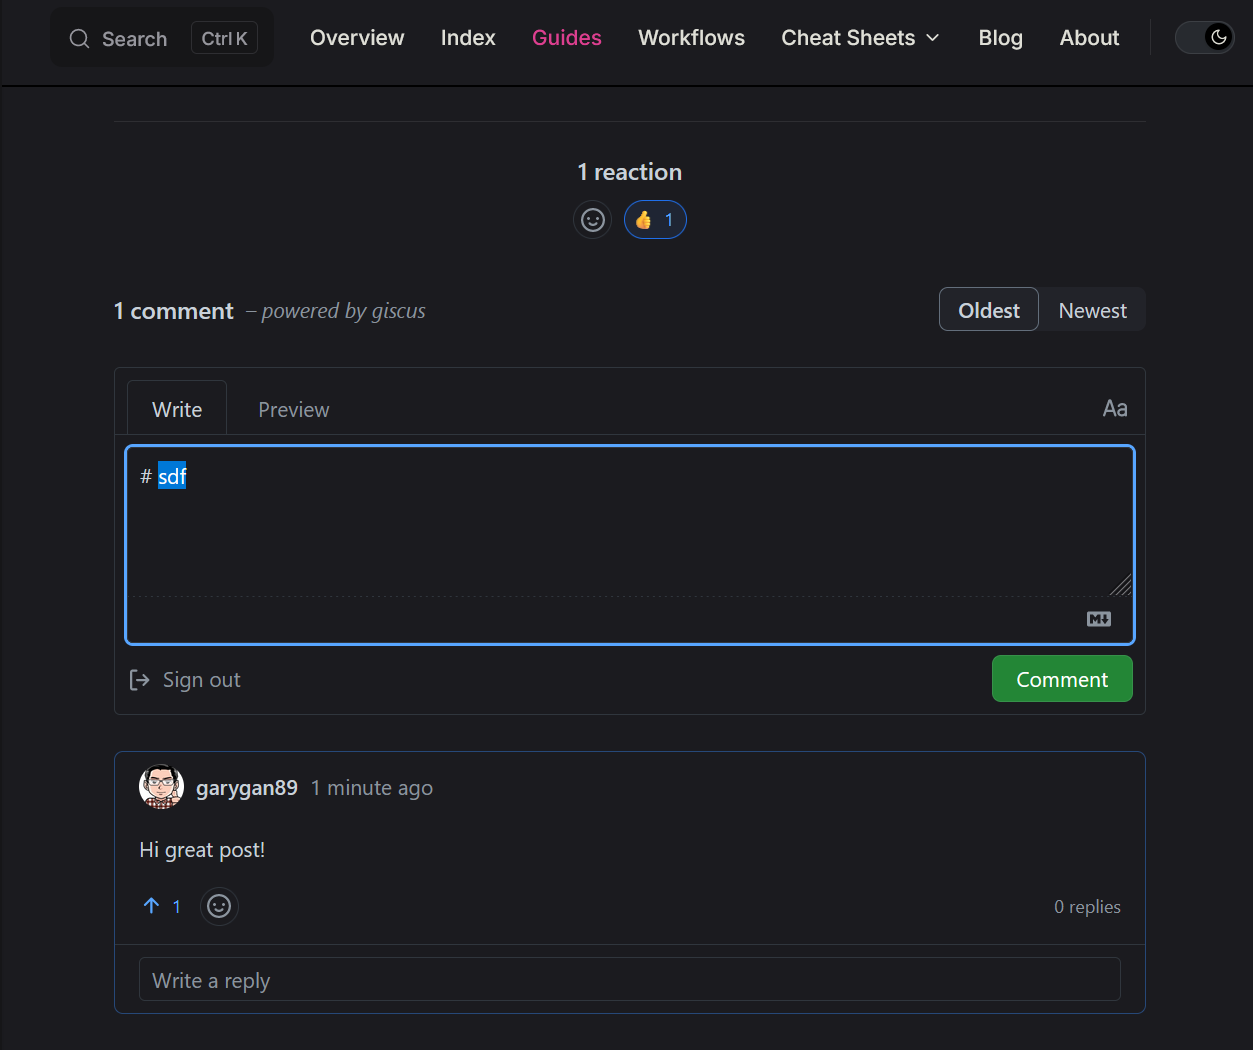
Restart vitepress and you should see the comment box at the bottom of the post.
WARNING
You must restart Vitepress server so that it can load the newly added config to the theme config file
Test
Post a comment on any post.
Check on the Discussion page.
Development IDE
I used Visual Studio Code to develop.
VS Code Extensions
ESLint
Download from https://marketplace.visualstudio.com/items?itemName=dbaeumer.vscode-eslint
Its configuration file is in <PROJECT_ROOT>/.eslintrc.json
I also add the following rule as I prefer having extra spaces before and after the curly braces {}.
{
  "env": {
    "node": true,
    "mocha": true,
    "es6": true
  },
  "parser": "vue-eslint-parser",
  "parserOptions": {
    "parser": "babel-eslint",
    "allowImportExportEverywhere": true,
    "sourceType": "module",
    "ecmaVersion": 9
  },
  "extends": [
    "plugin:vue/recommended",
    "google"
  ],
  "rules": {
    "object-curly-spacing": ["error", "always"],
    "vue/multi-word-component-names": 0,
    "linebreak-style": 0,
    "arrow-parens": ["error",
      "as-needed"
    ],
    "max-len": ["error", {
      "code": 12000,
      "ignoreComments": true
    }],
    "require-jsdoc": ["error", {
      "require": {
        "FunctionDeclaration": false,
        "MethodDefinition": false,
        "ClassDeclaration": false,
        "ArrowFunctionExpression": false,
        "FunctionExpression": false
      }
    }]
  }
}
By setting that, it will show error if there is a missing space between the {}.

Press CTRL+SHIFT+P then search for eslint: fix, then select ESLint: Fix all auto-fixable Problems in the result.
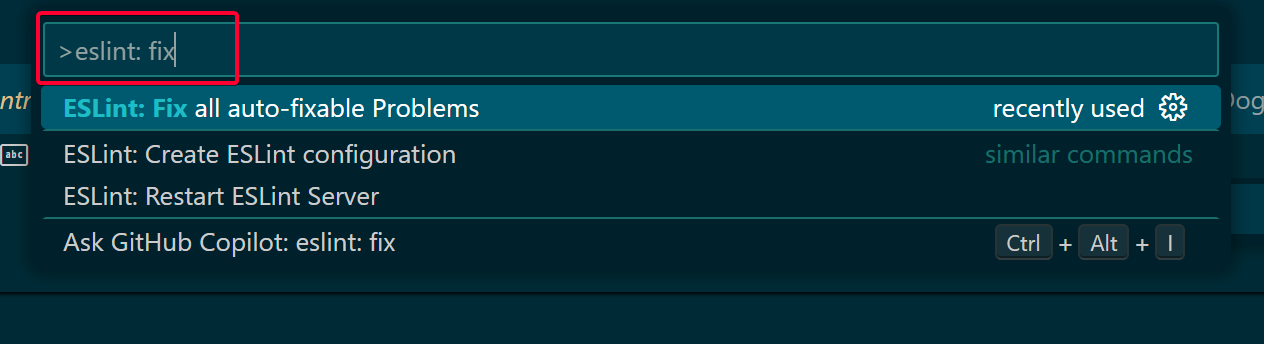
After the fix:

Add Custom Collection
You can use collection to group things together.
VitePress Theme Default + already comes with two built-in collections guide, and post, see https://vitepress-theme-default-plus.lando.dev/config/config.html#collections for more info
Example of me adding two new collections: workflow and cheatsheet.
  themeConfig: {
    autometa: {
      canonicalUrl: 'https://vitepress-theme-default-plus.lando.dev/',
      image: 'https://vitepress-theme-default-plus.lando.dev/images/hero.png',
      x: '@devwithlando',
    },
    carbonAds: {
      code: 'CE7DCKJU',
      placement: 'landodev',
    },
    containers: {
      special: {},
    },
    collections: {
      post: {
        frontmatter: {
          collection: 'post',
          contributors: false,
          backLink: {
            text: '<- Back to blog',
            link: '/blog',
          },
          aside: false,
          sidebar: false,
          prev: false,
          next: false,
          editLink: false,
        },
        icon: '<svg xmlns="http://www.w3.org/2000/svg" fill="none" viewBox="0 0 24 24" stroke-width="1.5" stroke="currentColor" class="w-6 h-6"><path stroke-linecap="round" stroke-linejoin="round" d="M7.5 8.25h9m-9 3H12m-9.75 1.51c0 1.6 1.123 2.994 2.707 3.227 1.129.166 2.27.293 3.423.379.35.026.67.21.865.501L12 21l2.755-4.133a1.14 1.14 0 0 1 .865-.501 48.172 48.172 0 0 0 3.423-.379c1.584-.233 2.707-1.626 2.707-3.228V6.741c0-1.602-1.123-2.995-2.707-3.228A48.394 48.394 0 0 0 12 3c-2.392 0-4.744.175-7.043.513C3.373 3.746 2.25 5.14 2.25 6.741v6.018Z"/></svg>',
        iconLink: '/blog',
        patterns: ['blog/**/*.md'],
      },
      guide: {
        frontmatter: {
          collection: 'guide',
        },
        icon: '<svg xmlns="http://www.w3.org/2000/svg" fill="none" viewBox="0 0 24 24" stroke-width="1.5" stroke="currentColor" class="w-6 h-6"><path stroke-linecap="round" stroke-linejoin="round" d="M4.26 10.147a60.438 60.438 0 0 0-.491 6.347A48.62 48.62 0 0 1 12 20.904a48.62 48.62 0 0 1 8.232-4.41 60.46 60.46 0 0 0-.491-6.347m-15.482 0a50.636 50.636 0 0 0-2.658-.813A59.906 59.906 0 0 1 12 3.493a59.903 59.903 0 0 1 10.399 5.84c-.896.248-1.783.52-2.658.814m-15.482 0A50.717 50.717 0 0 1 12 13.489a50.702 50.702 0 0 1 7.74-3.342M6.75 15a.75.75 0 1 0 0-1.5.75.75 0 0 0 0 1.5Zm0 0v-3.675A55.378 55.378 0 0 1 12 8.443m-7.007 11.55A5.981 5.981 0 0 0 6.75 15.75v-1.5" /></svg>',
        iconLink: '/guides',
        patterns: ['guides/**/*.md'],
      },
      workflow: {
        frontmatter: {
          collection: 'workflow',
          sidebar: true,
        },
        icon: '<svg xmlns="http://www.w3.org/2000/svg" fill="none" viewBox="0 0 24 24" stroke-width="1.5" stroke="currentColor" class="w-6 h-6"><path stroke-linecap="round" stroke-linejoin="round" d="M4.26 10.147a60.438 60.438 0 0 0-.491 6.347A48.62 48.62 0 0 1 12 20.904a48.62 48.62 0 0 1 8.232-4.41 60.46 60.46 0 0 0-.491-6.347m-15.482 0a50.636 50.636 0 0 0-2.658-.813A59.906 59.906 0 0 1 12 3.493a59.903 59.903 0 0 1 10.399 5.84c-.896.248-1.783.52-2.658.814m-15.482 0A50.717 50.717 0 0 1 12 13.489a50.702 50.702 0 0 1 7.74-3.342M6.75 15a.75.75 0 1 0 0-1.5.75.75 0 0 0 0 1.5Zm0 0v-3.675A55.378 55.378 0 0 1 12 8.443m-7.007 11.55A5.981 5.981 0 0 0 6.75 15.75v-1.5" /></svg>',
        iconLink: '/workflows',
        patterns: ['workflows/**/*.md'],
      },
      cheatsheet: {
        frontmatter: {
          collection: 'cheatsheet',
          sidebar: false,
        },
        icon: '<svg xmlns="http://www.w3.org/2000/svg" fill="none" viewBox="0 0 24 24" stroke-width="1.5" stroke="currentColor" class="w-6 h-6"><path stroke-linecap="round" stroke-linejoin="round" d="M4.26 10.147a60.438 60.438 0 0 0-.491 6.347A48.62 48.62 0 0 1 12 20.904a48.62 48.62 0 0 1 8.232-4.41 60.46 60.46 0 0 0-.491-6.347m-15.482 0a50.636 50.636 0 0 0-2.658-.813A59.906 59.906 0 0 1 12 3.493a59.903 59.903 0 0 1 10.399 5.84c-.896.248-1.783.52-2.658.814m-15.482 0A50.717 50.717 0 0 1 12 13.489a50.702 50.702 0 0 1 7.74-3.342M6.75 15a.75.75 0 1 0 0-1.5.75.75 0 0 0 0 1.5Zm0 0v-3.675A55.378 55.378 0 0 1 12 8.443m-7.007 11.55A5.981 5.981 0 0 0 6.75 15.75v-1.5" /></svg>',
        iconLink: '/cheatsheets',
        patterns: ['cheatsheets/**/*.md'],
      },
    },
TIP
All properties within the frontmatter block will be automatically added to the pages that matches the patterns.
You can then create an index page for these collection.
---
description: My personal workflow to get things done.
layout: page
title: Workflow
sidebar: false
---
<VPLCollectionPage>
  <VPLCollectionPageTitle>
    <template #title>
      WORKFLOW
    </template>
    <template #lead>
      My personal workflow to get things done.
    </template>
  </VPLCollectionPageTitle>
  <VPLCollectionPageTags v-model="tags" />
  <VPLCollectionItems :items="pages" :tags="tags"/>
</VPLCollectionPage>

<script setup>
import {useCollection} from '@lando/vitepress-theme-default-plus';
import {VPLCollectionPage, VPLCollectionPageTags, VPLCollectionPageTitle, VPLCollectionItems} from '@lando/vitepress-theme-default-plus'

const {pages, tags} = useCollection('workflow');
</script>
Result
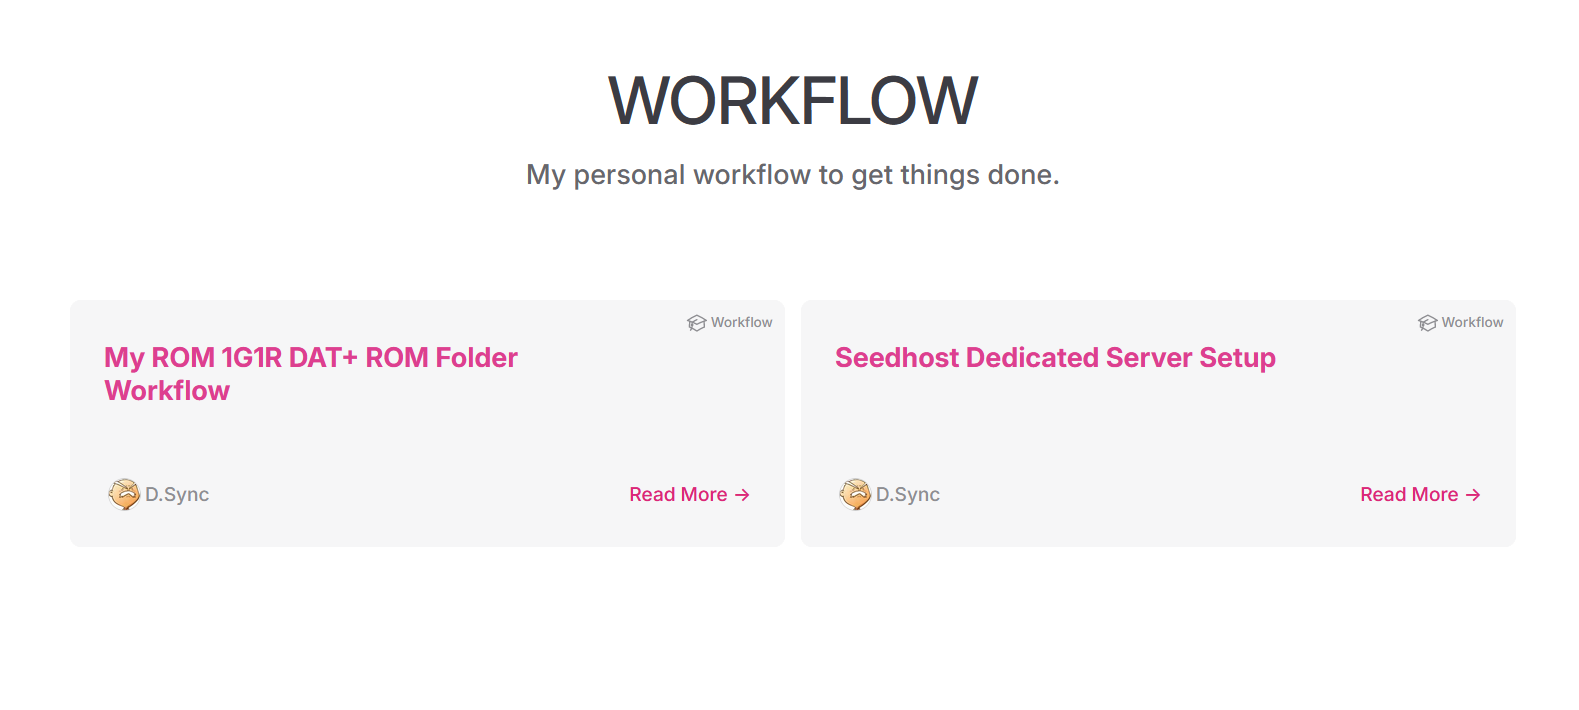
Add CMS
You may choose any supported Content Management Service (CMS) to manage your Vitepress content instead of an IDE like VSCode, especially if you are on the go and do not have access to your development machine.
I'm considering Webiny but have no clue how to integrate with VitePress. While VitePress has a page that explain how to integrate with CMS here, the steps provided are very generic.
Local CMS
BUG
There is currently a mysterious bug where the page will automatically scroll up if you are not at the top or bottom of the page. This bug make this CMS unusable!
You can install a local CMS instead of a paid one to manage VitePress content. This is undoubtedly the quickest and no-brainer to setup. However the editor is very limited in what it offers and you may only consider this if you only care about text editing.
@ref: https://huyikai.github.io/local-cms/Guide/1.Introduction/Started.html
Limitations
DO NOT SUPPORT
- User account or login
- Inserting image to any markdown document
- Image does not showing in preview
To install, simply run the following command in your Vitepress root folder.
npx @huyikai/local-cms init$ npx @huyikai/local-cms init
Need to install the following packages:
@huyikai/[email protected]
Ok to proceed? (y) y
? Please select the action you want to perform:(请选择您要执行的操作:) 1.Add 'Local-CMS' to the current directory to manage the content.(在当前目录添加 'Local-CMS' 来管理内容)
? Set up a directory to store content.
设置一个用来存放内容的目录 docs
✔ install Complete!!!
Now you can execute npm run cms to run cms management content.
现在你可以执行 npm run cms 来运行 cms 来管理内容了。Screenshots
Home page 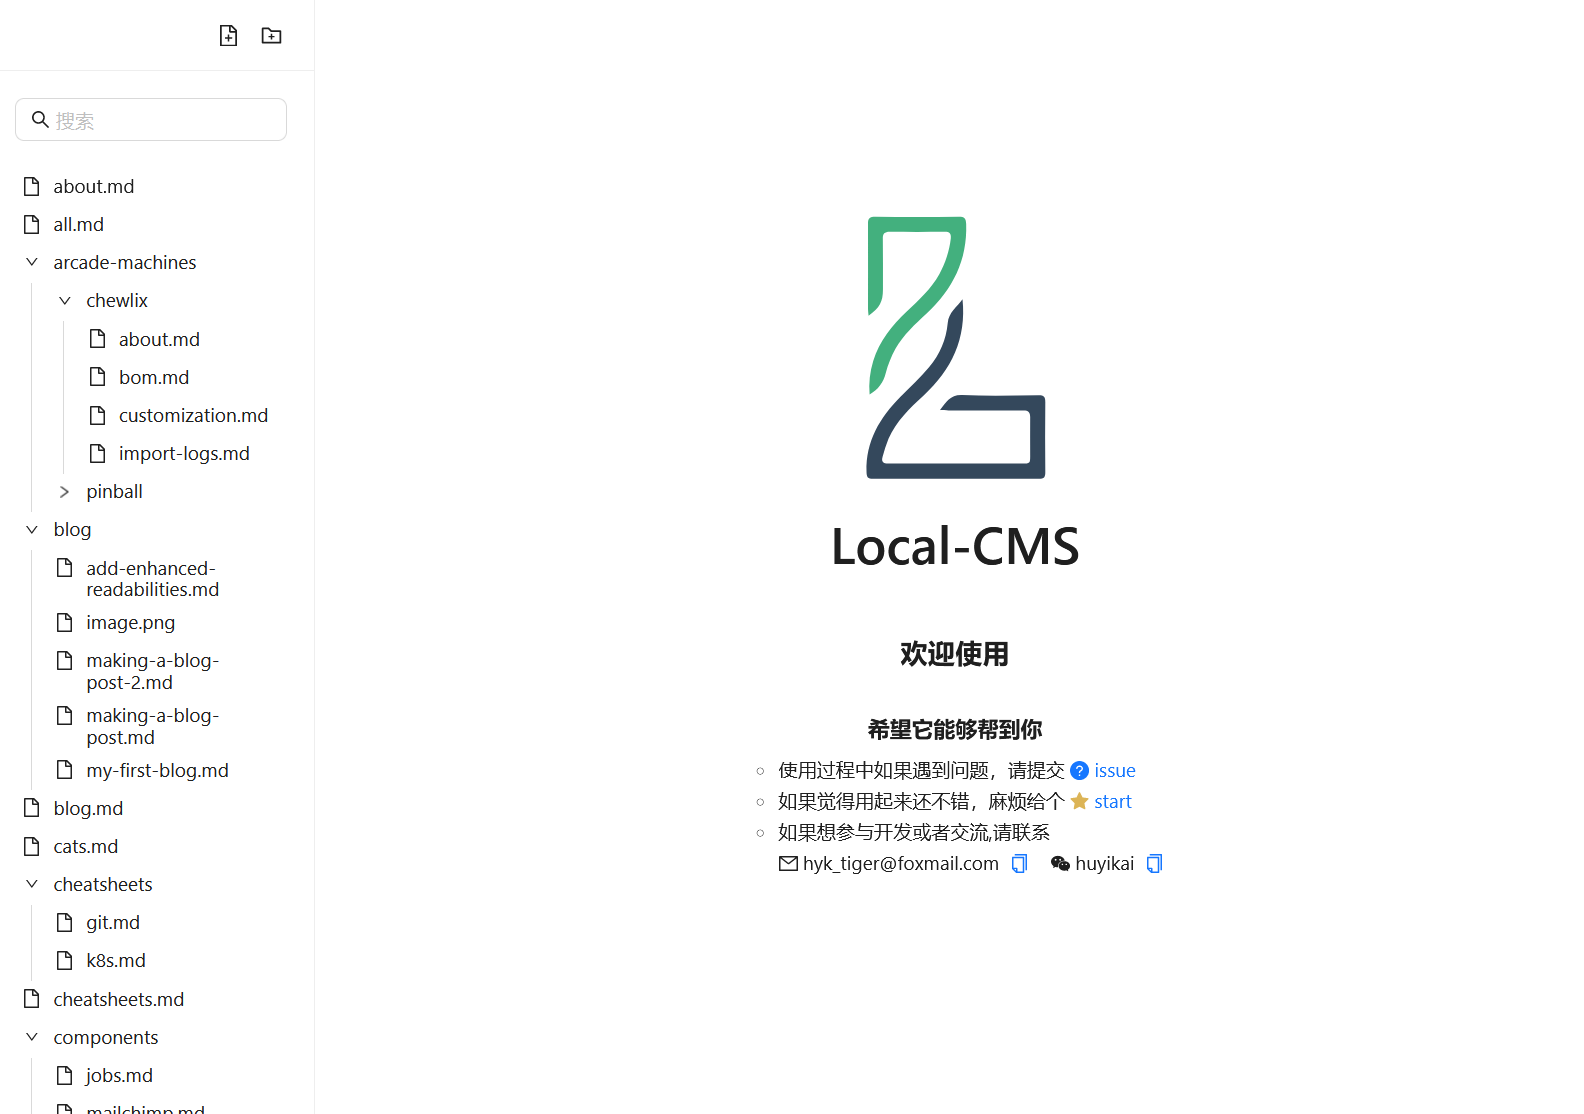
Editor page 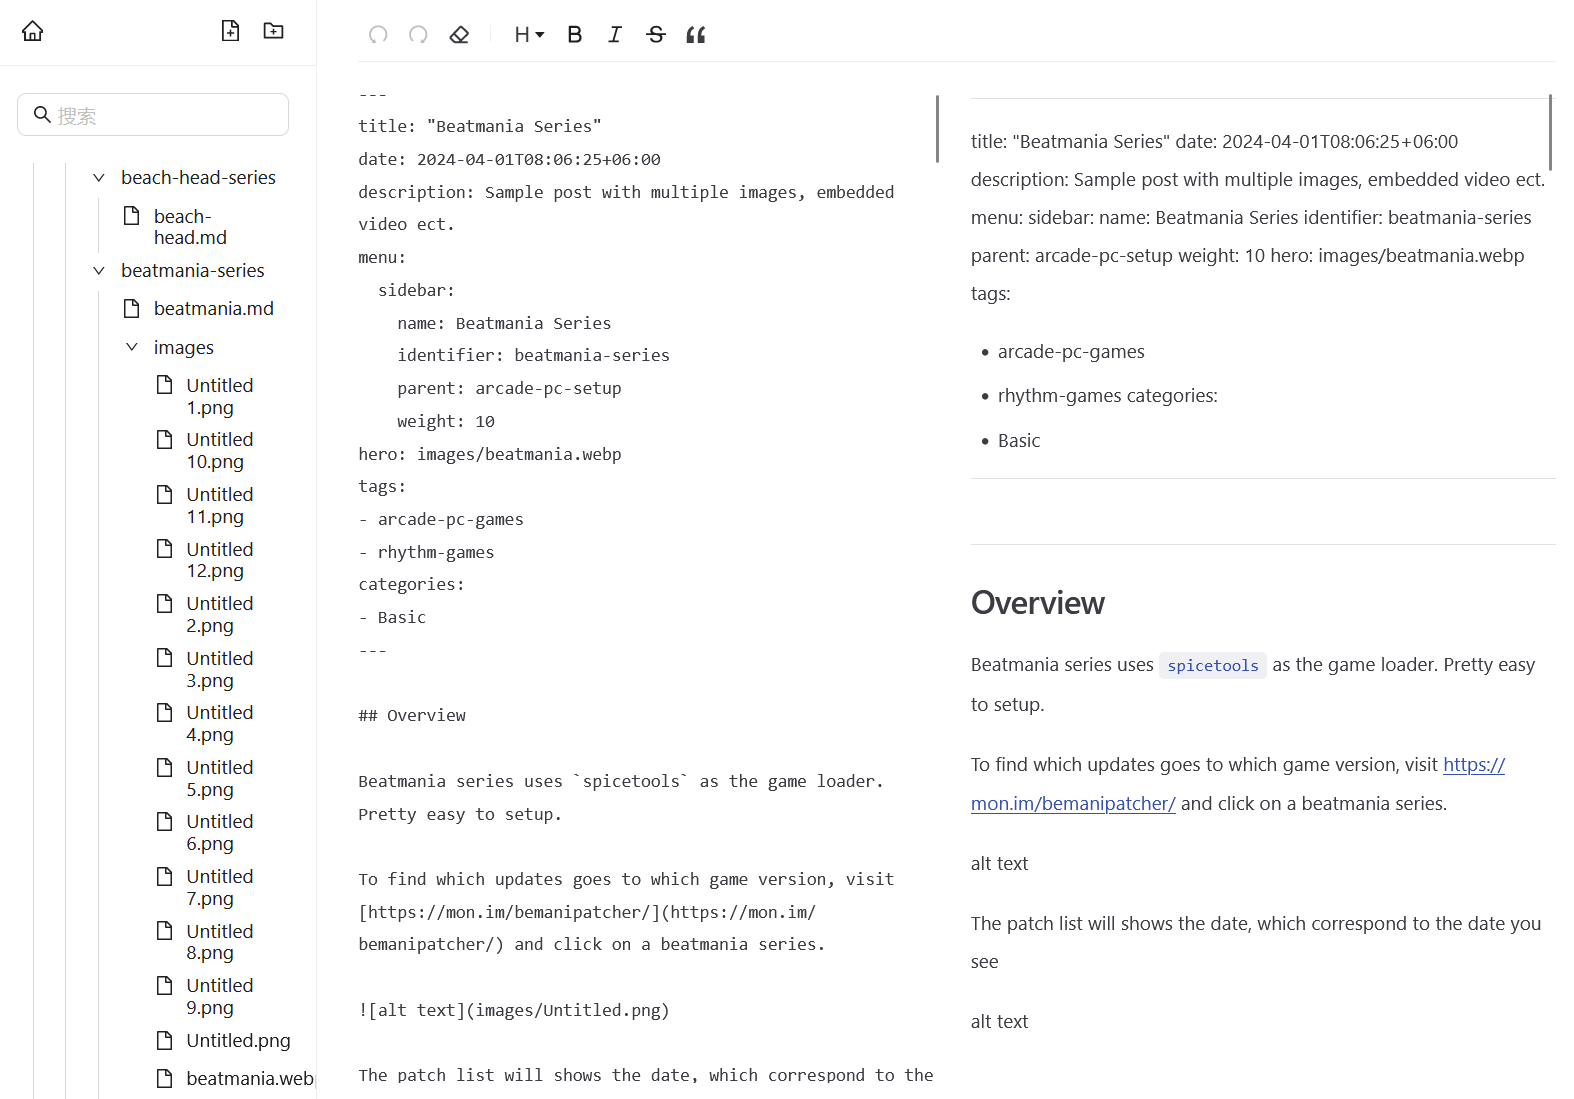
Google Search Console
Visit https://search.google.com/search-console/welcome and enter the root domain for site performance analysis. I chose the first option.
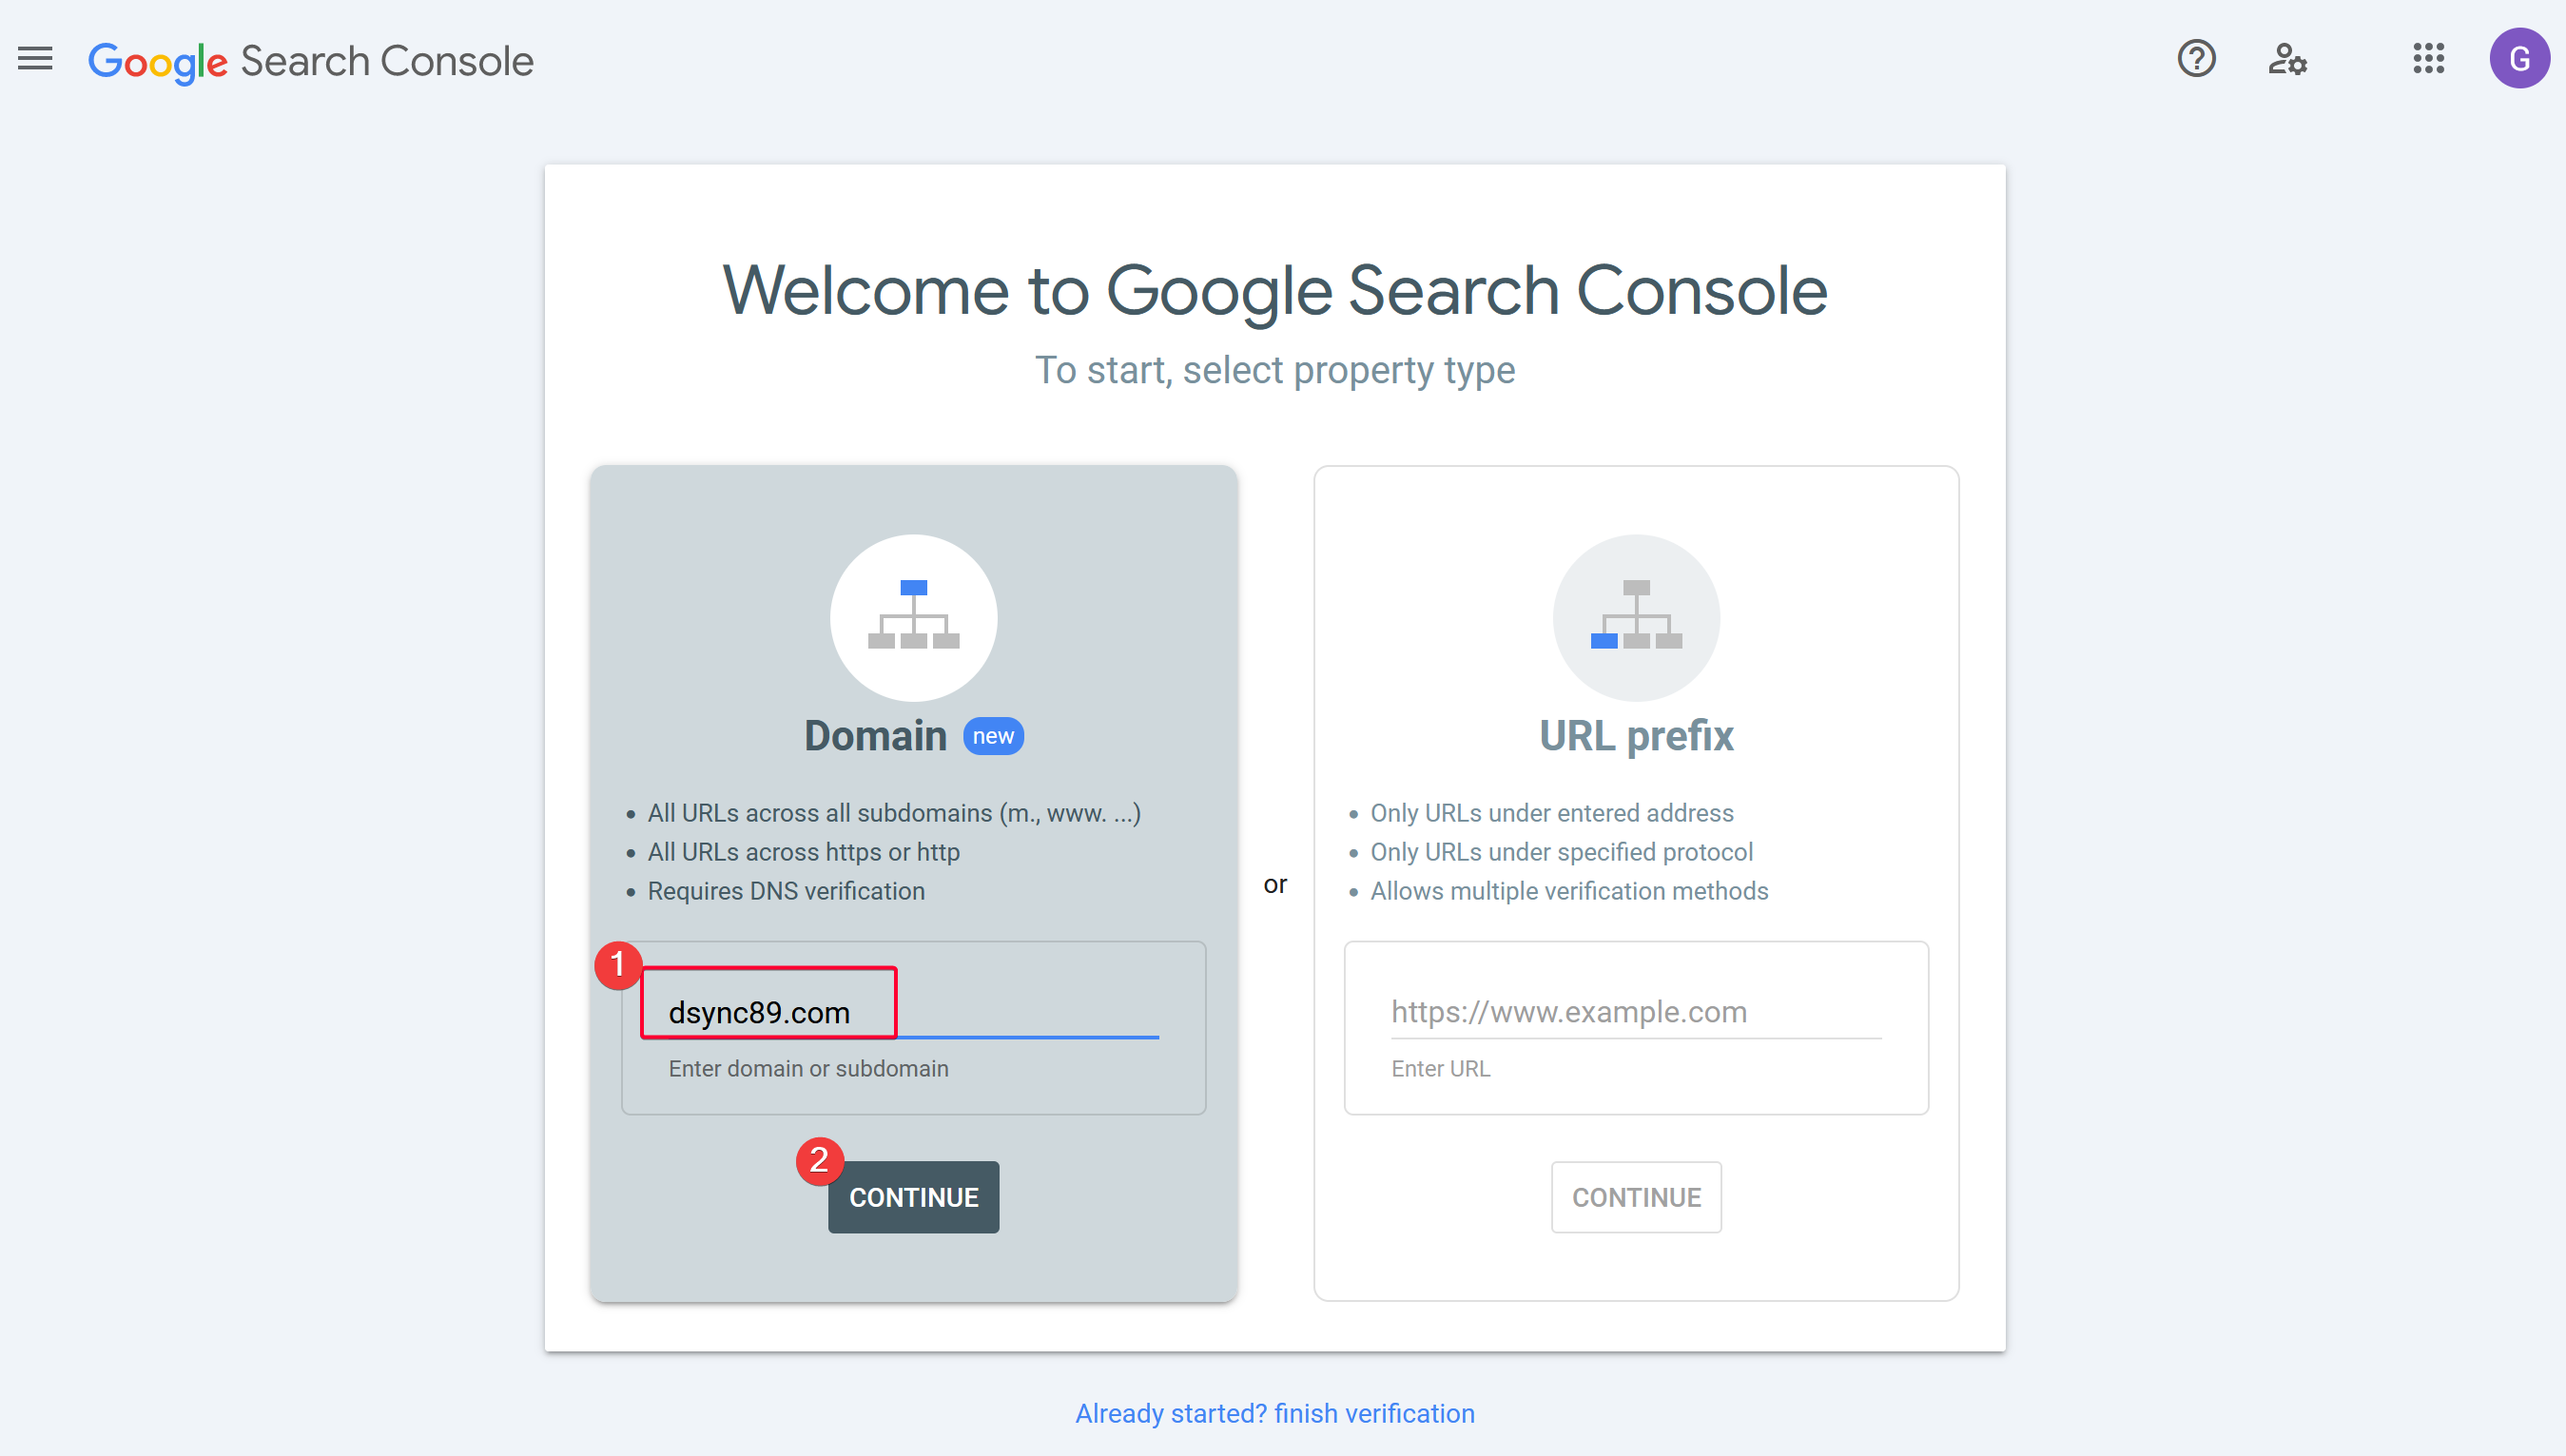
Since my DNS is managed by CloudFlare, it then prompted me to authenticate to CloudFlare and then adding a TXT DNS record. Accept and voila!
Create a Production Build
Production build not only make the page load faster, but is also needed if you want to submit your site for Google AdSense review to show ads because they need to have access to sitemap.xml and robots.txt to crawl the site.
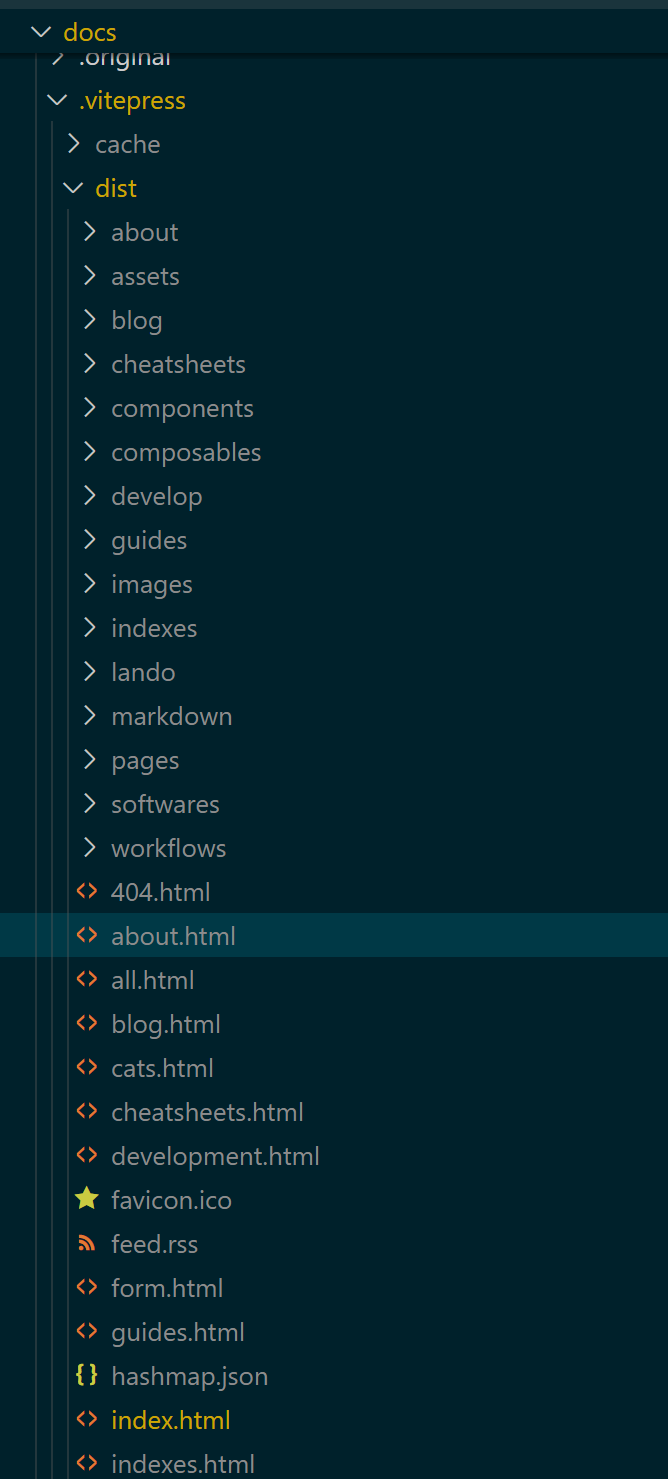
Build the site using pnpm build instead of pnpm dev docs so that it can generate sitemap.xml and robots.xml. You can then serve the dist folder using nginx if you don't want to link it with Github Pages, Netlify or any other deployment site.
WARNING
While building, you might encounter build error that is not shown during development mode. This is because development mode is more lenient when resolving module resolution, but production build is stricter.
Example of successful build with dist folder.
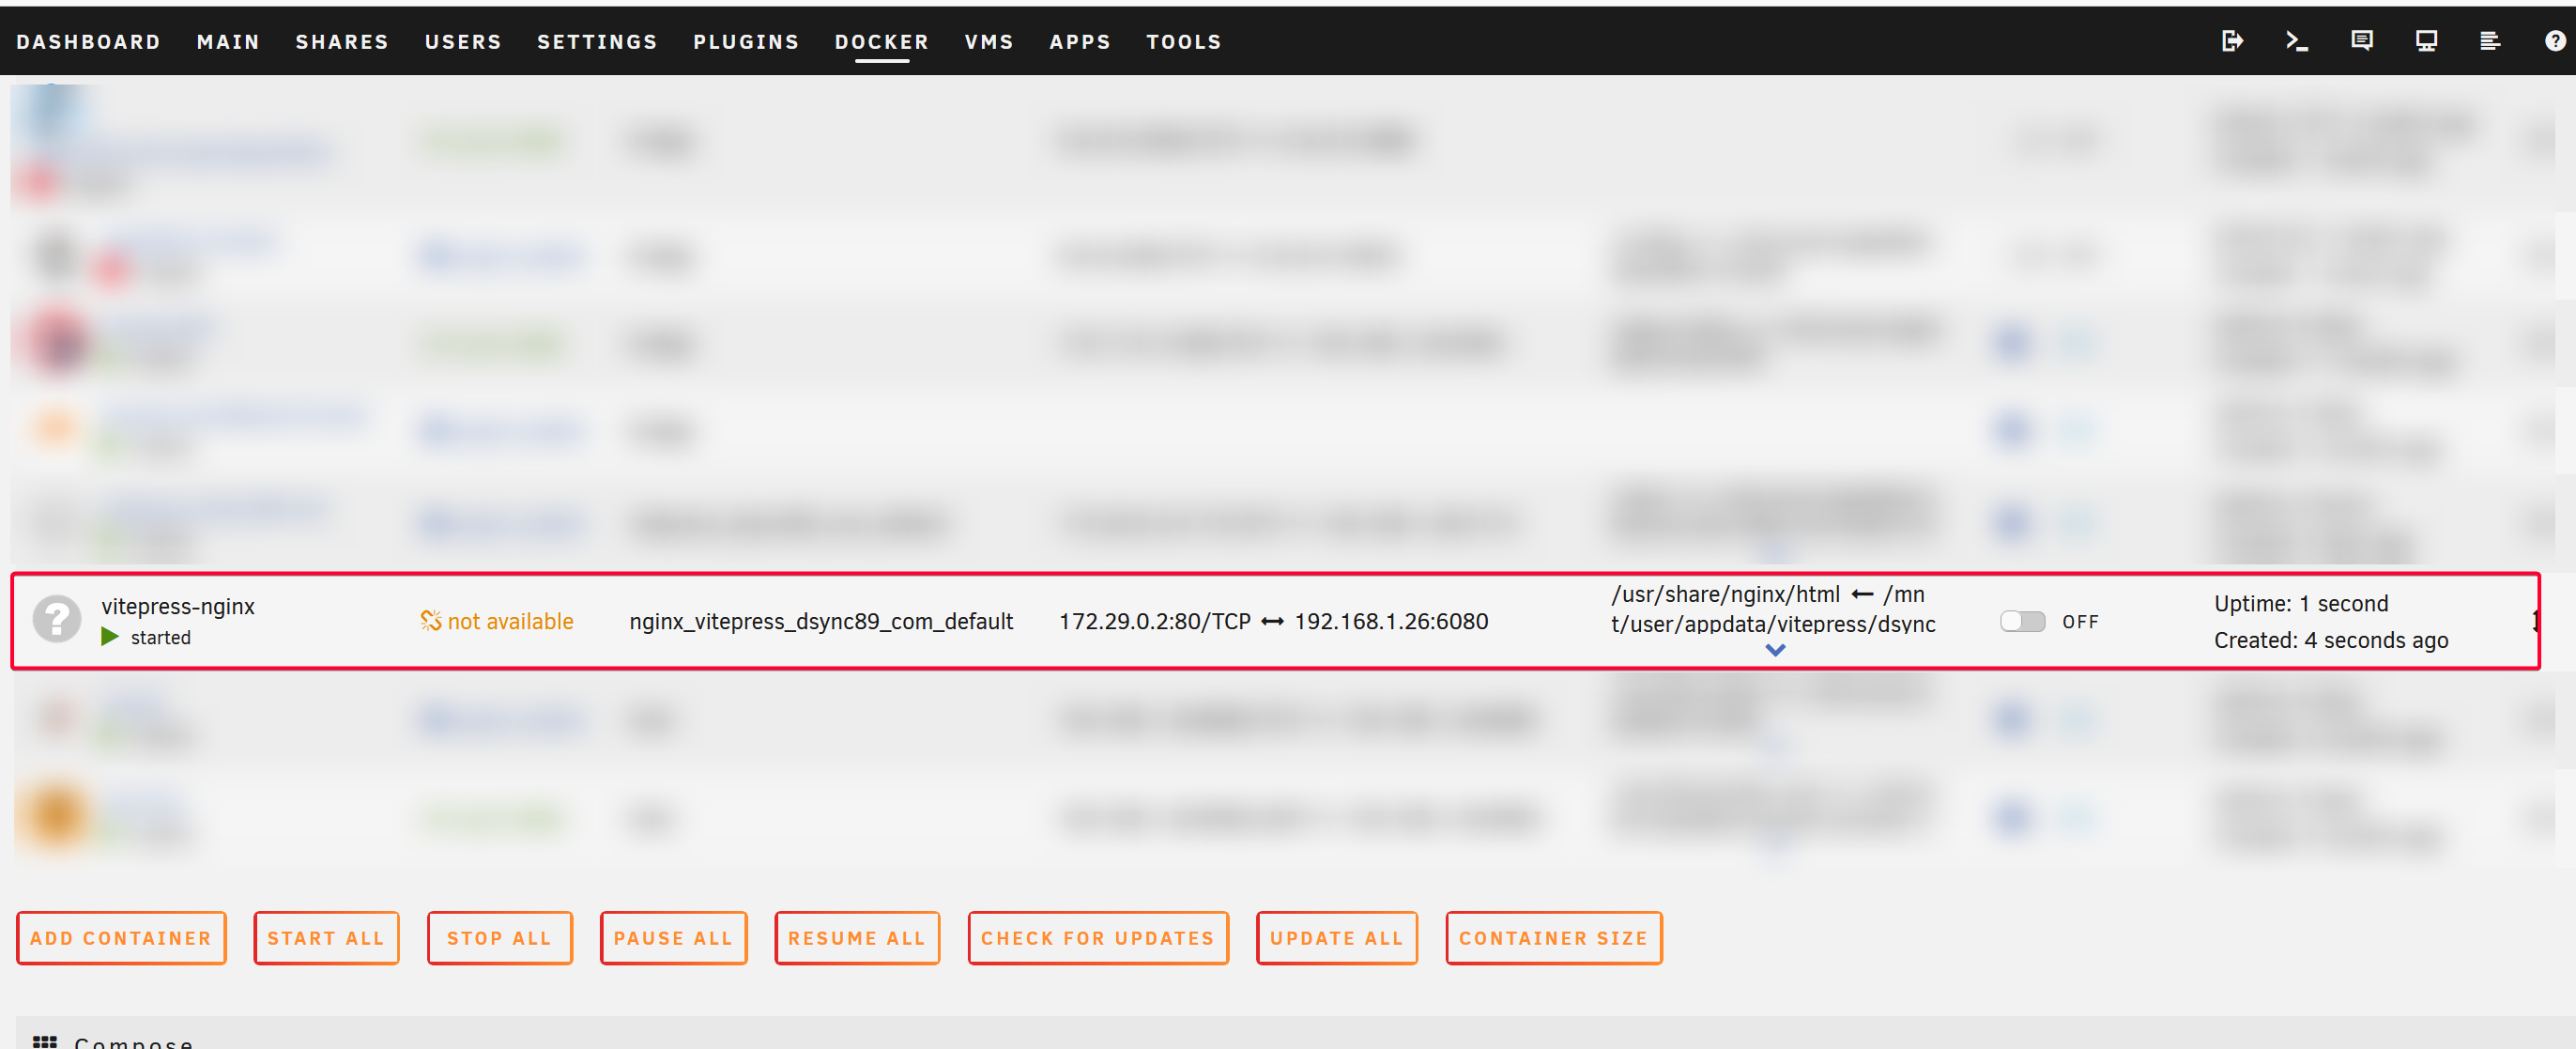
Serve the Static Files using Nginx
I created a docker-compose file that run nginx and serve the dist folder.
version: '3'
services:
  nginx:
    image: nginx:latest
    container_name: vitepress-nginx
    ports:
      - "6080:80"
    volumes:
      - /mnt/user/appdata/vitepress/dsync89-com/axelot-vitepress/docs/.vitepress/dist:/usr/share/nginx/html:ro
      - ./nginx.conf:/etc/nginx/conf.d/default.conf:ro
    restart: unless-stopped
After deploy
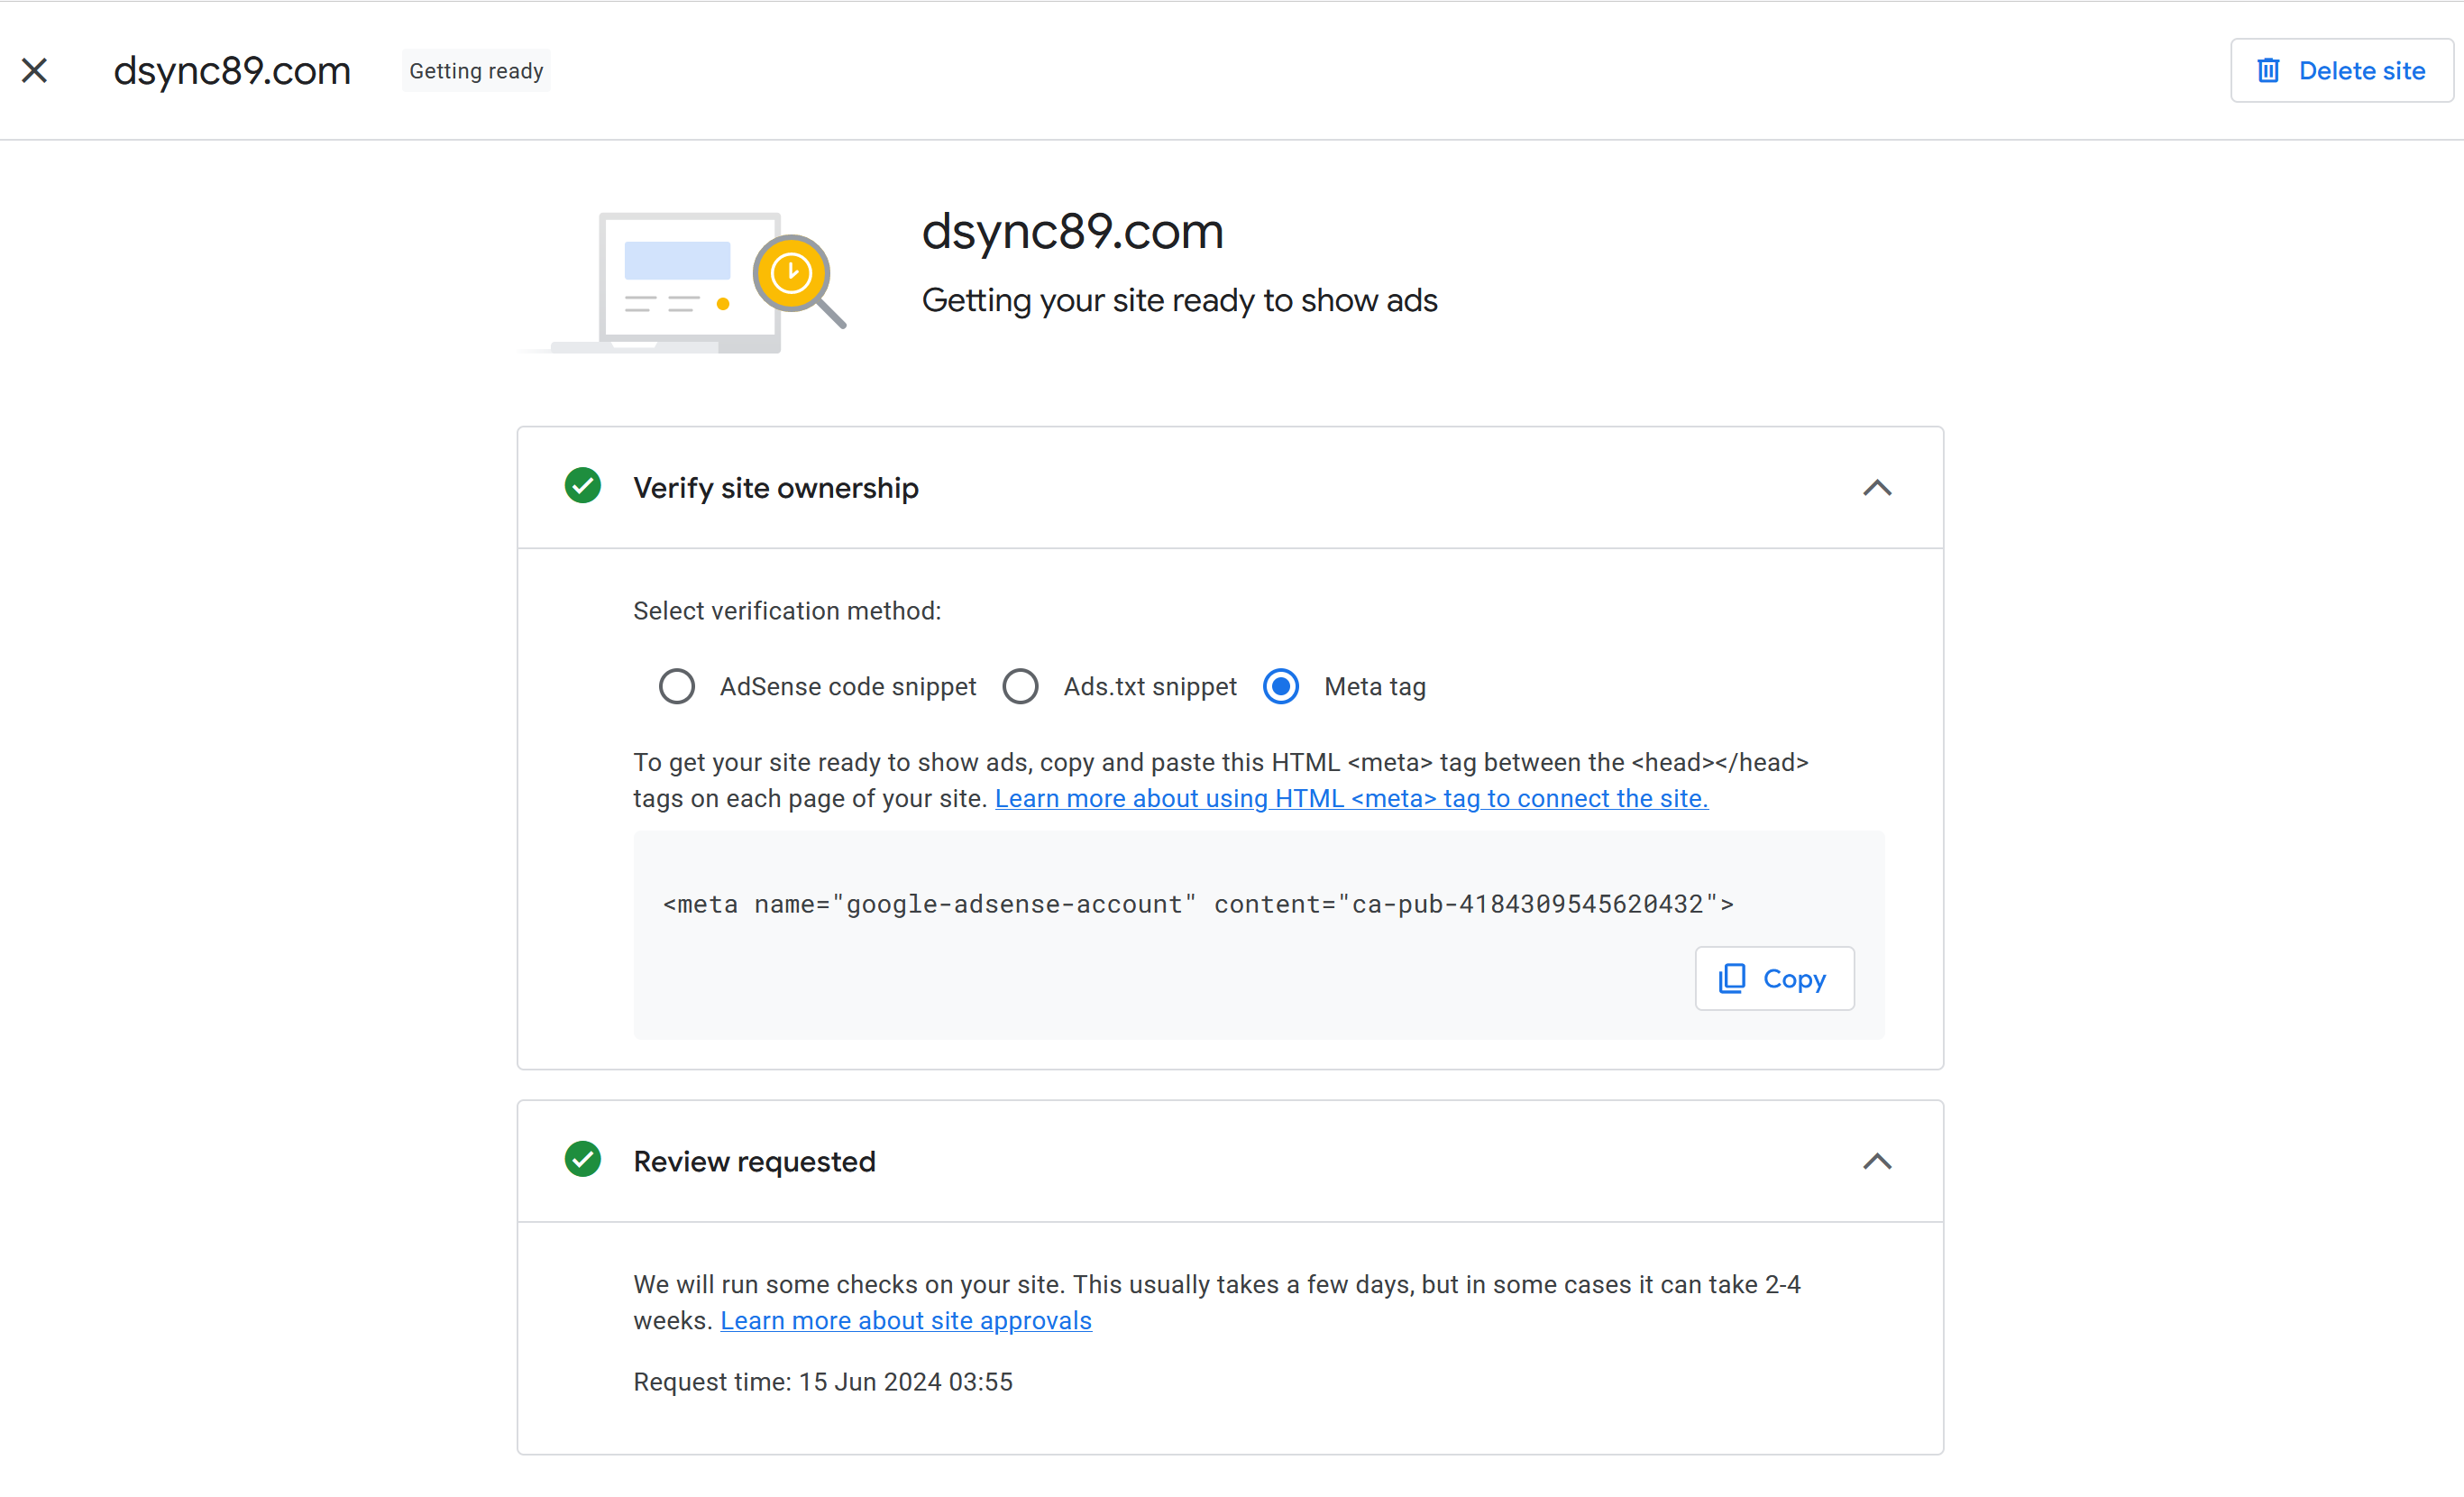
Google AdSense
WARNING
You need to serve the dist folder using web server and expose it to Google to review. It won't work if you expose the Development mode.
The page loading speed is blazingly fast compared to development mode!
Result