Overview
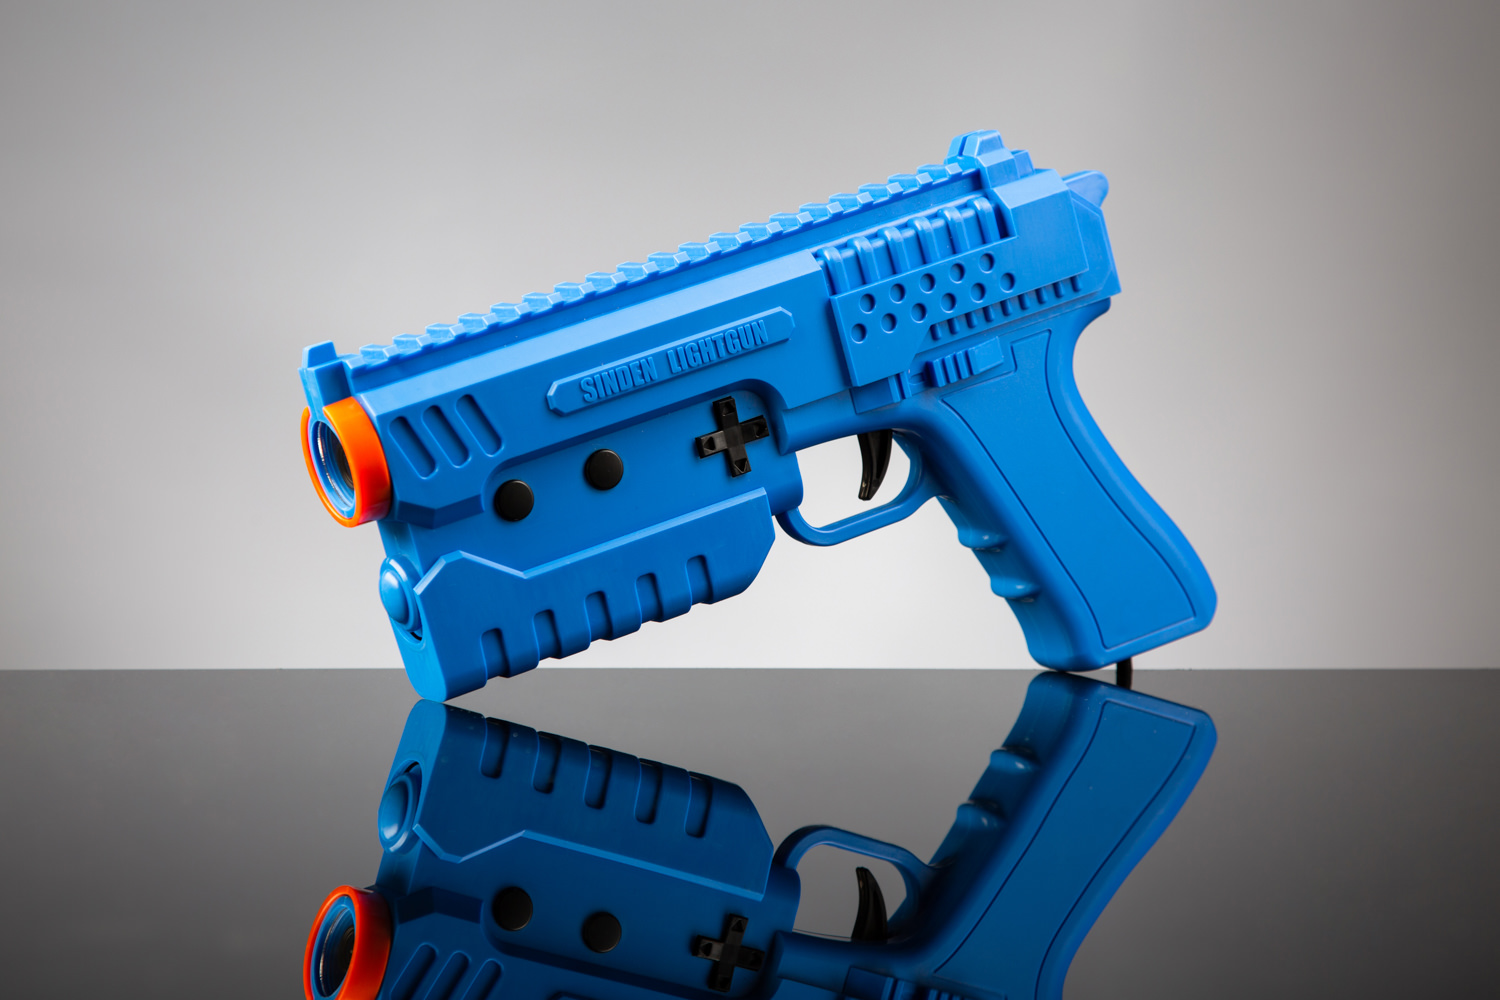
The Sinden Lightgun is a cutting-edge peripheral designed for modern PCs and game consoles, bringing the classic light gun gaming experience into the 21st century. Unlike traditional light guns that required CRT TVs, the Sinden Lightgun uses advanced technology to work with LCD TVs, monitors, and projectors. It offers high accuracy and low latency, making it ideal for shooting games. Its unique border detection technology allows it to accurately track movements and shots on the screen, providing an immersive gaming experience for new titles and retro games alike. This innovation revitalizes the genre for gamers looking to recapture the arcade's thrill from the comfort of their homes.
Downloads
Download v2.05 from https://www.sindenlightgun.com/software/SindenLightgunWindowsSoftwareV2.05beta.zip or get from Sinden official driver website: https://sindenlightgun.com/drivers/.
INFO
Even though it is listed as Beta, it still works 100% in my setup!
Release log from Sinden website
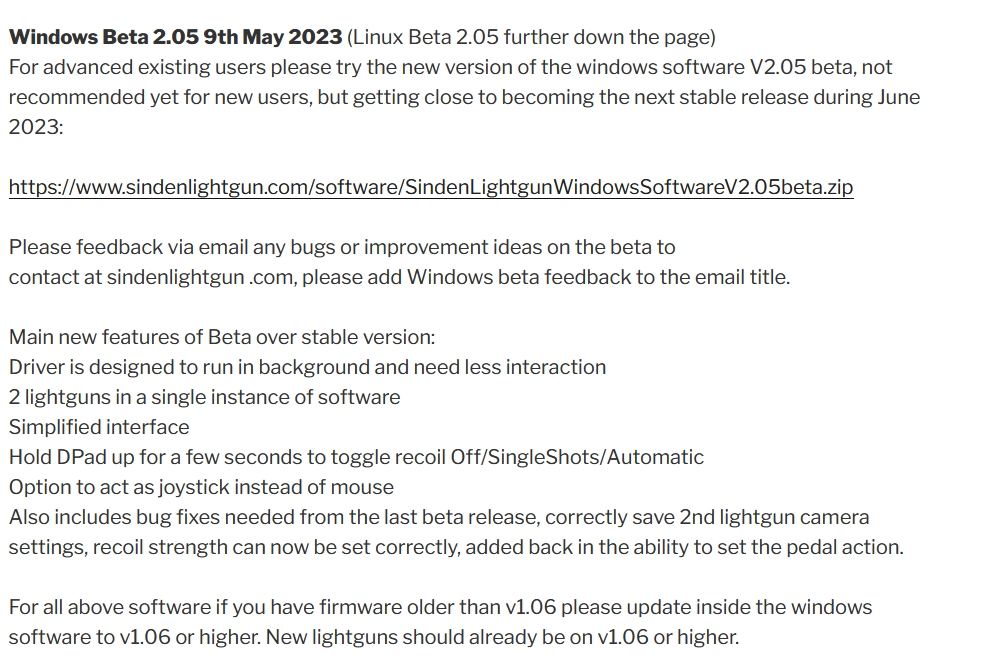
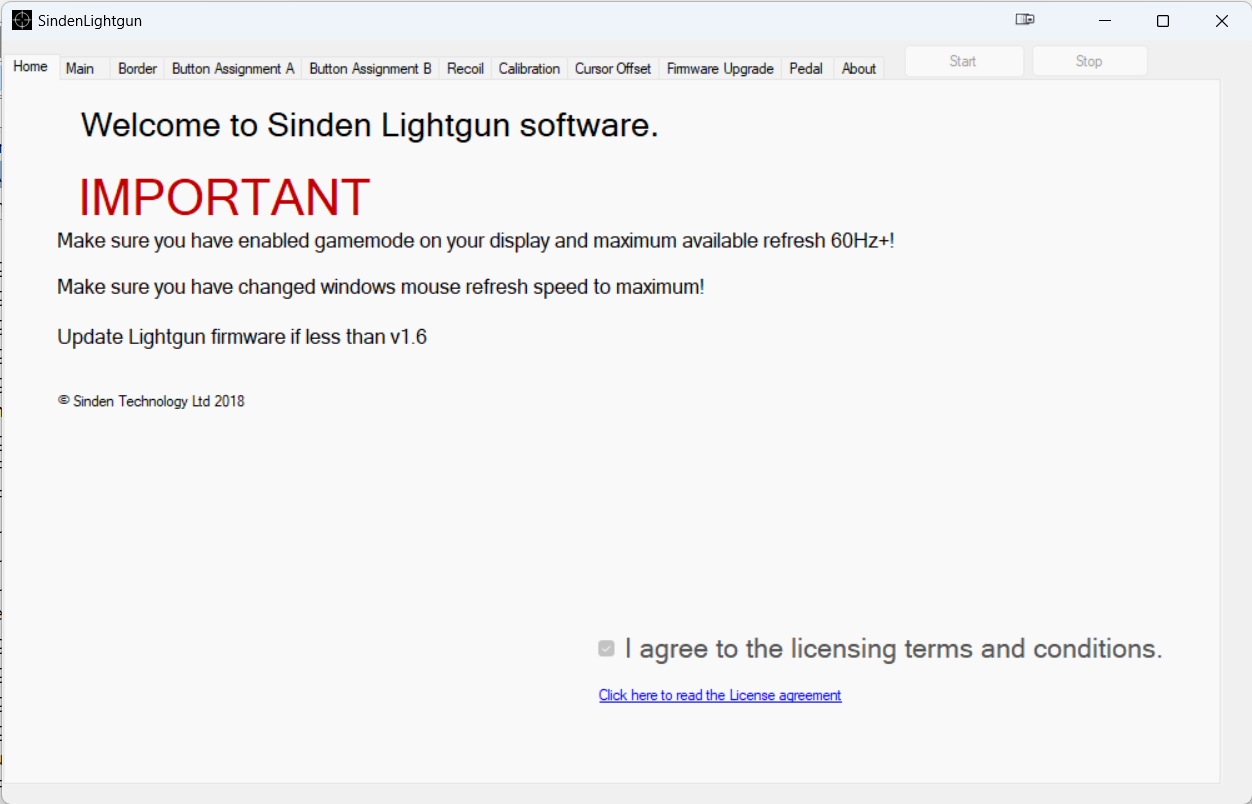
Program screenshot.
INFO
In my case when connecting the second Sinden Lightgun, the second COM port always disconnect and reconnect when checked in Device Manager. This odd issue is solved after restarting my PC, and Sinden program is then able to detect BOTH lightguns consistently.
Tips
- For the lightgun to work properly, all games NEED to have the square White border overlayed on the game. Press
Alt+Bto activate configured as bezel! - To show the border properly by the software, the game HAS TO run in Fullscreen Window Borderless, NOT Exclusive Full Screen! Use Reshade plugin with
border.fxif the game does not support Full screen window or full screen borderless.
Finding GunID
Device Manager
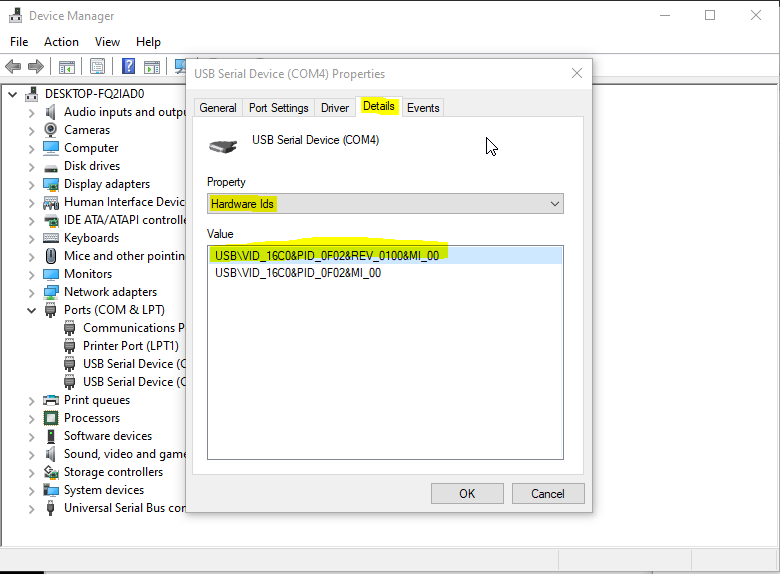
- Go to Device Manager
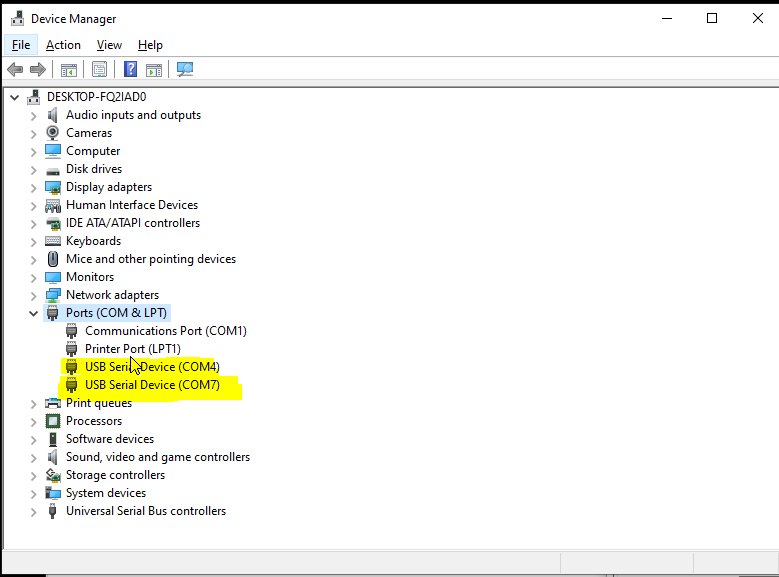
- Select one of the COM port and check the Hardware ID
Emulator Configuration
MAME
Reference: https://www.sindenwiki.org/wiki/MAME#Crosshair_Pack
- Download SindenRelease v.1.08 pack from https://www.sindenlightgun.com/software/SindenLightgunSoftwareReleaseV1.08b.zip.
WARNING
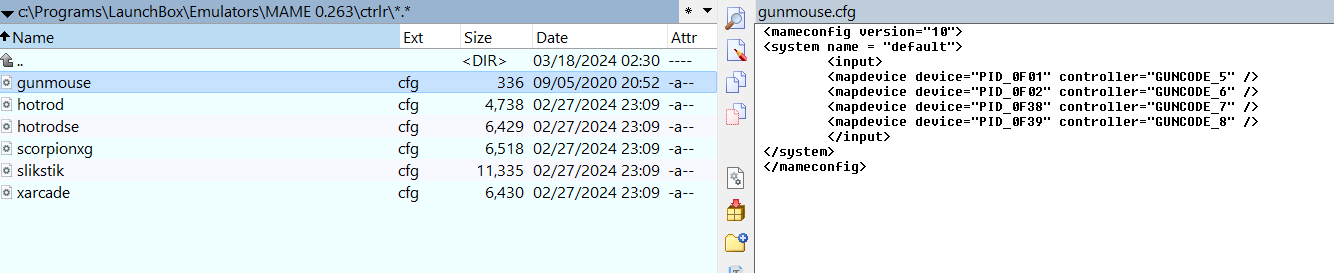
💡 Don’t download the v2 because it doesn’t include gunmouse.cfg that contains the GUN ID
- Extract the zip file and copy
gunmouse.cfgintoMAME/ctrlr
- Modify
mame.iniand make it like
#
# CORE INPUT OPTIONS
#
coin_lockout              1
ctrlr                     gunmouse
mouse                     1
joystick                  1
lightgun                  1
multikeyboard             0
multimouse                0
steadykey                 0
ui_active                 0
offscreen_reload          0
joystick_map              auto
joystick_deadzone         0.3
joystick_saturation       0.85
natural                   0
joystick_contradictory    0
coin_impulse              0

#
# CORE INPUT AUTOMATIC ENABLE OPTIONS
#
paddle_device             keyboard
adstick_device            mouse
pedal_device              keyboard
dial_device               keyboard
trackball_device          keyboard
lightgun_device           mouse
positional_device         mouse
mouse_device mouse- Open
mame.exeand Go intoGeneral Settings > Input Assignments > Player 1 Controlsto setup Lightgun - Press
Upto quicky go to Lightgun Input settings. - Press
Alt+Bor the hotkey on your Sinden Lightgun to turn on Border. Border must be ON for the tracking to work! - Press
EnteronLightgun X Analog.Move your Lightgun from Left to Right. It should showGun <ID> X. If it showsX+orX-, pressDeletekey and restart over again!
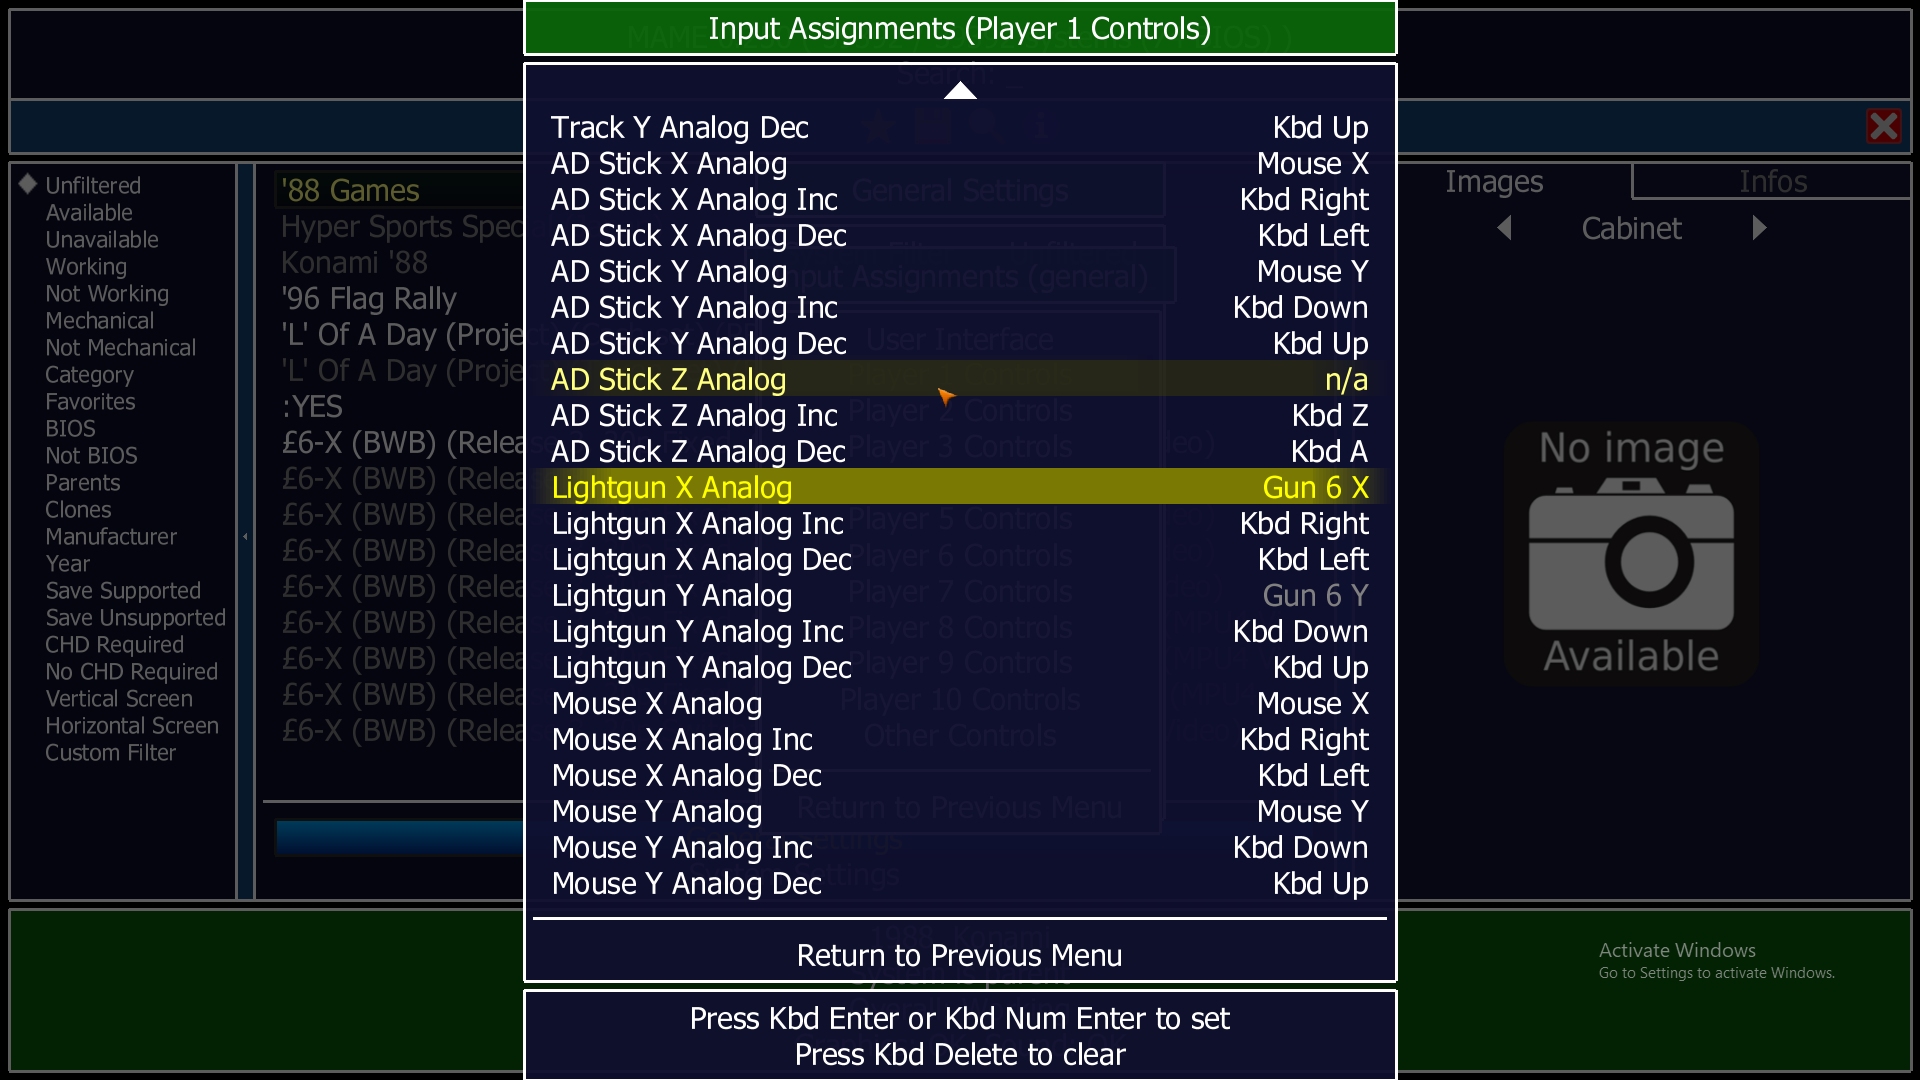
- Repeat the same for
Lightgun Y Analog,AD Stick X AnalogandAD Stick Y Analog - Start the game and Voila!
- Some games might still require per game settings. Press
Tabto enter the menu and setup the inputs if not configured properly. Thegame.cfgwould be store incfgfolder.
SuperModel (for Sega Model 3 Games)
reference: https://www.sindenwiki.org/wiki/Supermodel_M3
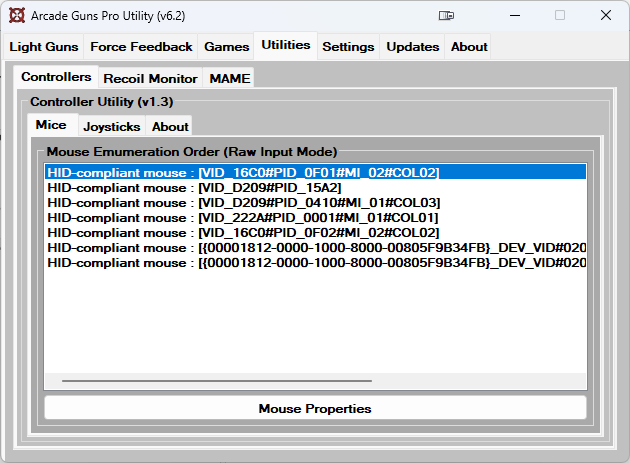
SuperModel uses raw input enumeration (index) of your lightgun as the mouse. To find which ID, run ArcadeGunsProUtility and click Utilities > Controllers > Mice
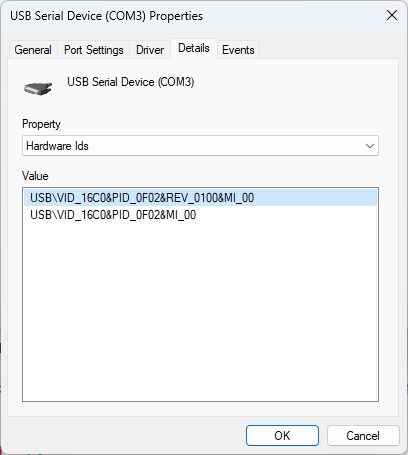
Also open Device Manager and look at the 2 devices under Ports (COM & LPT)
My Lightgun Red which uses COM3
My Lightgun Blue which uses COM6
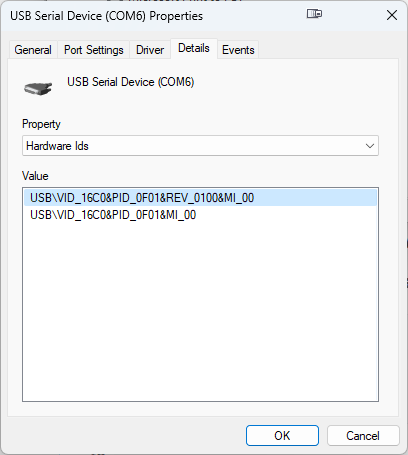
For example, my Sinden Lightgun Red (Player 1) has the hardware ID VID_16C0#PID_0F02 and Sinden Lightgun Blue (Player 2) has the hardware ID VID_16C0#PID_0f01 . From the ArcadeGunsProUtility output, the first item is my Lightgun Blue hardware ID, and the fifth item is my Lightgun Red hardware ID. This corresponds to Mouse5 for Player 1 and Mouse1 for Player 2 which we will set in supermodel.ini later.
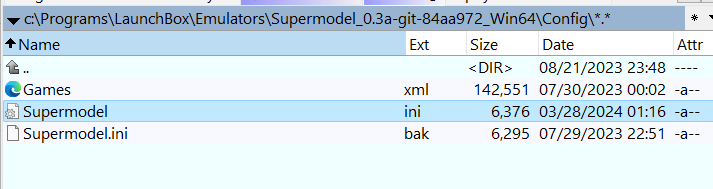
Open config/Supermodel.ini
Search for the following. Replace MOUSE_n with the mouse index you find earlier. For example, mine is:
; Light guns (Lost World)
InputGunX = MOUSE5_XAXIS,JOY1_XAXIS
InputGunY = MOUSE5_YAXIS,JOY1_YAXIS
InputTrigger = MOUSE5_LEFT_BUTTON,KEY_A,JOY1_BUTTON1
InputOffscreen = MOUSE5_RIGHT_BUTTON,KEY_S,JOY1_BUTTON2

InputGunX2 = MOUSE1_XAXIS,JOY2_XAXIS
InputGunY2 = MOUSE1_YAXIS,JOY2_YAXIS
InputTrigger2 = MOUSE1_LEFT_BUTTON,JOY2_BUTTON1
InputOffscreen2 = MOUSE1_RIGHT_BUTTON,JOY2_BUTTON2

; Analog guns (Ocean Hunter, LA Machineguns)
InputAnalogGunX = MOUSE5_XAXIS,JOY1_XAXIS
InputAnalogGunY = MOUSE5_YAXIS,JOY1_YAXIS
InputAnalogTriggerLeft = MOUSE5_LEFT_BUTTON,KEY_A,JOY1_BUTTON1
InputAnalogTriggerRight = MOUSE5_RIGHT_BUTTON,KEY_S,JOY1_BUTTON2

InputAnalogGunX2 = MOUSE1_XAXIS
InputAnalogGunY2 = MOUSE1_YAXIS
InputAnalogTriggerLeft2 = MOUSE1_LEFT_BUTTON
InputAnalogTriggerRight2 = MOUSE1_RIGHT_BUTTON
WARNING
You MIGHT have to reconfigure the mouse ID because the enumeration might change every time you reboot. Always check the index using ArcadeGunsProUtility program.
Setup Bezel
Download bezel pack from https://www.mediafire.com/file/14kwjl99nonxec8/Sinden_M3_Bezel_Pack_v3.1_.rar/file
Extract to Supermodel root folder
The .bat file from that pack will unzip the right bezel file according to the right game to reshade-shader folder.
To enable Launchbox to run the .bat file before starting the game, we have to create Additional Apps for that game.
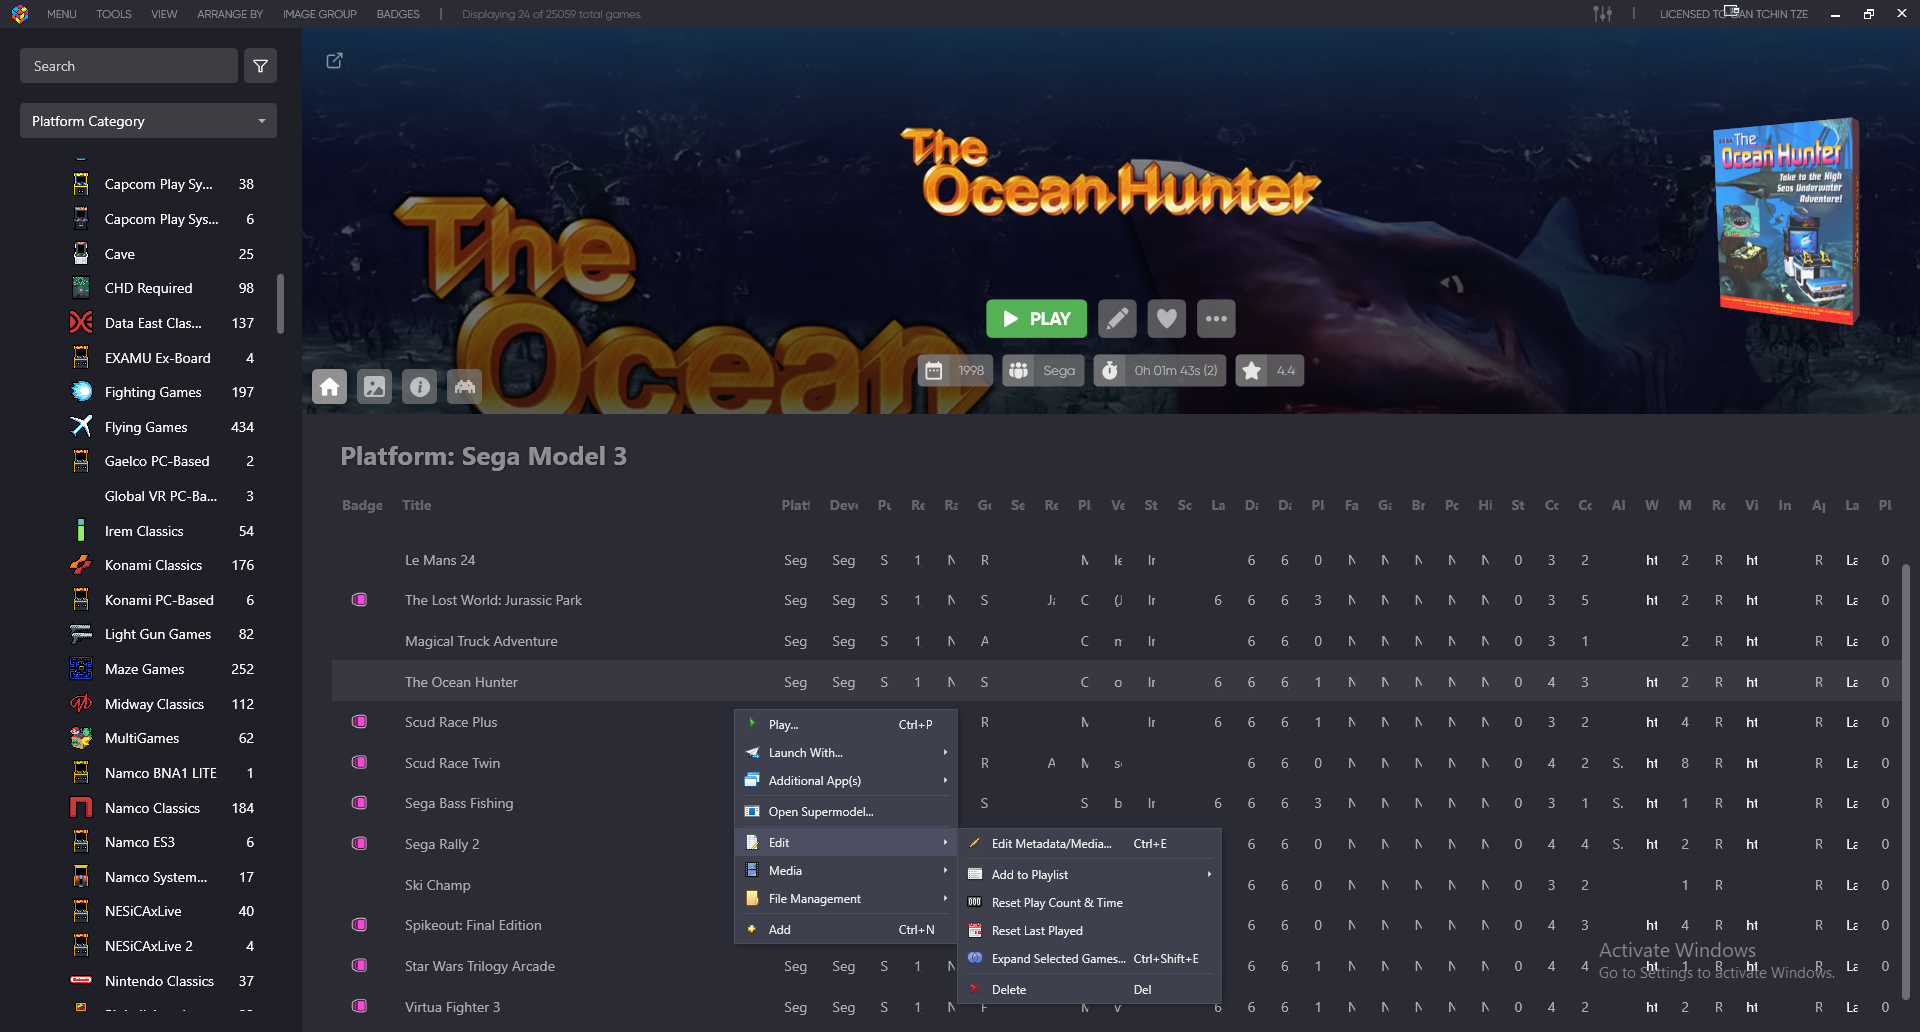
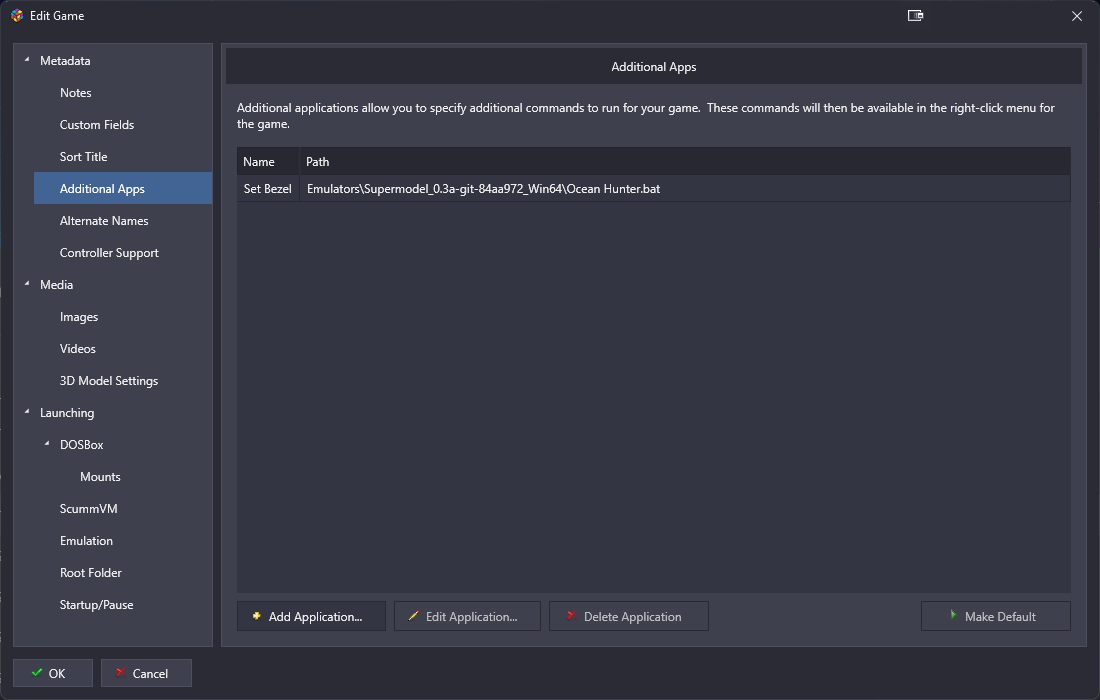
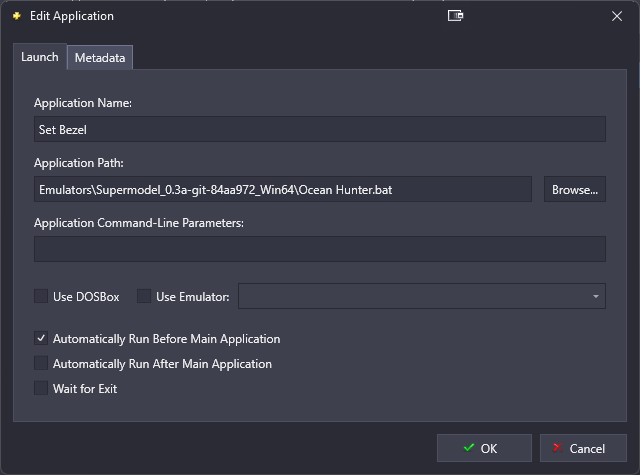
Done! The next time you launch the game LB will run the bat file!
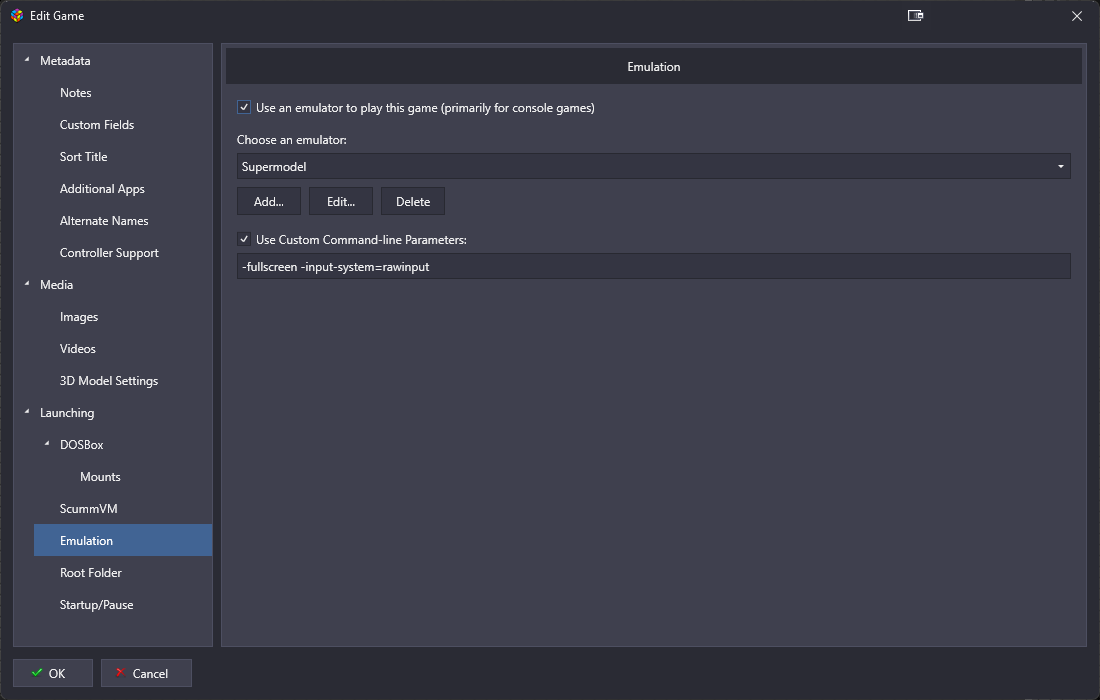
Configure Launchbox
Be sure to use the argument fullscreen -input-system=rawinput for the lightgun guns so that it can use raw inputs for Both players.
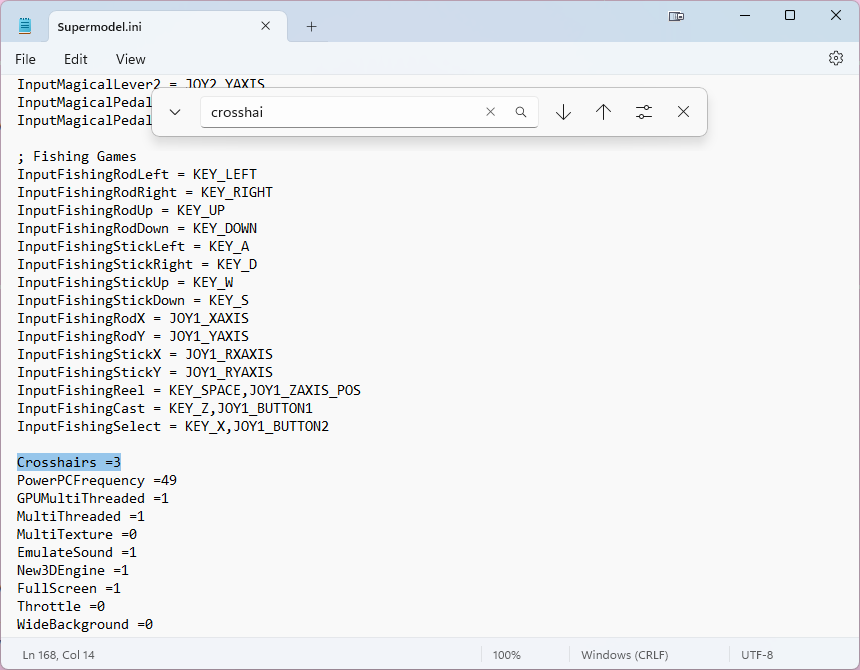
Crosshair Not Showing
You can press Alt+I to cycle between None, Player 1, Player 2, or both Player crosshair. You can also forcefully set it in the config file. See http://webcache.googleusercontent.com/search?q=cache:rV7rz49otLkJ:www.supermodel3.com/Forum/viewtopic.php%3Ff%3D2%26t%3D939&cd=9&hl=en&ct=clnk&gl=tw&client=firefox-b-d
0 - no crosshairs
1 - show only player 1 crosshair
2 - show only player 2 crosshair
3 - show both Player 1 and 2 crosshairs
Some games like Lost World: Jurassic Park won’t have crosshair shown if you didn’t set the mode.
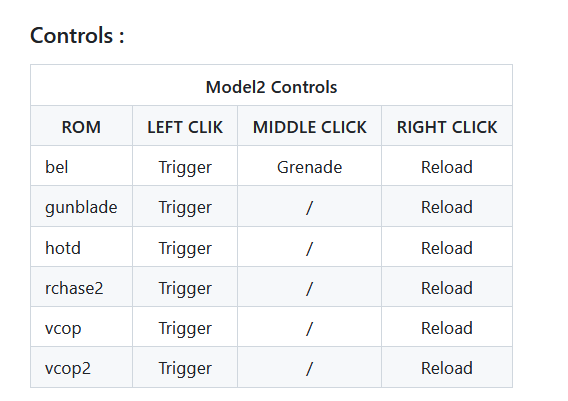
Model 2 (for Sega Model 2 Games)
reference: https://github.com/argonlefou/DemulShooter/wiki/Configuration
Use DemulShoooter to enable lightgun input for Model 2 emulator.
Configure Emulator
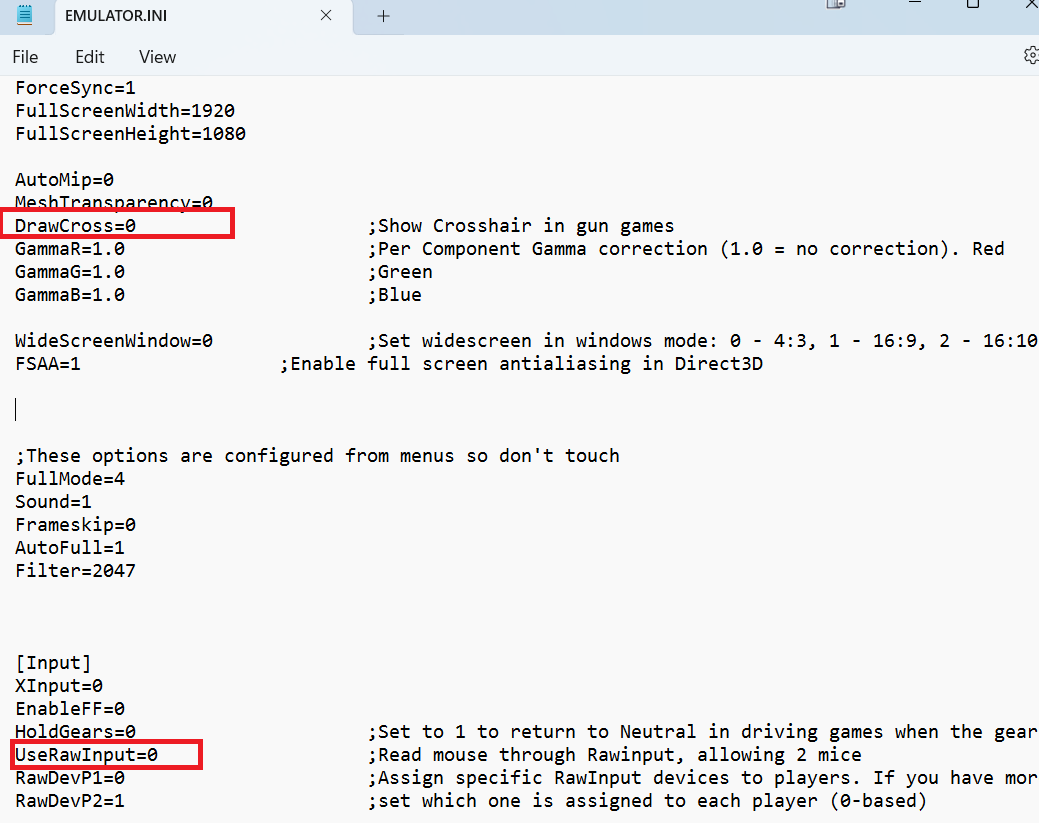
Edit the file EMULATOR.INI to make sure that RawInput is disabled
UseRawInput=0
Genuine emulator crosshairs are not working anymore, so change DrawCross=1 to DrawCross=0
Configure DemulShooter
We will use Demulshooter to enable lightgun for m2 emulator.
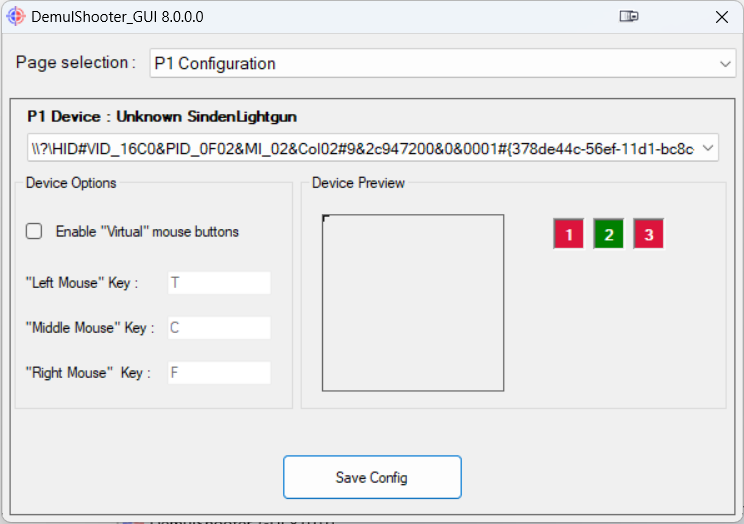
Step 1: Configure Lightgun
Click the dropdown menu under P1 Configuration and select the right Hardware ID for your Sinden Lightgun. Read Finding Gun ID here for details.
Step 2: Install custom crosshair because we disable it in Model 2 Emulator
We have to install custom crosshair because we disabled it in Model 2 Emulator.
Select m2Emulator from Page selection. Then click Install m2emulator crosshair scripts button.
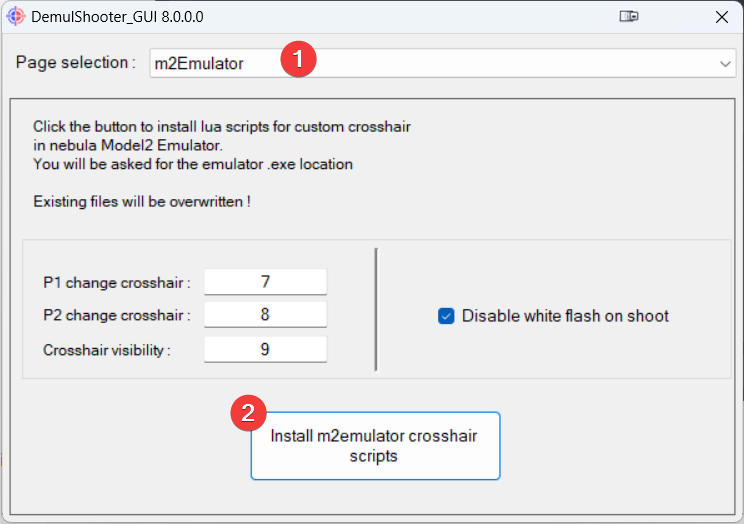
After clicking Install m2emulator crosshair scripts, select the folder of your m2 emulator.
INFO
If you noticed both of your Sinden Lightgun is controlling Player 1 instead of two players, make sure that you close any existing m2emulator. Demulshooter probably hooked to your first m2emulator window.
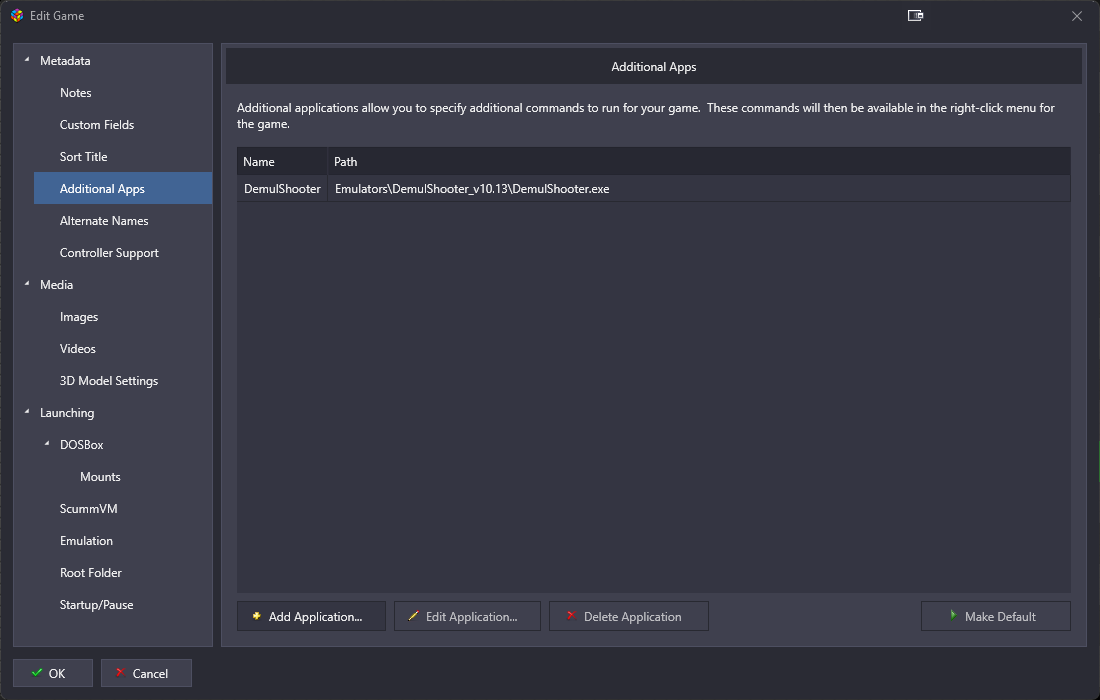
Configure Launchbox
Use the Additional App feature in LB to auto run DemulShooter.exe automatically before starting the m2-multicpu.exe emulator.
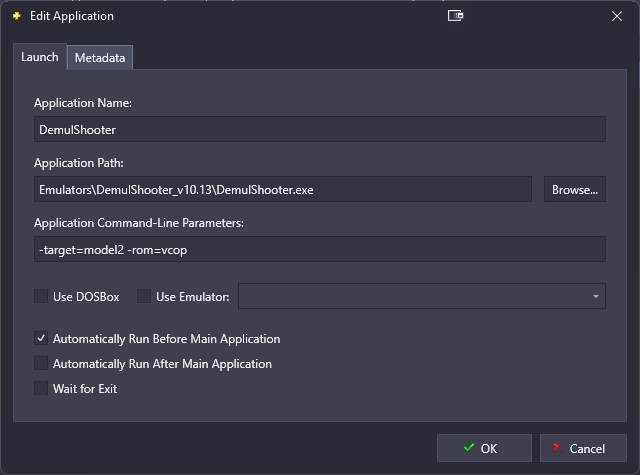
INFO
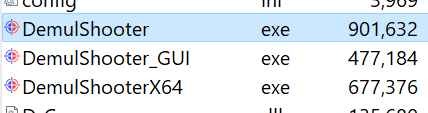
In my setup, I have to use DemulShooter.exe instead of DemulShooterX64.exe to prevent the issue where both my lightgun is controller Player 1. And my second lightgun pointer (shown in Blue) is always pointed to the Top Left corner
Visit https://github.com/argonlefou/DemulShooter/wiki/Model2 for a list of supported games by demulshooter
Flycast
reference: https://www.sindenwiki.org/wiki/Flycast_(Windows)
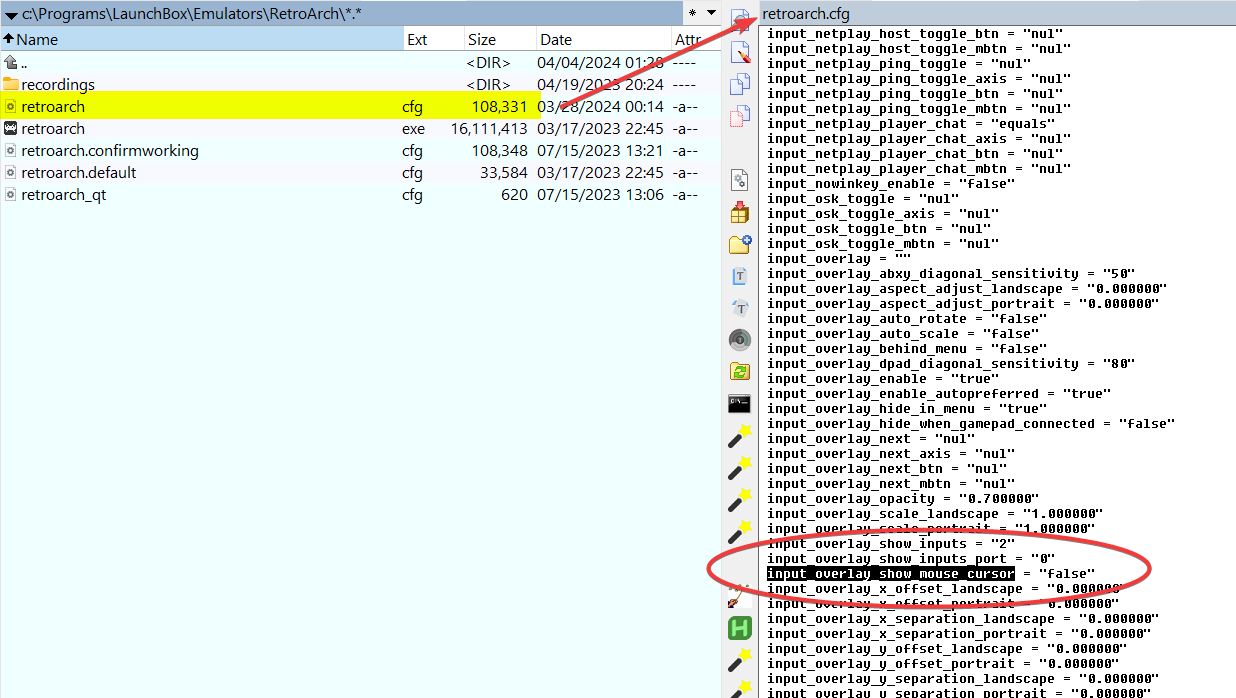
Retroarch
Disable showing mouse cursor when the crosshair is showing by editing retroarch.cfg, then set input_overlay_show_mouse_cursor = "false"
SNES
Configure Port 2, and select Superscope
Sony Playstation
When using Beetle PSX HW Core, you must set the Renderer to Software instead of Hardware. Otherwise there won’t be crosshair showing. Make sure to quit and restart Retroarch after the settings, instead of just restarting the core.
Steps
Start the game with the
Beetle PSX HWcore and go toQuick Menu > Options.Change
Rendereroption toSoftwareand clickCreate Game Options file(at the top of the menu) so it ONLY applies for this game instead of all the games.The core needs to be restarted, so
Quick Menu > Close Contentand start the game again.
See https://www.reddit.com/r/RetroArch/comments/nmp5lw/mouse_as_lightgun_for_psx_games/ for the explanation.
List of Games with Lightgun Support
...
References
Sinden Lightgun Driver Software