Part 1: Install Traefik and Automate Hostname Creation
Inspired by https://mattdyson.org/blog/2024/02/using-traefik-with-cloudflare-tunnels/#part-3-cloudflare-tunnel, and adapted to unRAID server.
Quick Info
| Web UI | http://<UNRAID_IP>:8183 |
|---|---|
Prerequisites
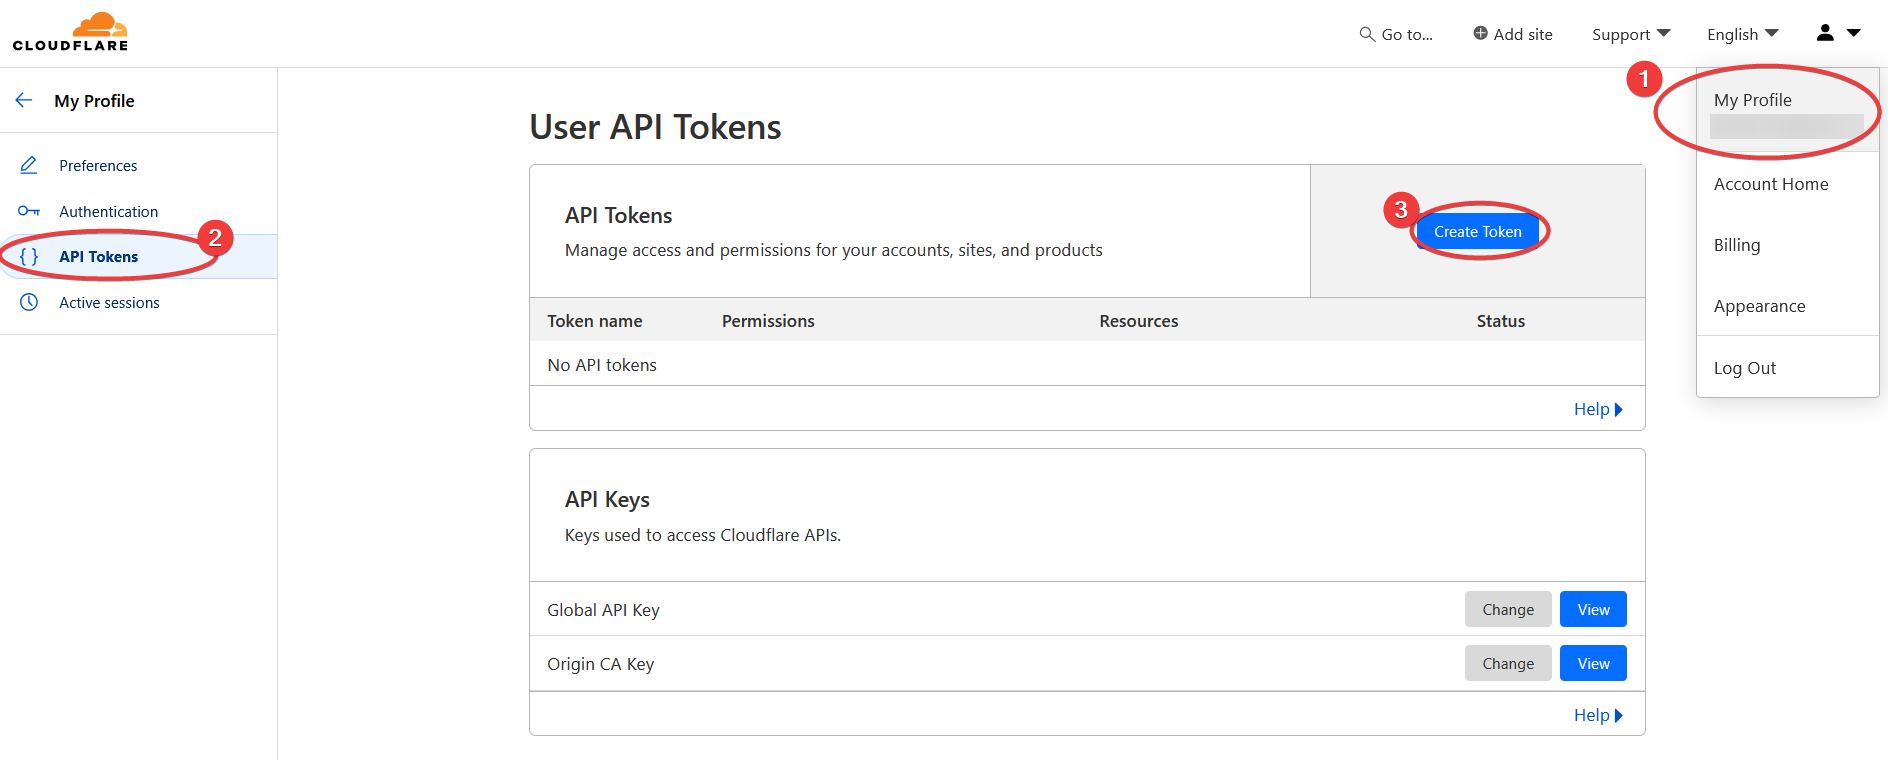
Cloudflare API Token
The token is needed so that Traefik can make changes to the domain zone DNS record managed by CloudFlare.
Login to CloudFlare dashboard, then
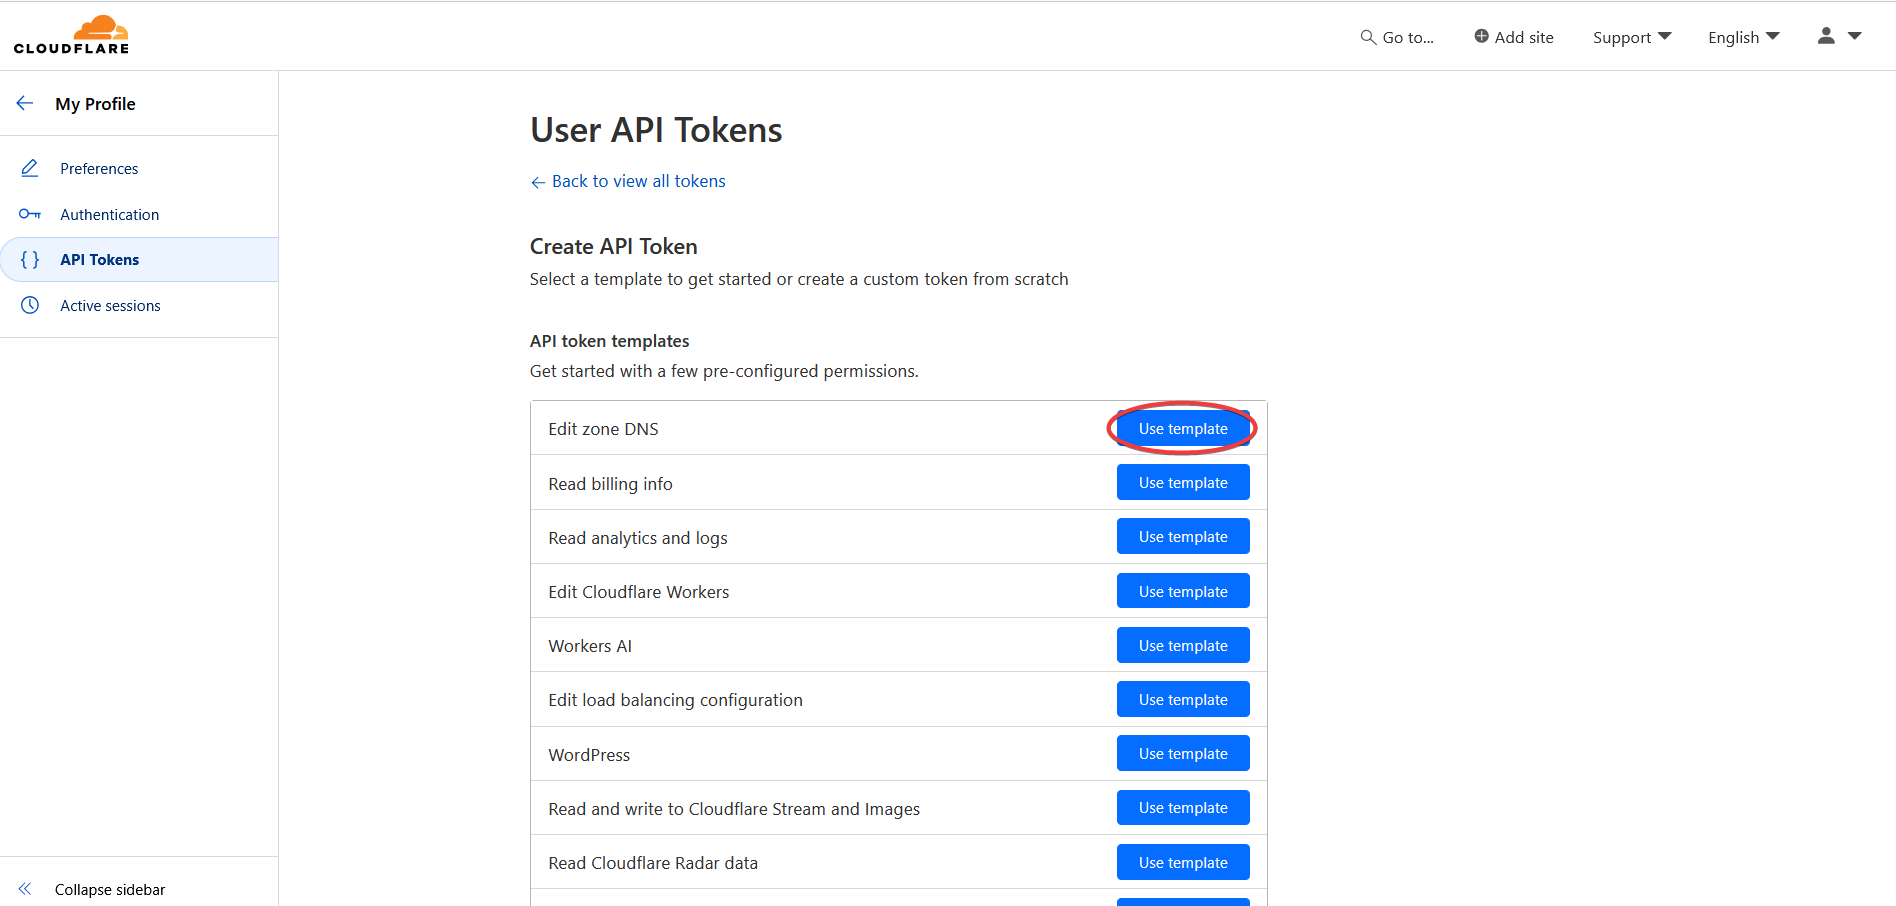
Click the Use Template button for Edit zone DNS
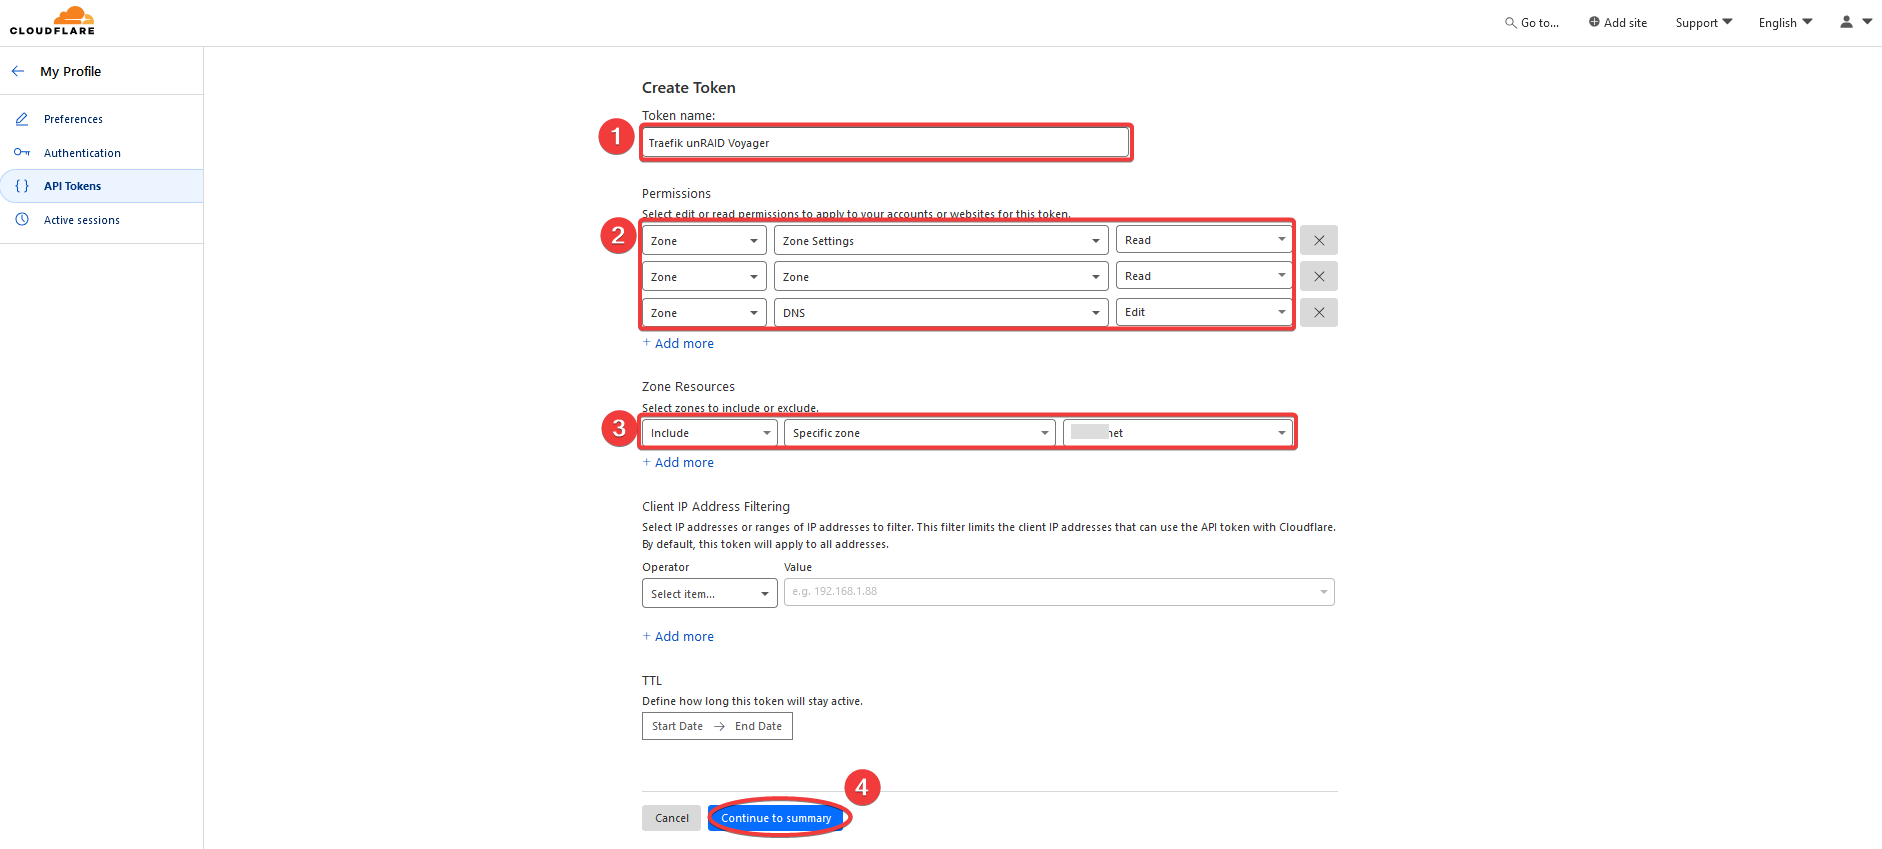
Do the following:
- Create a meaningful name for the service that will use this API token
- Fill in the zone settings:
- Zone : Zone Settings : Read
- Zone : Zone : Read
- Zone : DNS : Edit
- Select a zone under your account
- Save the settings and show summary page next
Click the Create Token button to create the API key.
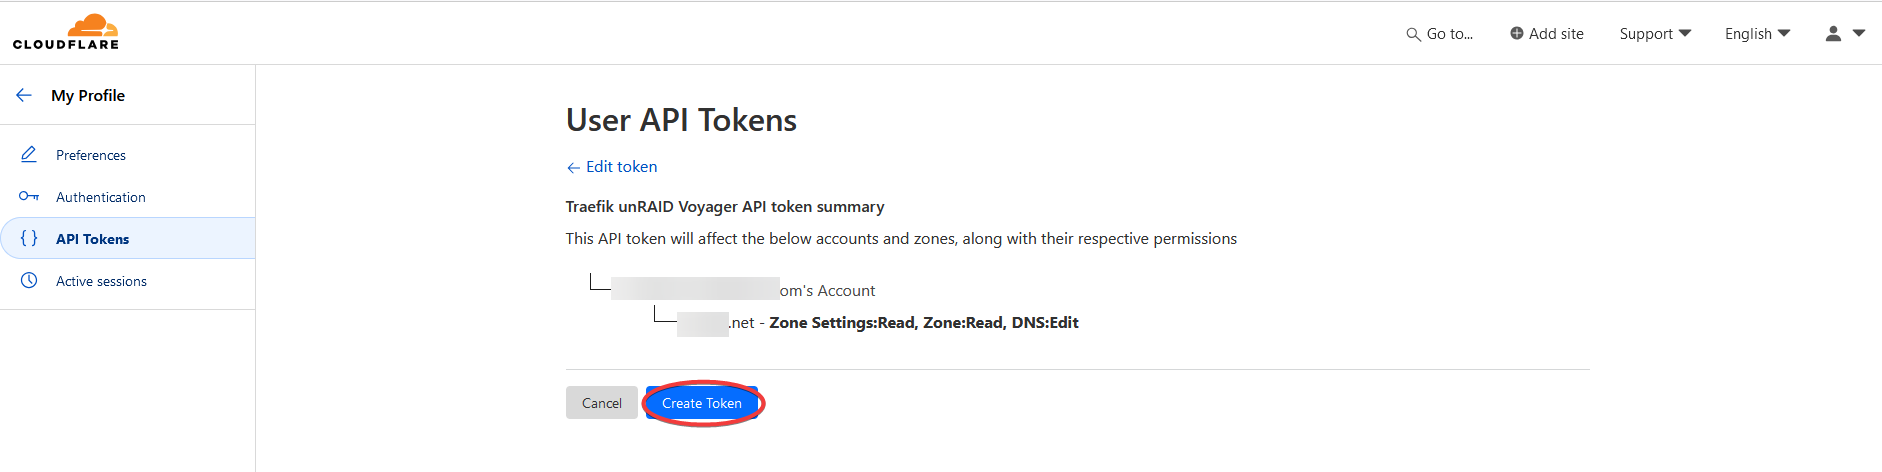
Copy the API key.
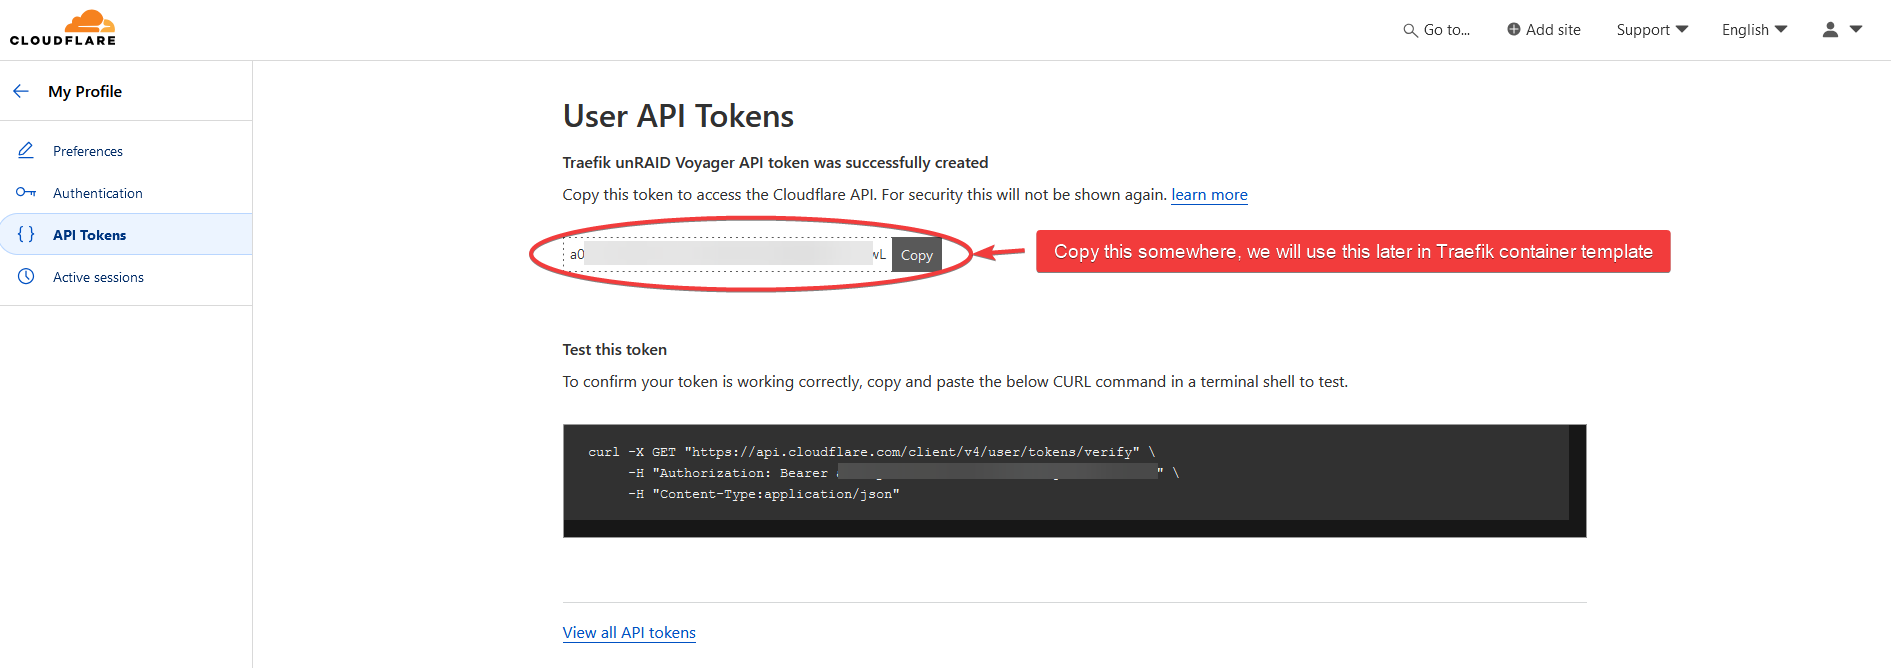
Install Traefik
Search for traefik in Apps.
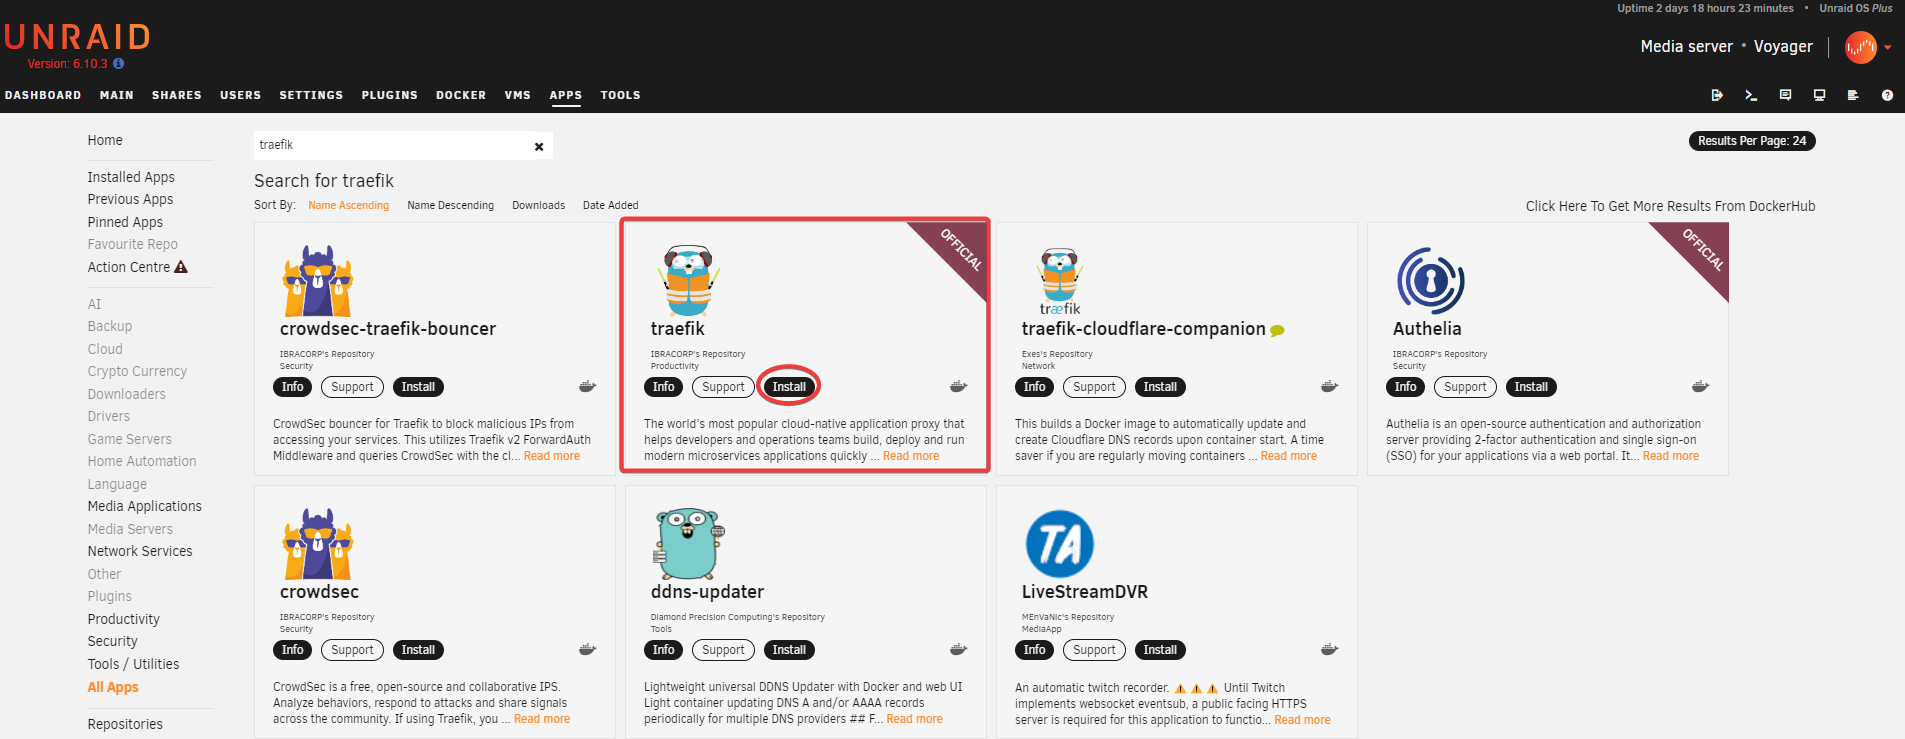
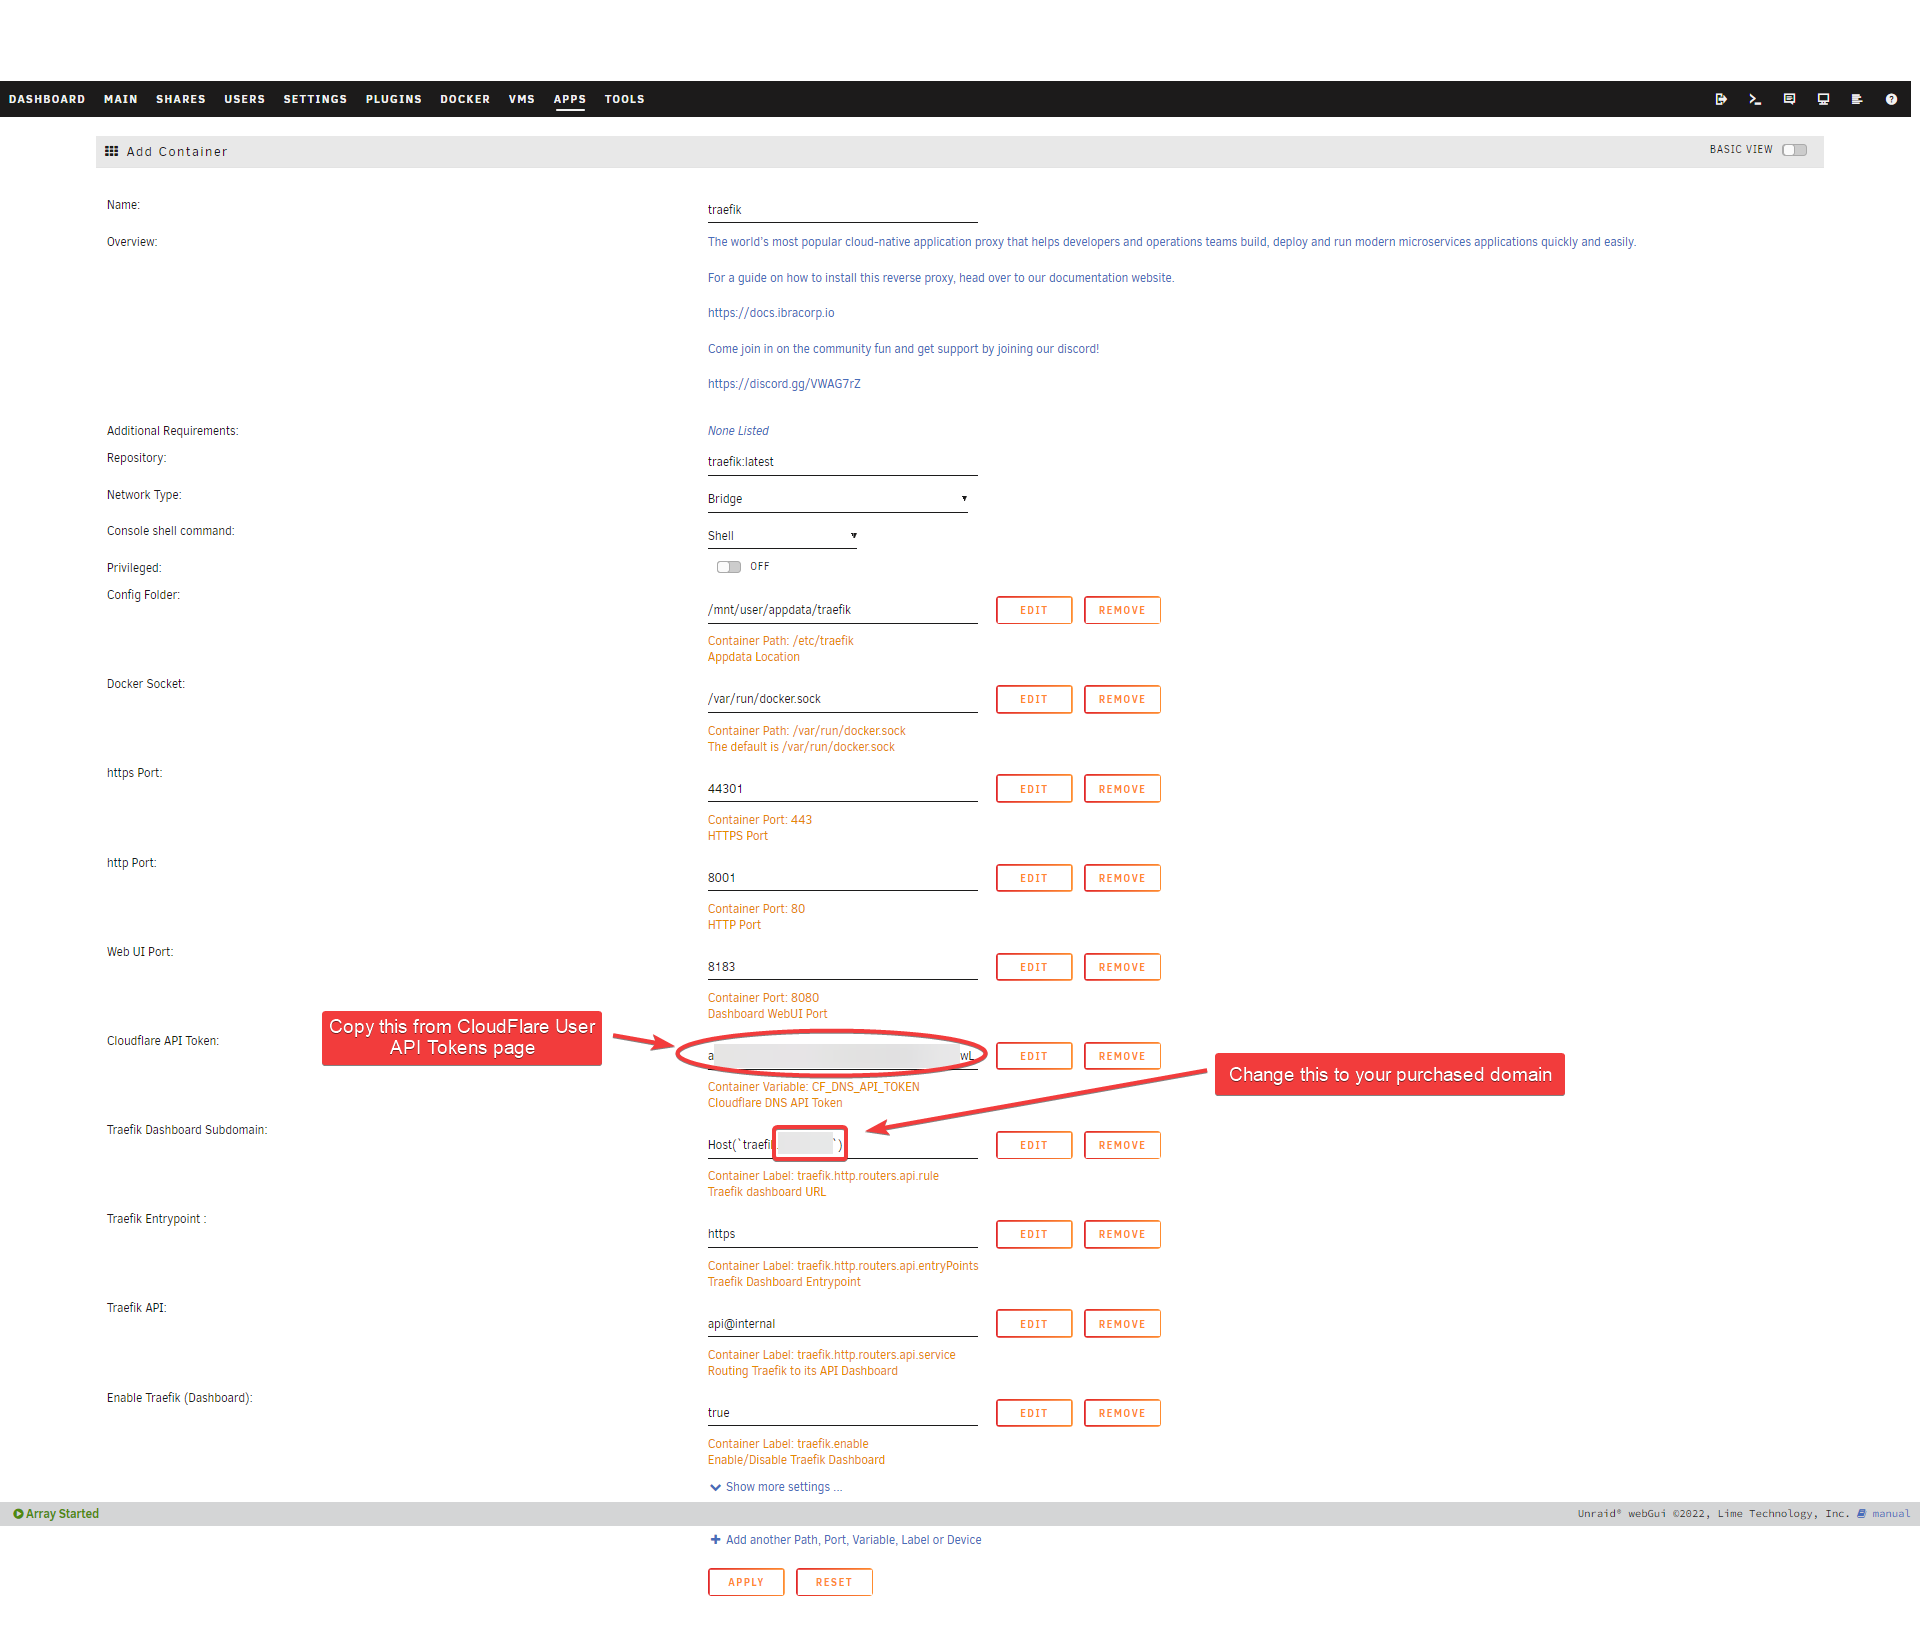
Edit template.
Paste the Cloudflare API tokencreated in Prerequisite step. This is needed so that Traefik can get HTTPS certificate from CloudFlare.
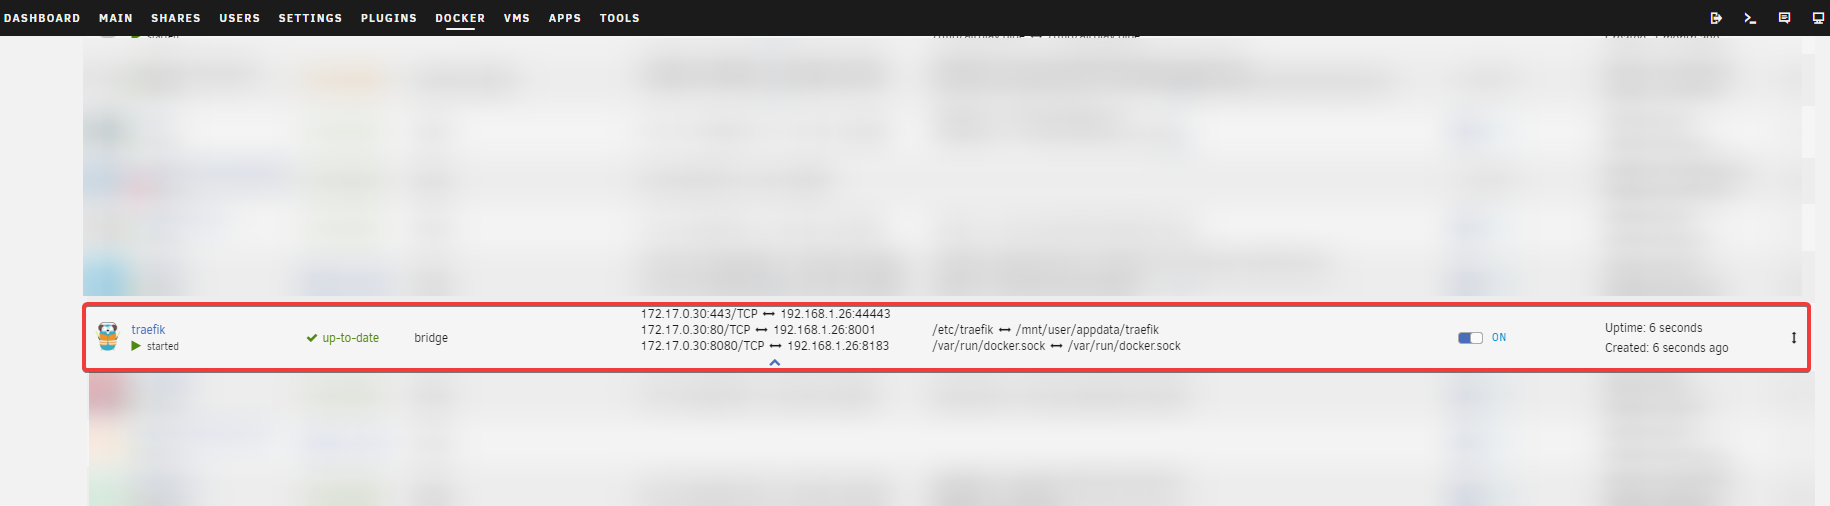
Check that it is up and running.
Create Configuration File
Create a file in /mnt/user/appdata/traefik/traefik.yml and paste the following. Replace YOURDOMAIN.COM with your domain name, e.g. example.com
TIP
💡 You have to first create traefik.yml configuration file in /mnt/user/appdata/traefik/traefik.yml. Otherwise the web UI and other ports won’t be accessible.

global:
  checkNewVersion: true
  sendAnonymousUsage: false

serversTransport:
  insecureSkipVerify: true

entryPoints:
  # Not used in apps, but redirect everything from HTTP to HTTPS
  http:
    address: :80
    forwardedHeaders:
      trustedIPs: &trustedIps
        # Start of Clouflare public IP list for HTTP requests, remove this if you don't use it
        - 173.245.48.0/20
        - 103.21.244.0/22
        - 103.22.200.0/22
        - 103.31.4.0/22
        - 141.101.64.0/18
        - 108.162.192.0/18
        - 190.93.240.0/20
        - 188.114.96.0/20
        - 197.234.240.0/22
        - 198.41.128.0/17
        - 162.158.0.0/15
        - 104.16.0.0/13
        - 104.24.0.0/14
        - 172.64.0.0/13
        - 131.0.72.0/22
        - 2400:cb00::/32
        - 2606:4700::/32
        - 2803:f800::/32
        - 2405:b500::/32
        - 2405:8100::/32
        - 2a06:98c0::/29
        - 2c0f:f248::/32
        # End of Cloudlare public IP list
    http:
      redirections:
        entryPoint:
          to: https
          scheme: https

  # HTTPS endpoint, with domain wildcard
  https:
    address: :443
    forwardedHeaders:
      # Reuse list of Cloudflare Trusted IP's above for HTTPS requests
      trustedIPs: *trustedIps
    http:
      tls:
        # Generate a wildcard domain certificate
        certResolver: letsencrypt
        domains:
          - main: YOURDOMAIN.COM
            sans:
              - '*.YOURDOMAIN.COM'
      middlewares:
        - securityHeaders@file

providers:
  providersThrottleDuration: 2s

  # File provider for connecting things that are outside of docker / defining middleware
  file:
    filename: /etc/traefik/fileConfig.yml
    watch: true

  # Docker provider for connecting all apps that are inside of the docker network
  docker:
    watch: true
    network: proxy    # Add Your Docker Network Name Here
    # Default host rule to containername.domain.example
    defaultRule: "Host(`{{ lower (trimPrefix `/` .Name )}}.YOURDOMAIN.COM`)"    # Replace with your domain
    exposedByDefault: false
    #endpoint: "tcp://dockersocket:2375" # Uncomment if you are using docker socket proxy

# Enable traefik ui
api:
  dashboard: true
  insecure: true

# Log level INFO|DEBUG|ERROR
log:
  level: INFO

# Use letsencrypt to generate ssl serficiates
certificatesResolvers:
  letsencrypt:
    acme:
      email: [email protected]
      storage: /etc/traefik/acme.json
      dnsChallenge:
        provider: cloudflare
        # Used to make sure the dns challenge is propagated to the rights dns servers
        resolvers:
          - "1.1.1.1:53"
          - "1.0.0.1:53"
Creating File Provider
Traefik allow us to specify a file provider as Dynamic Configuration where any changes there will be automatically detected by Traefik without having to restart it. Where as the configuration.yml above is Static Configuration where any changes require restarting Traefik.
TIP
💡 Not all settings can be specified in Dynamic settings, such as entry points. So both are needed.
Create a file /mnt/user/appdata/traefik/fileConfig.yml and paste the following. As usual, replace YOURDOMAIN.COM with the domain name that you registered.
I’m running HomeAssistant on a VM with IP 192.168.1.40, so I also created a router for it.
http:
  ## EXTERNAL ROUTING - Only use if you want to proxy something manually ##
  routers:
    # Homeassistant routing - Remove if not used
    homeassistant:
      entryPoints:
        - https
      rule: 'Host(`homeassistant.YOURDOMAIN.COM`)'
      service: homeassistant
      middlewares:
        - "auth"
  ## SERVICES ##
  services:
    # Homeassistant service - Remove if not used
    homeassistant:
      loadBalancer:
        servers:
          - url: http://192.168.1.40:8123/

  ## MIDDLEWARES ## <-- THIS IS ONLY NEEDED IF YOU USE AUTHELIA
  middlewares:
    # Only Allow Local networks
    local-ipwhitelist:
      ipWhiteList:
        sourceRange:
          - 127.0.0.1/32 # localhost
          - 192.168.1.1/24 # LAN Subnet

    # Authelia guard
    auth:
      forwardauth:
        address: http://auth:9091/api/verify?rd=https://auth.YOURDOMAIN.COM/ # replace auth with your authelia container name
        trustForwardHeader: true
        authResponseHeaders:
          - Remote-User
          - Remote-Groups
          - Remote-Name
          - Remote-Email

    # Authelia basic auth guard
    auth-basic:
      forwardauth:
        address: http://auth:9091/api/verify?auth=basic # replace auth with your authelia container name
        trustForwardHeader: true
        authResponseHeaders:
          - Remote-User
          - Remote-Groups
          - Remote-Name
          - Remote-Email

    # Security headers
    securityHeaders:
      headers:
        customResponseHeaders:
          X-Robots-Tag: "none,noarchive,nosnippet,notranslate,noimageindex"
          X-Forwarded-Proto: "https"
          server: ""
        customRequestHeaders:
          X-Forwarded-Proto: "https"
        sslProxyHeaders:
          X-Forwarded-Proto: "https"
        referrerPolicy: "same-origin"
        hostsProxyHeaders:
          - "X-Forwarded-Host"
        contentTypeNosniff: true
        browserXssFilter: true
        forceSTSHeader: true
        stsIncludeSubdomains: true
        stsSeconds: 63072000
        stsPreload: true

# Only use secure ciphers - https://ssl-config.mozilla.org/#server=traefik&version=2.6.0&config=intermediate&guideline=5.6
tls:
  options:
    default:
      minVersion: VersionTLS12
      cipherSuites:
        - TLS_ECDHE_ECDSA_WITH_AES_128_GCM_SHA256
        - TLS_ECDHE_RSA_WITH_AES_128_GCM_SHA256
        - TLS_ECDHE_ECDSA_WITH_AES_256_GCM_SHA384
        - TLS_ECDHE_RSA_WITH_AES_256_GCM_SHA384
        - TLS_ECDHE_ECDSA_WITH_CHACHA20_POLY1305
        - TLS_ECDHE_RSA_WITH_CHACHA20_POLY1305
TIP
💡 If you do not run Authelia or HomeAssistant, use the following instead:
http:

# Only use secure ciphers - https://ssl-config.mozilla.org/#server=traefik&version=2.6.0&config=intermediate&guideline=5.6
tls:
  options:
    default:
      minVersion: VersionTLS12
      cipherSuites:
        - TLS_ECDHE_ECDSA_WITH_AES_128_GCM_SHA256
        - TLS_ECDHE_RSA_WITH_AES_128_GCM_SHA256
        - TLS_ECDHE_ECDSA_WITH_AES_256_GCM_SHA384
        - TLS_ECDHE_RSA_WITH_AES_256_GCM_SHA384
        - TLS_ECDHE_ECDSA_WITH_CHACHA20_POLY1305
        - TLS_ECDHE_RSA_WITH_CHACHA20_POLY1305
Also create the acme.json file.
touch /mnt/user/appdata/traefik/acme.json; chmod 600 /mnt/user/appdata/traefik/acme.jsonThe traefik config folder should have the following three files:
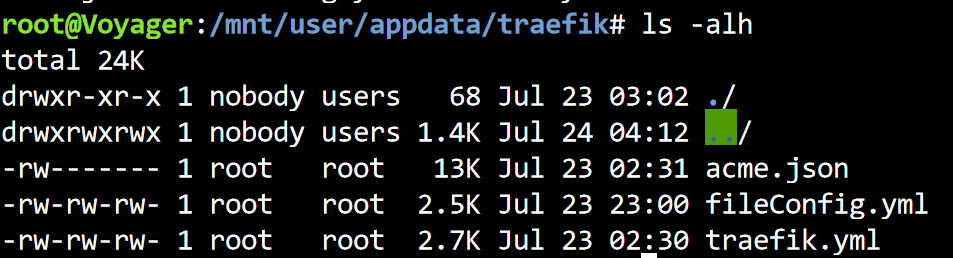
With these files present, restart Traefik container.
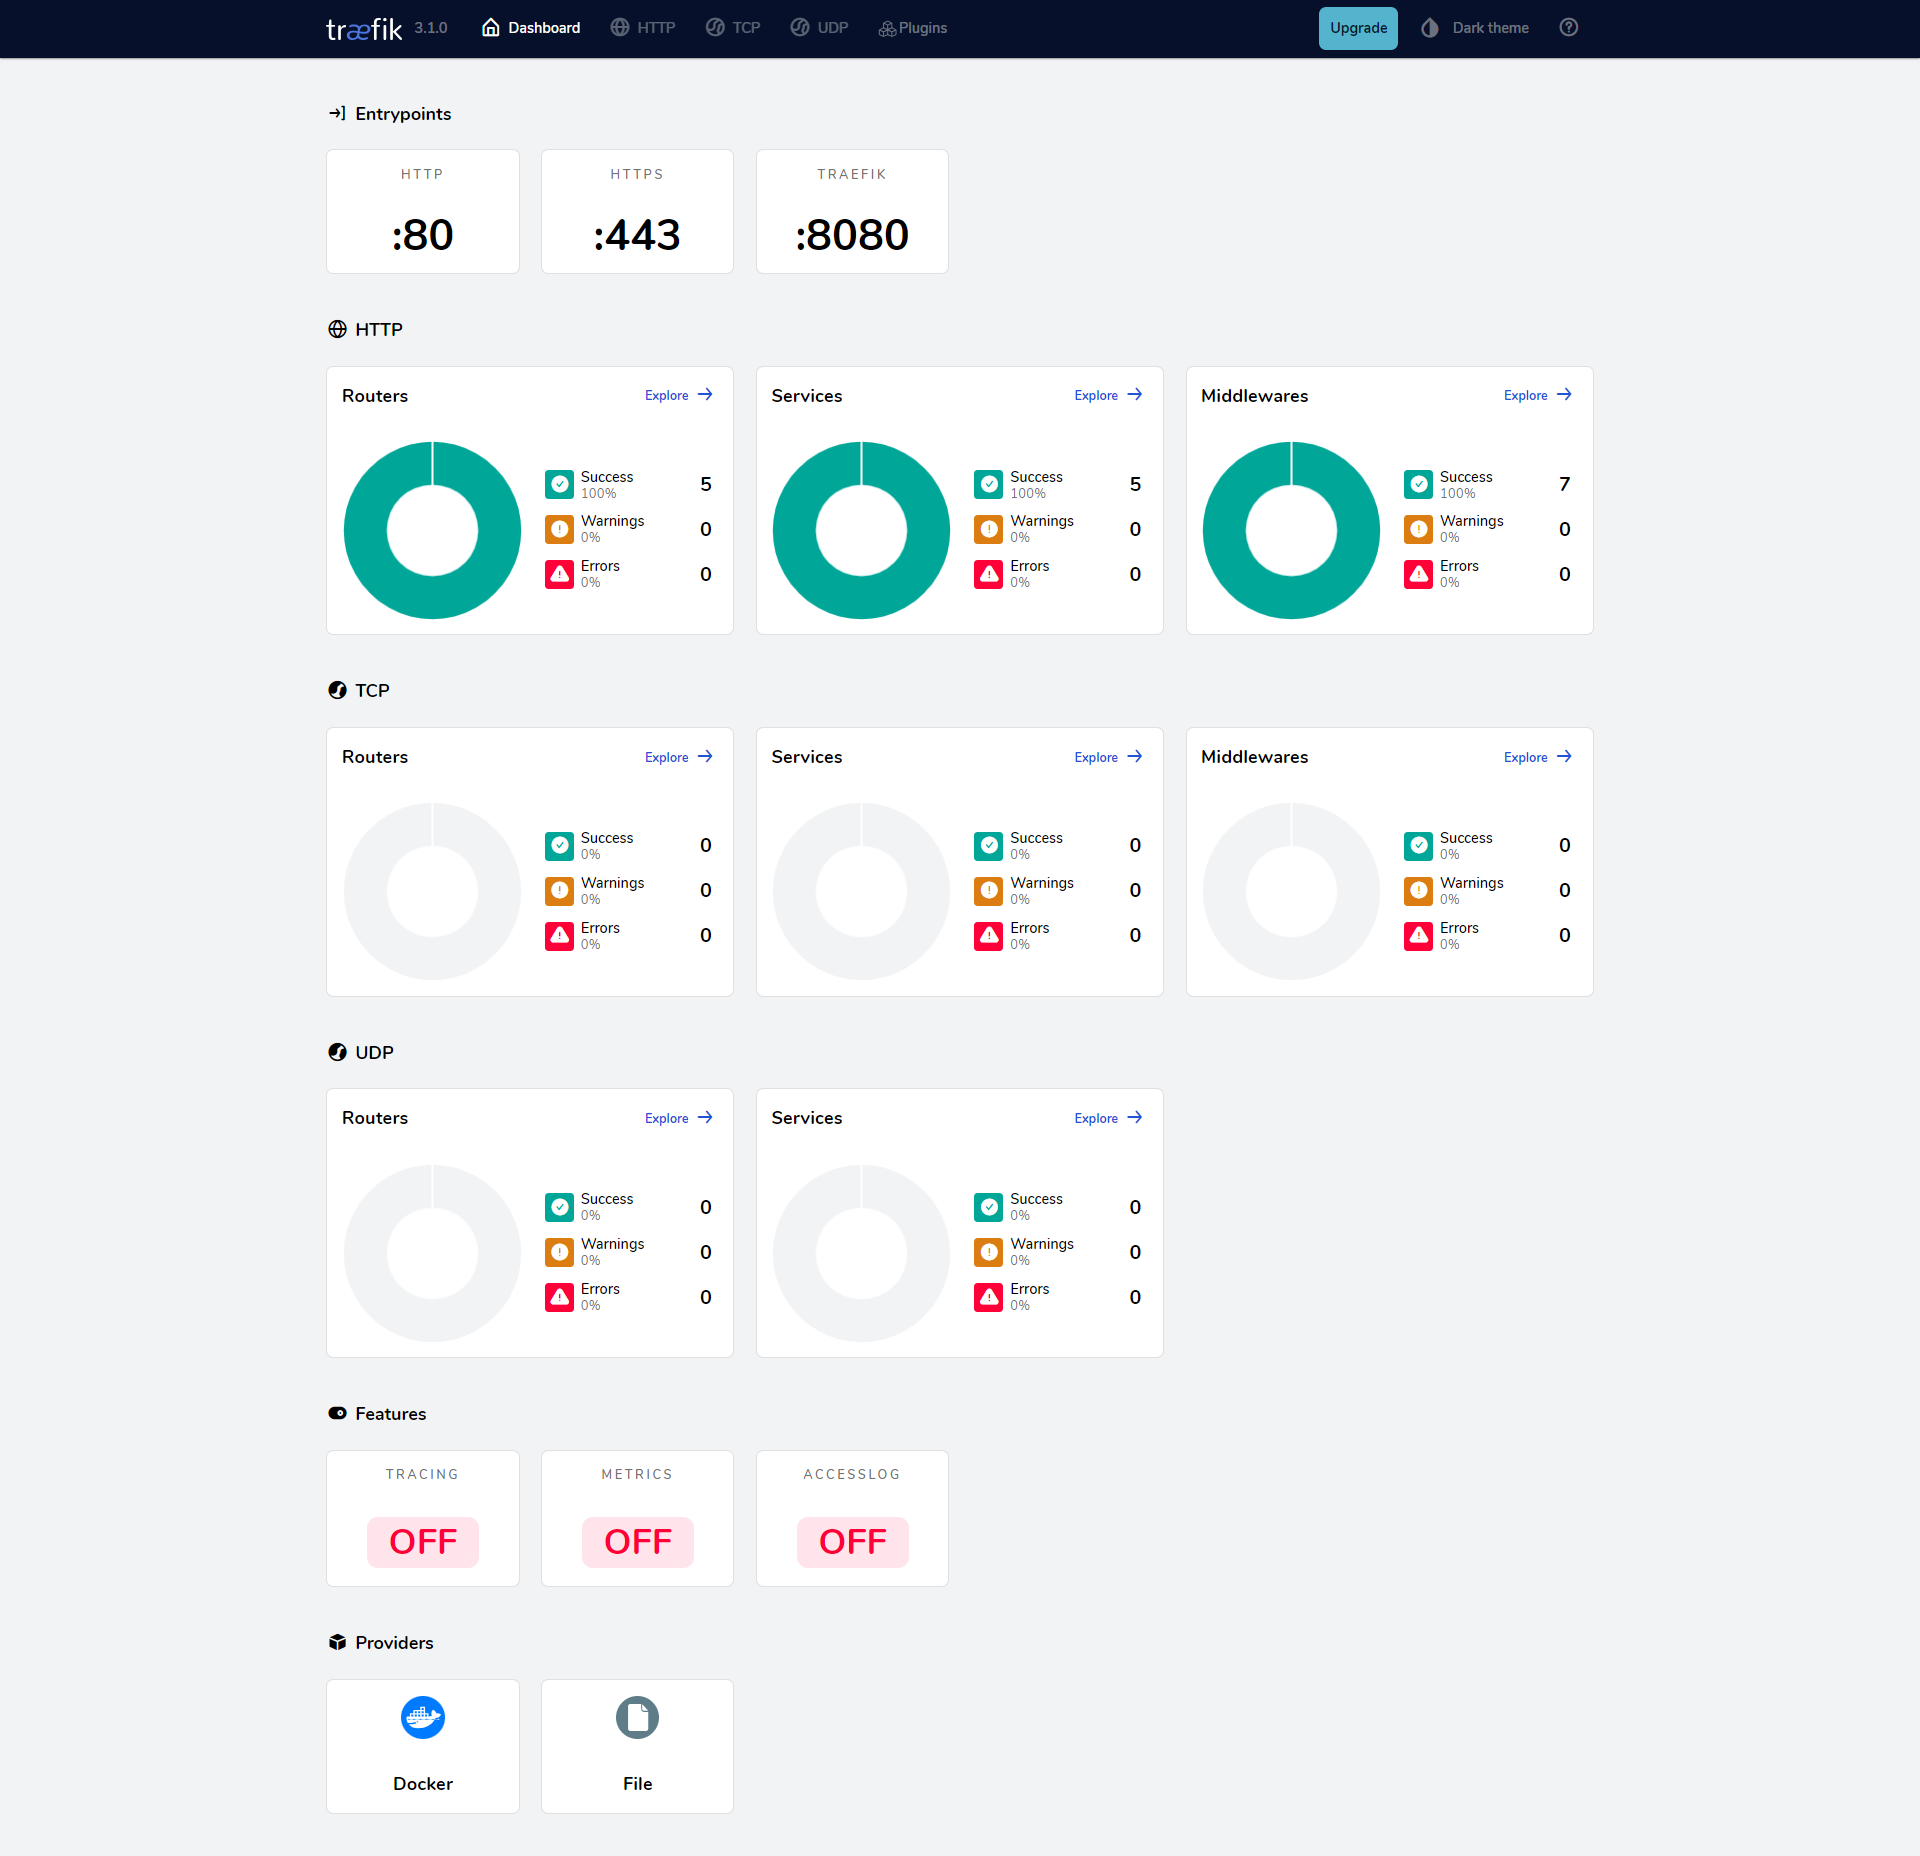
Finally, open the dashboard UI at http://<UNRAID_IP>:8183 to see a dashboard.
Automatically Add Docker Container Service as Route to Traefik
By adding some labels that matches a pattern, Traefik will automatically add them. You can then see it in real-time in Traefik Dashboard.
TIP
💡 Adding labels to container is the recommended way to add public hostname/route to Traefik. Although you can also specify it via its File Provider in fileProvider.yml.
Edit any container template, and add the following labels:
Label 1:
- Name:
Enable Traefik - Key:
traefik.enable - Value:
true
Label 2:
- Name:
https entrypoint - Key:
traefik.http.routers.<APP_NAME>.entryPoints - Value:
https
Label 3:
- Name:
traefik.http.routers.<APP_NAME>.rule - Key:
traefik.http.routers.<APP_NAME>.rule - Value:
Host(APP.DOMAIN.COM)